Author name: Vikram Chiluka

Python html.escape() Function

We must escape special characters that are not markup text but may be misinterpreted as such when saving raw HTML in databases or variables.

 <, >, ", ', and &. are examples of these characters.

If certain characters are not escaped, the browser may display a web page improperly. For example, the quote marks around “Python Programs” in the following HTML content may cause confusion between the end and beginning of a new string.

Hello this is "Python Programs"

Special entity names and entity numbers are essentially escape sequences that replace these characters in HTML. In HTML, escape sequences begin with an ampersand and terminate with a semicolon.

The table below lists the special characters that HTML 4 recommends escaping, as well as their entity names and numbers:

Character                            Entityname                         EntityNumber

>                                                &gt;                                            &#62;

<                                                &lt;                                             &#60;

”                                                 &quot;                                       &#34;

&                                                &amp;                                       &#38;

We can use the html.escape() method in Python to encode your HTML in an ascii string to escape these characters. escape() takes one optional argument quote, which is set to True by default, and an HTML script as an argument. To use html.escape(), you must first import the html module, which is included in Python 3.2 and higher.

Python html.escape() Function:

Using the html.escape() method, we can convert an html script into a string by replacing special characters with ascii characters.

Syntax:

 html.escape(string)

Return Value:

A string of ASCII character script from HTML is returned by the escape() function.

html.escape() Function in Python

Method #1: Using escape() Function (Static Input)

Approach:

  • Import html module using the import keyword
  • Give the HTML script as static input and store it in a variable.
  • Pass the above-given HTML script as an argument to the escape() function to encode the given HTML string in ASCII string and store it in another variable.
  • Print the ASCII string for the given HTML string.
  • The Exit of the Program.

Below is the implementation:

# Import html module using the import keyword
import html

# Give the HTML script as static input and store it in a variable.
gvn_html =  '<html><head></head><body><h1>welcome to "Python-programs"</h1></body></html>'

# Pass the above given HTML script as an argument to the escape() function to
# encode the given HTML string in ascii string and store it in another variable.
rslt = html.escape(gvn_html)

# Print the ascii string for the given html string.
print("The ASCII string for the given html string is:")
print(rslt)

Output:

The ASCII string for the given html string is:
&lt;html&gt;&lt;head&gt;&lt;/head&gt;&lt;body&gt;&lt;h1&gt;welcome to &quot;Python-programs&quot;&lt;/h1&gt;&lt;/body&gt;&lt;/html&gt;

Method #2: Using escape() Function (User Input)

Approach:

  • Import html module using the import keyword
  • Give the HTML script as user input using the input() function and store it in a variable.
  • Pass the above-given HTML script as an argument to the escape() function to encode the given HTML string in ASCII string and store it in another variable.
  • Print the ASCII string for the given HTML string.
  • The Exit of the Program.

Below is the implementation:

# Import html module using the import keyword
import html

# Give the HTML script as user input using the input() function and store it in a variable.
gvn_html =  input("Enter some random HTML string:\n")
print()

# Pass the above given HTML script as an argument to the escape() function to
# encode the given HTML string in ascii string and store it in another variable.
rslt = html.escape(gvn_html)

# Print the ascii string for the given html string.
print("The ASCII string for the given html string is:")
print(rslt)

Output:

Enter some random HTML string:
'<html><body><p>Good morning,&& <all> </p></body></html>'

The ASCII string for the given html string is:
&#x27;&lt;html&gt;&lt;body&gt;&lt;p&gt;Good morning,&amp;&amp; &lt;all&gt; &lt;/p&gt;&lt;/body&gt;&lt;/html&gt;&#x27;


Python html.escape() Function Read More »

12 pip Commands For Python Developers

Pip is a Python package manager tool. If you’ve worked with Python before, you’ve almost certainly used pip as well. Installing packages is the most obvious use of pip, but there are a couple of other useful commands you may not be aware of.
Pip can quickly and efficiently download, install, and manage Python packages.

You’re probably wondering what exactly a Package Manager is and what it accomplishes.

What is a Package Manager?
A package manager is a tool for computer languages that makes it simple to install external dependencies. It installs and uninstalls any package without a problem.

For Example: For package management, JavaScript uses npm, Python uses pip, and.NET uses NuGet.

Package management in Python has grown in popularity and importance to the point where it is now included by default with the Python installation starting with versions 3.4 for Python3 and 2.7.9 for Python2.

12 pip Commands For Python Developers

1)Pip Install and Uninstall Package

This command is essential for installing and uninstalling a package according to your needs. You can use this command on your command prompt to install or uninstall Python by heading to the Python folder.

pip install packageName

pip uninstall packageName

For Example:

If you want to install & uninstall matplotlib module then follow the below commands:

pip install matplotlib - for installation
pip uninstall matplotlib - for Uninstallating

2)Update pip

If the pip is not in its latest version, you can also upgrade it. To check if it has an updated version, simply type pip –version; if it does not, simply update it using the command below. Make sure this command is written in the Python folder.

pip install –upgrade pip

Here the command pip install –upgrade pip,  updates pip to the most recent/latest version.

3)Update Package

pip install -U <packageName>

For Example:
If we want to update the version of numpy, below is the command:

pip install -U numpy

4)Update All Packages

If an older version of the package exists, pip will remove it first. It will then download and install the most recent version from PyPI. If you already have an up-to-date version installed, pip will do nothing.

To update all packages at once, use the command pip freeze > requirements.txt to create a requirements.txt file that contains all of the packages. To update all of the packages, simply update the requirements.txt file.

Packages with updated versions will be excluded in the requirements.txt file, while the remainder will be updated.

pip freeze > requirements.txt
pip install -r requirements.txt –upgrade

For Example:

pip freeze requirements.txt generates a temporary file named requirements.txt that may include all of the packages that need to be installed, and then pip install -r requirements.txt –upgrade updates all of the items in requirements.txt at once.

5)Information about an Installed Package

You can get the information about the package that is installed already using the following command:

pip show packageName

For Example:
You get information about the numpy package that is installed already by:

pip show numpy

pip will return a “Package Not Found” warning if you try to acquire information about a package that isn’t installed in your environment.

5)List all the installed Packages

This is one of the most essential commands for any Python programmer. The pip list command displays the list of packages in the current environment. For each package, it also returns the installed version. The packages are arranged in a case-insensitive manner.

pip list

All packages are listed using pip list. However, we may want to display all of the list of packages that are currently outdated for any reason.
To do so, run the command:

"pip list -o" or
"pip list —outdated,"

which will provide a list of packages with both the currently installed version and the most recent accessible version.

6)Pip search

When you’re working on a project and need a package but don’t know which location we can fing it , then use the pip search packageName command. It returns the name of all matching packages as well as information about them.

pip search packageName

For Example:

pip search pandas

This command helps you navigate to pandas by searching the path where it is kept with pip search pandas.

7) Generating Requirement Files using pip

What is requirements.txt file in a code?

Generally, We create(generate) and share the requirements.txt files to make it easier for other developers to install the righ/correct versions of the required Python libraries (or “packages”) in order to run the Python code that we developed.

We can just execute the below command to generate the requirements.txt file:

pip freeze > requirements.txt

This code will create a requirements.txt file in the working directory after execution.

We can now simply use the following command to install all dependencies on their system.

pip install -r requirements.txt

After you’ve installed these dependencies, you’re ready to go.

8)Activate Editable Mode

If you want to develop a package locally after installing it, you can do so in editable mode. It connects the package to the given location, allowing you to make modifications that are immediately reflected.

The below command installs the package in develop or editable mode, which allows you to alter it.

pip install -e

That means, pip install -e opens the package(whichever was previously installed) in an editable form, allowing you to make modifications locally if necessary.

9)Verifying If the installed Packages have compatible dependencies

It checks if the dependencies of all installed packages in the requirements.txt file are appropriate. It examines all three requirements, namely whether the dependencies are compatible, whether the package has an updated version, and whether a package is missing.

pip check

10)To Remove All the Installed Packages by pip

Instead of deleting packages one by one, you can save time by using the commands

pip freeze > requirements.txt && pip uninstall -e requirements.txt -y.

It creates a requirements.txt file with a list of packages and then uninstalls them all.

11)Using pip to specify the Package Version

In Python, the pip install command always installs the most latest versions of a package. To install a specific version of the package rather than the most recent, we can use the pip command to specify the version directly.

pip install packageName==version

For Example:

pip install pandas==2.7

The command above will download and install the package ‘package’ of the version we specified i.e 2.7 (and not the latest one). It will be installed in your Python installation folder, or if you are using a virtual environment, it will be installed here.

12)To install all the requirements from requirements.txt File

pip install -r requirements.txt

The above command will install all of the dependencies required for project implementation. Dependencies contain all of the package’s information.

12 pip Commands For Python Developers Read More »

Differences Between ExpressJS vs NestJS

What precisely is a web application framework?

You may have heard a lot about Express and how it is a Node web application framework that is used to construct online applications. But, exactly, what is a web application framework?

A web framework is a software framework that is used to standardize and automate processes for building applications via the internet, according to Wikipedia.

These several frameworks help with database access, templating resources, and session management. They aid in the development of dynamic websites.

People look for lightweight frameworks while developing large-scale apps. As a result, NestJS has taken command of ExpressJS. Without a question, ExpressJS has grown in popularity among developers in recent years, and NestJS is on its way to becoming more widely used in the coming years.
Let us now look at what ExpressJS and NestJS are and see their most important features of them.

NestJS:

NestJS is a NodeJS framework for developing scalable server-side applications. NestJS allows for understandable and predictable code, thanks to TypeScript, which is gaining popularity. It is a framework that is adaptable, progressive, and versatile. Despite the fact that the API in ExpressJS is reliable, it cannot handle async/await methods. NestJS was implemented to avoid similar problems.

Furthermore, ExpressJS is a lightweight NodeJS framework for developing online and mobile applications.

ExpressJS:

Express.js is a simple framework that works on top of the Node.js web server functionality to simplify APIs and provide some useful new features. It facilitates the organization of your application’s functionality through the use of middleware and routing. It adds useful utilities to Node.js HTTP objects and makes dynamic HTTP objects easier to render.

Features:

  • Quickly and easily creates Node.js web applications.
  • It is simple to set up and customize.
  • You can use HTTP methods and URLs to define application routes.
  • Contains a number of middleware modules that can be used to carry out additional requests and answers.
  • It’s easy to interface(connect) with a variety of template engines, including Jade, Vash, and EJS.
  • Allows you to provide middleware for error handling.

Differences: ExpressJS vs NestJS


             ExpressJs


                   NestJS

Because ExpressJS is unopinionated, it does not have a set of pre-defined rules to follow, giving developers the ability to create different options and implement code as needed.NestJS is opinionated, which means it has SOLID Principles to follow, which helps to avoid issues during development and also produces applications that are less prone to error. NestJS is entirely Angular-based, hence TypeScript is its primary programming language. The use of TypeScript ensures that the application is reliable and bug-free.
ExpressJs does not follow  MVC (Model View Controller) architectureNestJS follows MVC architecture.
Because ExpressJS does not follow to MVC, there is no correct structure, making the application inefficient and less optimised.NestJS becomes a better choice for developers because it is explicitly built on an architecture that includes components such as modules, controllers, and providers. You can also break the application into microservices, which simplifies development and makes the code easier to understand.
ExpressJS does not support TypeScript, making ExpressJS less efficient and incompatible with many browsers. Decorators are another aspect of TypeScriptNestJS also supports TypeScript, which is a big plus. TypeScript follows to static typing, is reliable, and includes a “type” feature. It is extremely useful when developing large-scale, efficient applications. NestJS is wholly built in TypeScript.
Unit testing with ExpressJS requires the creation of distinct code, which takes time and can reduce the application’s productivity rate.NestJS CLI (Command Line Interface) has a default testing environment that is set up with Jest. When a service, interceptor, or controller is formed, the CLI creates a “spec” file that includes auto-generated testing bed code, removing the need for developers to write extra code for unit testing. As a result, unit testing is significantly easier with NestJS than it is with ExpressJS.
ExpressJS is less efficient and has poor performance compared to NestJS.NestJS has a CLI (command-line interface) to increase productivity. A CLI allows you to give instructions directly without having to write extensive scripts. Dependency Injection is another reason why developers like NestJS since it allows you to add as many dependencies as you need for the application to run smoothly. NestJS provides many developers with an out-of-the-box structure and supports third-party plugins. These are the reasons NestJS can assist you in developing scalable applications, which enhances performance and results in an efficient solution.

Differences Between ExpressJS vs NestJS Read More »

Return Statement in Python Function

To return a value from a function, use the Python return statement. In a function, the user can only utilize the return statement. It can only be used within the Python function. A return statement contains the return keyword as well as the value to be returned after that.
We can return a single value or multiple values using the return statement in the python function.

Returning Single Value using return Statement in Python Function

Approach:

  • Create a function say multiply() which accepts two numbers as an argument
  • Inside the function, multiply the above passed two numbers and store it in a variable
  • Return the above multiplication result using the return statement
  • Call the above-created multiply() function by passing some random two numbers as arguments
    and store it in another variable
  • Here it multiplies the two numbers(3*4) that we pass by calling the function and stores the result
  • Print the multiplication of the given two numbers.
  • The Exit of the Program.

Below is the implementation:

# Create a function say multiply() which accepts two numbers as an argument
def multiply(x, y):
  # Inside the function, multiply the above passed two numbers and
  # store it in a variable
  mul = x * y
  # Return the above multiplication result using the return statement
  return mul

# Call the above created multiply() function by passing some random two numbers as arguments
# and store it in another variable
# Here it multiplies the two numbers(3*4) that we pass by calling the function and stores the result
rslt = multiply(3, 4)
# Print the multiplication of given two numbers
print(rslt)

Output:

12

Returning Multiple Values using return Statement in Python Function

Approach:

  • Create a function say multiply() which accepts two numbers as an argument
  • Inside the function, multiply the above passed two numbers and store it in a variable
  • Calculate the average of the given two numbers and store it in another variable
  • Return the above multiplication, and average results using the return statement
  • Here we can observe that we are returning multiple values
  • Call the above-created multiply() function by passing some random two numbers as arguments
    and store it in another variable
  • Here it stores both multiplication and average results of the given two numbers
  • Print the multiplication and average of given two numbers.
  • The Exit of the Program.

Below is the implementation:

# Create a function say multiply() which accepts two numbers as an argument
def multiply(x, y):
  # Inside the function, multiply the above passed two numbers and
  # store it in a variable
  mul = x * y
  # Calculate the average of given two numbers and store it in another variable
  average = (x+y)/2
  # Return the above multiplication, average results using the return statement
  # Here we can observe that we are returning multiple values
  return mul, average

# Call the above created multiply() function by passing some random two numbers as arguments
# and store it in another variable
# Here it stores both multiplication, average results of the given two numbers
rslt = multiply(3, 4)
# Print the multiplication, average of given two numbers
print("The multiplication, average of given two numbers is:")
print(rslt)

Output:

The multiplication, average of given two numbers is:
(12, 3.5)

NOTE:

Not only two values, but you can also return multiple values 
using the return statement in python function

Return Statement in Python Function Read More »

Why Import star(*) in Python is a Bad Idea?

We should not use import * in Python applications since it corrupts our namespace. Importing all functions and classes (whether required or not) into our own namespace using the import * corrupts our namespace.

This may conflict with functions you define or functions from other libraries you import It can sometimes be difficult to determine which library a certain function came from at times.

With the import * practice, there is always the possibility of overriding variables/functions, etc.

Here are some more reasons why import * should not be used:

  • It is difficult to know or recognize what is imported from which module, resulting in poor code readability.
  • The possibility of hidden bugs grows.
  • Because pyflake-like tools cannot be utilized, we cannot discover errors in the source code statically.
  • Python, as we know, allows the user to import any module required. However, in huge projects or with numerous lines of code, we will be unable to detect the user-defined function and different methods.

If you still wish to use it, you should be cautious and strive to keep it in good working order.
All of this is not to say that using import * is always a bad idea;  The only thing you should remember while using import * is that you should always use it with caution and discipline.

Example:

# Import the module sampleModule using import keyword and *
from sampleModule import *

# Create a function say multiply() which accepts two numbers as arguments.
def multiply (a, b):
  # Multiply both the passed numbers and return the result
  return a*b

# Call the above created function by passing two random numbers and print the result.
print (multiply (3, 2))

Explanation:

If there was a ‘multiply’ function in module “sampleModule,” the problem would be that the defined ‘multiply’ function overrides the ‘multiply’ function from module “sampleModule.” As a result, it is recommended that import * not be used in practice.

Correct Approach for the above Code:

sampleModule:

# Create a function say multiply() which accepts two numbers as arguments 
def multiply(a, b):
  # Multiply both the passed numbers and return the result
  print(a*b)

Approach:

  • Import the module sampleModule using import keyword and *
  • Create a function say multiply() which accepts two numbers as arguments.
  • Multiply both the passed numbers and return the result
  • Call the above-created function by passing two random numbers and print the result.
  • The Exit of the Program.

Below is the Implementation:

# Import the module sampleModule using import keyword and *
from sampleModule import *

# Create a function say multiply() which accepts two numbers as arguments.
def multiply (a, b):
  # Multiply both the passed numbers and return the result
  return a*b

# Call the above created function by passing two random numbers and print the result.
print (multiply (3, 2))
print(sampleModule.multiply(4,5)

Output:

6
20

Explanation:

Coding in this manner improves code readability, makes debugging easier, and virtually eliminates the possibility of conflict.(may be 0 chances of conflicts).

Why Import star(*) in Python is a Bad Idea? Read More »

How to Compute the Sign and Natural Logarithm of the Determinant of an Array in Python?

Let us see how to use the NumPy module in python to compute the sign and natural logarithm of the determinant of an array here.

Python numpy.linalg.slogdet() Function:
The numpy.linalg.slogdet() method in Python helps us to calculate the sign and natural logarithm of the determinant of an array.
If the determinant of an array is very tiny or very large, a call to slogdet may overflow or underflow. This approach is more resistant to such difficulties since it computes the logarithm of the determinant rather than the determinant of itself.

Syntax:

numpy.linalg.slogdet()

Parameters
x: It is the 2-Dimensional array given as input.

Return Value:
The logarithm of the determinant of an array is returned by this method

The method with a sign returns an integer representing the determinant’s sign. This is 1, 0, or -1 for a real matrix. This is a complex number having an absolute value 1 or 0 for a complex matrix. The method logdet returns the natural log of the determinant’s absolute value.

Python Program to Compute the Sign and Natural Logarithm of the Determinant of an Array

Here the numpy.lib.linalg.slogdet() function is used to calculate the log of the determinant of an array and sign.
It returns the sign and logarithm of the determinant of an array. and logarithm.

Approach:

  • Import numpy module using the import keyword
  • Pass some random 2-dimensional array as an argument to the array() function of the numpy module to create an array.
  • Store it in a variable
  • Print the given array
  • Apply the shape attribute on the given array to get the shape of the given array and print the result
  • Apply ndim attribute on the given array to get the dimension of the given array and print the result
  • Apply dtype attribute on the given array to get the datatype of all the elements of the
    given array and print the result
  • Pass the given array as an argument to the slogdet() function of linalg of the numpy module
    to calculate the sign and logarithm of the determinant of the given input 2D array.
  • Store them in two separate variables.
  • Print the sign of the given 2D array
  • Print the logarithm of the determinant of the given input 2D array.
  • The Exit of the Program.

Below is the implementation:

# Import numpy module using the import keyword
import numpy as np

# Pass some random 2-dimensional array as an argument to the array() function
# of the numpy module to create an array.
# Store it in a variable
gvn_arry = np.array([[5, 12],[8, 10]])

# Print the given array
print("The given array is:")
print(gvn_arry)

# Apply shape attribute on the given array to get the shape of the given array and
# print the result
print("The Shape of the given array = ", gvn_arry.shape)

# Apply ndim attribute on the given array to get the dimension of the given array and
# print the result
print("The dimension of the given array = ",gvn_arry.ndim)

# Apply dtype attribute on the given array to get the datatype of all the elements of the
# given array and print the result
print("The datatype of the given array = ",gvn_arry.dtype)

# Pass the given array as an argument to the slogdet() function of linalg of the numpy module
# to calculate the sign and logarithm of determinant of the given input 2D array
# Store them in two separate variables.
arry_sign, det = (np.linalg.slogdet(gvn_arry))

# Print the sign of the given 2D array
print("The sign of the given 2D array = ", arry_sign)

# Print the logarithm of determinant of the given input 2D array
print("The logarithm determinant of the given input 2D array = ", det)

Output:

The given array is:
[[ 5 12]
[ 8 10]]
The Shape of the given array = (2, 2)
The dimension of the given array = 2
The datatype of the given array = int64
The sign of the given 2D array = -1.0
The logarithm determinant of the given input 2D array = 3.828641396489095

Another Example:

If we additionally wish to find the determinant of an array, we can use sign*exp(logdet). The numpy.lib.linalg.slogdet() method returns sign and logdet.

# Import numpy module using the import keyword
import numpy as np

# Pass some random 2-diemsional array as an argument to the array() function
# of the numpy module to create an array.
# Store it in a variable
gvn_arry = np.array([[4, 8],[3, 1]])

# Print the given array
print("The given array is:")
print(gvn_arry)

# Apply shape attribute on the given array to get the shape of the given array and
# print the result
print("The Shape of the given array = ", gvn_arry.shape)

# Apply ndim attribute on the given array to get the dimension of the given array and
# print the result
print("The dimension of the given array = ",gvn_arry.ndim)

# Apply dtype attribute on the given array to get the datatype of all the elements of the
# given array and print the result
print("The datatype of the given array = ",gvn_arry.dtype)

# Pass the given array as an argument to the slogdet() function of linalg of the numpy module
# to calculate the sign and logarithm of determinant of the given input 2D array
# Store them in two separate variables.
arry_sign, det = (np.linalg.slogdet(gvn_arry))

# Print the sign of the given 2D array
print("The sign of the given 2D array = ", arry_sign)

# Print the logarithm of determinant of the given input 2D array
print("The logarithm determinant of the given input 2D array = ", det)

# Print the determinant of the given array with the np.exp() function
print("The determinant of the given array with the np.exp() function = ", arry_sign*np.exp(det))

Output:

The given array is:
[[4 8]
[3 1]]
The Shape of the given array = (2, 2)
The dimension of the given array = 2
The datatype of the given array = int64
The sign of the given 2D array = -1.0
The logarithm determinant of the given input 2D array = 2.995732273553991
The determinant of the given array with the np.exp() function = -19.999999999999996

How to Compute the Sign and Natural Logarithm of the Determinant of an Array in Python? Read More »

How to Compute the logarithm Base 10 with NumPy scimath in Python?

The NumPy package includes numpy.lib.scimath.log10() function, which allows us to compute the logarithm base 10 with scimath in Python.

Syntax:

lib.scimath.log10(x)

This function returns the “primary value” of (see numpy.log10). If real x > 0, this is a real number (log10(0) = -inf, log10(np.inf) = inf). If none of the above requirements are met, the complicated principle value is returned.

Parameters
x: It is the array given as input.

Return Value:

This function returns the log base 10 of the x value. If x was a scalar, out is also a scalar; otherwise, an array object is returned.

Python Program to Compute the logarithm Base 10 with NumPy scimath

Approach:

  • Import numpy module using the import keyword
  • Pass some random list of numbers as an argument to the array() function of the numpy module to create an array.
  • Store it in a variable.
  • Print the given array.
  • Apply the shape attribute on the given array to get the shape of the given array and print the result
  • Apply ndim attribute on the given array to get the dimension of the given array and
    print the result
  • Apply dtype attribute on the given array to get the datatype of all the elements of the given array and print the result
  • Pass the given array as an argument to the log10() function of scimath of the numpy module to calculate the logarithm base 10 values of the given input array and print the result.
  • The Exit of the Program.

Below is the implementation:

# Import numpy module using the import keyword
import numpy as np

# Pass some random list of numbers as an argument to the array() function
# of the numpy module to create an array.
# Store it in a variable
gvn_arry = np.array([5, 10, 15])

# Print the given array
print("The given array is:")
print(gvn_arry)

# Apply the shape attribute on the given array to get the shape of the given array and
# print the result
print("The Shape of the given array ",gvn_arry," = ", gvn_arry.shape)

# Apply ndim attribute on the given array to get the dimension of the given array and
# print the result
print("The dimension of the given array ",gvn_arry," = ",gvn_arry.ndim)

# Apply dtype attribute on the given array to get the datatype of all the elements of the
# given array and print the result
print("The datatype of the given array ",gvn_arry," = ",gvn_arry.dtype)
print()
# Pass the given array as an argument to the log10() function of scimath of the numpy module
# to calculate the logarithm base 10 values of the given input array and print it.
print("The logarithm base 10 values of the given input array:")
print(np.lib.scimath.log10(gvn_arry))

Output:

The given array is:
[ 5 10 15]
The Shape of the given array [ 5 10 15] = (3,)
The dimension of the given array [ 5 10 15] = 1
The datatype of the given array [ 5 10 15] = int64

The logarithm base 10 values of the given input array:
[0.69897 1. 1.17609126]

As previously stated, np.lib.scimath.log10() function returns

  • infinity – when np.inf is passed
  • -inf is returned – when 0 is passed
  • inf – when -inf is passed

Example

# Import numpy module using the import keyword
import numpy as np

# Calculate log10 values when np.inf is passed an an argument
print(np.lib.scimath.log10(np.inf))
# Passing -np.inf as an argument
print(np.lib.scimath.log10(-np.inf))
# Passing 0 as an argument
print(np.lib.scimath.log10(0))

Output:

inf
(inf+1.3643763538418412j)
-inf


How to Compute the logarithm Base 10 with NumPy scimath in Python? Read More »

How to calculate the Square Root of Negative Input with emath in Python?

Let us see how to use NumPy to compute the square root of negative inputs with emath in Python.

Python numPy.emath.sqrt() Function:

The numpy.emath.sqrt() function of the numpy module is used to compute the square root of complex inputs. In contrast to numpy.sqrt, which returns NaN for negative input elements, complex values are returned.

Syntax:

numpy.emath.sqrt()

Parameters

x: It is an array-like object given as input.

Return Value:
A scalar value or an ndarray is returned by the numpy.emath.sqrt() function.

If the array contains negative input values, complex numbers are returned in the output, and the .shape, dtype, and .ndim attributes can be used to determine the array’s shape, datatype, and dimensions respectively.

Python Program to Calculate the Square Root of Negative Input with emath

For Negative Array Values:

Approach:

  • Import numpy module using the import keyword
  • Pass some random list of negative numbers as an argument to the array() function of the numpy module to create an array.
  • Store it in a variable.
  • Print the given array.
  • Apply the shape attribute on the given array to get the shape of the given array and print the result.
  • Apply ndim attribute on the given array to get the dimension of the given array and print the result.
  • Apply dtype attribute on the given array to get the datatype of all the elements of the given array and print the result.
  • Pass the given array as an argument to the sqrt() function of emath of the numpy module to calculate the square root of the given negative input array and print the result.
  • The Exit of the Program.

Below is the implementation:

# Import numpy module using the import keyword
import numpy as np

# Pass some random list of negative numbers as an argument to the array() function
# of the numpy module to create an array.
# Store it in a variable
gvn_arry = np.array([-2, -5, -3])

# Print the given array
print("The given array is:")
print(gvn_arry)

# Apply shape attribute on the given array to get the shape of the given array and
# print the result
print("The Shape of the given array ",gvn_arry," = ", gvn_arry.shape)

# Apply ndim attribute on the given array to get the dimension of the given array and
# print the result
print("The dimension of the given array ",gvn_arry," = ",gvn_arry.ndim)

# Apply dtype attribute on the given array to get the datatype of all the elements of the
# given array and print the result
print("The datatype of the given array ",gvn_arry," = ",gvn_arry.dtype)

# Pass the given array as an argument to the sqrt() function of emath of the numpy module
# to calculate the square root of the given negative input array and print it.
print(np.emath.sqrt(gvn_arry))

Output:

The given array is:
[-2 -5 -3]
The Shape of the given array [-2 -5 -3] = (3,)
The dimension of the given array [-2 -5 -3] = 1
The datatype of the given array [-2 -5 -3] = int64
[0.+1.41421356j 0.+2.23606798j 0.+1.73205081j]

For Complex numbers:

Approach:

  • Import numpy module using the import keyword
  • Pass some random list of complex numbers using the complex() function as an argument to the array() function of the numpy module to create an array.
  • Store it in a variable.
  • Print the given array.
  • Apply the shape attribute on the given array to get the shape of the given array and print the result
  • Apply ndim attribute on the given array to get the dimension of the given array and print the result
  • Apply dtype attribute on the given array to get the datatype of all the elements of the given array and print the result
  • Pass the given array as an argument to the sqrt() function of emath of the numpy module to calculate the square root of the given array of complex values and print the result.
  • The Exit of the Program.

Below is the implementation:

# Import numpy module using the import keyword
import numpy as np

# Pass some random list of complex numbers using the complex() function as an argument
# to the array() function of the numpy module to create an array.
# Store it in a variable
gvn_arry = np.array([complex(-3, -1),complex(-2, -4)])

# Print the given array
print("The given array is:")
print(gvn_arry)

# Apply shape attribute on the given array to get the shape of the given array and
# print the result
print("The Shape of the given array ",gvn_arry," = ", gvn_arry.shape)

# Apply ndim attribute on the given array to get the dimension of the given array and
# print the result
print("The dimension of the given array ",gvn_arry," = ",gvn_arry.ndim)

# Apply dtype attribute on the given array to get the datatype of all the elements of the
# given array and print the result
print("The datatype of the given array ",gvn_arry," = ",gvn_arry.dtype)

# Pass the given array as an argument to the sqrt() function of emath of the numpy module
# to calculate the square root of the given array of complex values and print it.
print(np.emath.sqrt(gvn_arry))

Output:

The given array is:
[-3.-1.j -2.-4.j]
The Shape of the given array [-3.-1.j -2.-4.j] = (2,)
The dimension of the given array [-3.-1.j -2.-4.j] = 1
The datatype of the given array [-3.-1.j -2.-4.j] = complex128
[0.28484878-1.7553173j 1.11178594-1.79890744j]

How to calculate the Square Root of Negative Input with emath in Python? Read More »

How to Install Pyrebase4 on Windows?

Python Pyrebase4 Library:
Pyrebase4 is a Python library for interacting with Google Firebase. Firebase offers its users a variety of services such as authentication, database hosting, and so on. Because Firebase was built mostly in JavaScript, the Pyrebase4 library was designed to help Python developers.

Install Pyrebase4 on Windows

Now, let us see how to install Pyrebase4 on Windows here.

Install of Python Pyrebase4 library on Windows
To install the Pyrebase4 library on Windows, follow the steps below:

Step 1: Determine whether Python is installed on your Windows PC. So, open the PowerShell/cmd terminal(command prompt) and enter the following command.

python –version

If you don’t have Python installed, then install it.

Output:

Setting path and checking python version

C:\Users\cirus\Desktop\pyrebase4>python --version
Python 3.10.4

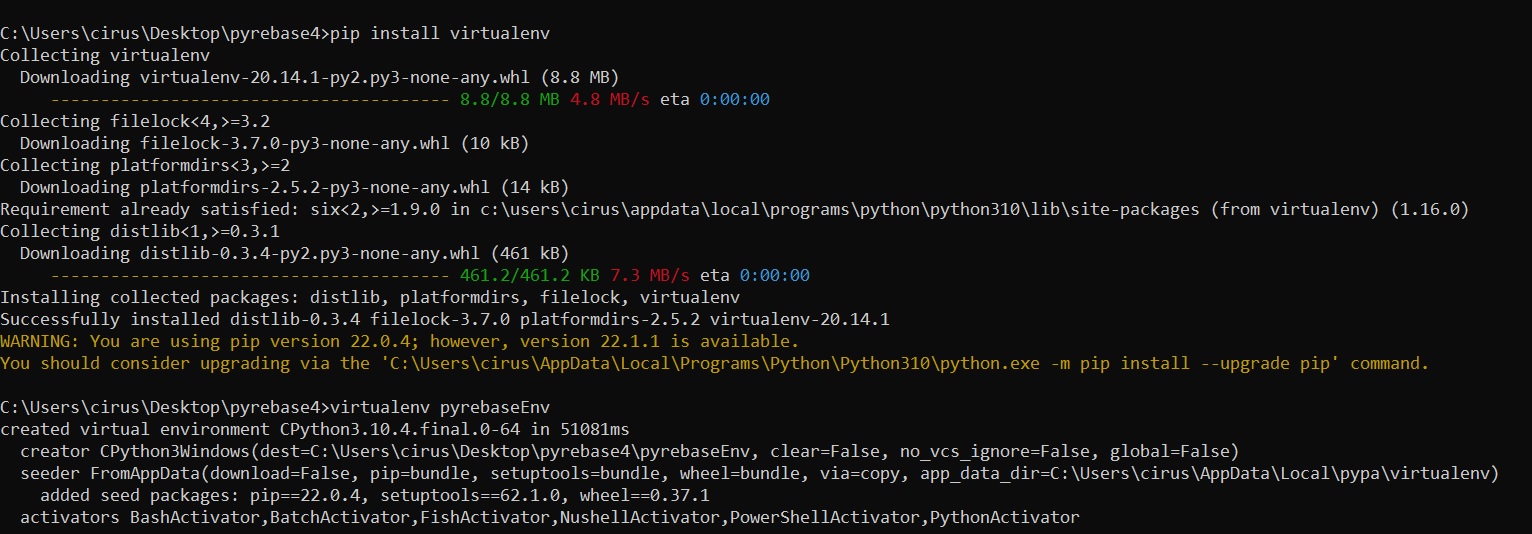
Step 2: To build/create a virtual environment, type the below command into your cmd terminal window.

virtualenv pyrebaseEnv

Step 3: Using the following command, we will now activate the virtual environment that we just created.

.\pyrebaseEnv\Scripts\activate

virtual environment

Step 4:Use the below command to install the Pyrebase4 library in this environment.

pip install Pyrebase4

Full Output:

C:\Users\cirus\Desktop\pyrebase4>pip install virtualenv
Collecting virtualenv
Downloading virtualenv-20.14.1-py2.py3-none-any.whl (8.8 MB)
---------------------------------------- 8.8/8.8 MB 4.8 MB/s eta 0:00:00
Collecting filelock<4,>=3.2
Downloading filelock-3.7.0-py3-none-any.whl (10 kB)
Collecting platformdirs<3,>=2
Downloading platformdirs-2.5.2-py3-none-any.whl (14 kB)
Requirement already satisfied: six<2,>=1.9.0 in c:\users\cirus\appdata\local\programs\python\python310\lib\site-packages (from virtualenv) (1.16.0)
Collecting distlib<1,>=0.3.1
Downloading distlib-0.3.4-py2.py3-none-any.whl (461 kB)
---------------------------------------- 461.2/461.2 KB 7.3 MB/s eta 0:00:00
Installing collected packages: distlib, platformdirs, filelock, virtualenv
Successfully installed distlib-0.3.4 filelock-3.7.0 platformdirs-2.5.2 virtualenv-20.14.1

C:\Users\cirus\Desktop\pyrebase4>virtualenv pyrebaseEnv
created virtual environment CPython3.10.4.final.0-64 in 51081ms
creator CPython3Windows(dest=C:\Users\cirus\Desktop\pyrebase4\pyrebaseEnv, clear=False, no_vcs_ignore=False, global=False)
seeder FromAppData(download=False, pip=bundle, setuptools=bundle, wheel=bundle, via=copy, app_data_dir=C:\Users\cirus\AppData\Local\pypa\virtualenv)
added seed packages: pip==22.0.4, setuptools==62.1.0, wheel==0.37.1
activators BashActivator,BatchActivator,FishActivator,NushellActivator,PowerShellActivator,PythonActivator
Collecting Pyrebase4
Downloading Pyrebase4-4.5.0-py3-none-any.whl (8.9 kB)
Collecting pycryptodome>=3.6.4
Downloading pycryptodome-3.14.1-cp35-abi3-win_amd64.whl (1.8 MB)
---------------------------------------- 1.8/1.8 MB 5.1 MB/s eta 0:00:00
Collecting requests-toolbelt>=0.7.1
Downloading requests_toolbelt-0.9.1-py2.py3-none-any.whl (54 kB)
---------------------------------------- 54.3/54.3 KB 2.9 MB/s eta 0:00:00
Collecting gcloud>=0.18.3
Downloading gcloud-0.18.3.tar.gz (454 kB)
---------------------------------------- 454.4/454.4 KB 7.2 MB/s eta 0:00:00
Preparing metadata (setup.py) ... done
Collecting requests>=2.19.1
Using cached requests-2.27.1-py2.py3-none-any.whl (63 kB)
Collecting python-jwt>=2.0.1
Downloading python_jwt-3.3.2-py2.py3-none-any.whl (6.8 kB)
Collecting oauth2client>=4.1.2
Downloading oauth2client-4.1.3-py2.py3-none-any.whl (98 kB)
---------------------------------------- 98.2/98.2 KB ? eta 0:00:00

Check whether Pyrebase4 library is installed or Not

1)Now let us check to see if the pyrebase library was successfully installed. So, in your terminal, enter the following command:

python

2)Importing the pyrebase4 library

import pyrebase

pyrebase imported

If we don’t see any issues after importing the library, it means the library was installed correctly and we can proceed to see its version.
If we notice any errors while importing the library, it implies the library was not installed properly.

pip show pyrebase4

Congrats! The Pyrebase4 library has been successfully installed on our system.


How to Install Pyrebase4 on Windows? Read More »

Python Program to Extract Numbers from a Text File and Add Them

Given a text file and the task is to extract all the numbers present in a given text file and add/sum all those numbers that are present in the text file.

Program to Extract Numbers from a Text File and Add Them in Python

Approach:

  • Open some random text file in write mode and store it in a variable.
  • Write some content into the above opened text file using the write function.
  • Close the above opened text file using the close() function.
  • Take a variable and initialize its value with 0 (which stores the sum of all the digits in a given text file).
  • Open some random text file in read-only mode using the open() function.
  • Iterate in each line of the given text file using the for loop
  • Loop in each character of the corresponding line using another nested for loop
  • Check if each character in the corresponding line is a digit/number or not using the isdigit() function and if conditional statement.
  • If it is true, then add that number to the above intialized variable(which stores the sum of all the digits in a given text file).
  • Print the sum of all the digits present in a given text file.
  • The Exit of the Program.

Below is the Implementation:

# Open some random text file in write mode and store it in a variable
gvn_txtfile = open('demo_textfile.txt', 'w+')
# Write some content into the above opened text file using the write function
gvn_txtfile.write('hello 1 python 4362programs. welcome 6123 all')
# Close the above opened text file using the close() function.
gvn_txtfile.close()

# Take a variable and initialize its value with 0 
# which stores the sum of all the digits in a given text file.
digits_sum = 0
# Open some random text file in read-only mode using the open() function.
with open('demo_textfile.txt', 'r') as txtfile:
    # Iterate in each line of the given text file using the for loop
    for f_line in txtfile:
        # Loop in each character of the corresponding line using another nested for loop
        for character in f_line:
            # Check if each character in corresponding line is digit/number or not using the
            # isdigit() function and if conditional statement. 
            if character.isdigit():
                # If it is true, then add that number to the above intialized variable.
                # (which stores the sum of all the digits in a given text file).
                digits_sum = digits_sum + int(character)

# Print the sum of all the digits present a given text file.  
print("The sum of all the digits present a given text file = ", digits_sum)

File Input:

hello 1 python 4362programs. welcome 6123 all

Output:

The sum of all the digits present a given text file = 28

Note:

You can also take any text file and provide the path of the text file to the open() function to open the given text file and to calculate the sum of digits of the text file as shown below.

# Take a variable and initialize its value with 0 
# which stores the sum of all the digits in a given text file.
digits_sum = 0
# Open some random text file in read-only mode using the open() function.
with open('sampleTextFile.txt', 'r') as txtfile:
    # Iterate in each line of the given text file using the for loop
    for f_line in txtfile:
        # Loop in each character of the corresponding line using another nested for loop
        for character in f_line:
            # Check if each character in corresponding line is digit/number or not using the
            # isdigit() function and if conditional statement. 
            if character.isdigit():
                # If it is true, then add that number to the above intialized variable.
                # (which stores the sum of all the digits in a given text file).
                digits_sum = digits_sum + int(character)

# Print the sum of all the digits present a given text file.  
print("The sum of all the digits present a given text file = ", digits_sum)

sampleTextFile.txt

hello 1 python 4362programs. welcome 6123 all

Output:

The sum of all the digits present a given text file = 28


Python Program to Extract Numbers from a Text File and Add Them Read More »