Satyabrata Jena

pandas.apply(): Apply a function to each row/column in Dataframe

How to apply a function  to each row or column in Dataframe in Python.

To apply a function to each row or column data in a warframe be it lambda, user-defined or a numpy function we have to use a function from Python’s Pandas library.  The function belongs to the dataframe class .

Syntax-

DataFrame.apply(func, axis=0, broadcast=None, raw=False, reduce=None, result_type=None, args=(), **kwds)

Arguments :

  1. Func : It is the function that is to be applied to the rows/columns. It takes series as arguments and also returns series
  2. Axis : Axis is the axis in which the function is applied to the rows/columns. (default value is 0. If 1 means it applies to all rows, If 0 means it applies to all columns)
  3. Args : All the arguments passed in a list of tuples.

Apply a lambda function to each row or each column in Dataframe :

Let us consider a lambda function

lambda x : x + 10

Apply a lambda function to each column :

To apply the function to each column we just have to pass the lambda function as argument in the Dataframe.apply( ) function.

#Program :

import pandas as pd
import numpy as np
#list of tuples
matrix = [(222, 34, 23),
         (333, 31, 11),
         (444, 16, 21),
         (555, 32, 22),
         (666, 33, 27),
         (777, 35, 11)
         ]
#creating an object from Dataframe class
dfObj = pd.DataFrame(matrix, columns=list('abc'))
#Passing only the lambda function into the Dataframe function so that it gets applied to columns only
modMatrix = dfObj.apply(lambda x : x + 10)
print("After applying the lambda function to each column in dataframe")
print(modMatrix)
Output :

After applying the lambda function to each column in dataframe

     a      b   c
0  232  44  33
1  343  41  21
2  454  26  31
3  565  42  32
4  676  43  37
5  787  45  21

Apply a lambda function to each row :

To apply the function to each row we just have to add axis=1 and pass it to the lambda function with the lambda function in the Dataframe.apply( ) function like we did in the column.

#Program :

import pandas as pd
import numpy as np
#list of tuples
matrix = [(222, 34, 23),
         (333, 31, 11),
         (444, 16, 21),
         (555, 32, 22),
         (666, 33, 27),
         (777, 35, 11)
         ]
#creating an object from Dataframe class
dfObj = pd.DataFrame(matrix, columns=list('abc'))
#Passing only the lambda function into the Dataframe function so that it gets applied to columns only
modMatrix = dfObj.apply(lambda x : x + 10)
print("After applying the lambda function to each row in dataframe")
print(modMatrix)
Output :
After applying the lambda function to each row in dataframe
     a      b    c
0  227  39  28
1  338  36  16
2  449  21  26
3  560  37  27
4  671  38  32
5  782  40  16

Apply a User Defined function with or without arguments to each row or column of a Dataframe :

For this let us consider a user-defined function that multiplies the values by 2

def doubleData(x):


return x * 2

Apply a user-defined function to each column :

Like we applied the lambda function to each column, similarly we will only pass the function here.

#Program :

import pandas as pd
import numpy as np
# Multiply given value by 2 and returns
def doubleData(x):
   return x * 2
#list of tuples
matrix = [(222, 34, 23),
         (333, 31, 11),
         (444, 16, 21),
         (555, 32, 22),
         (666, 33, 27),
         (777, 35, 11)
         ]
#creating an object from Dataframe class
dfObj = pd.DataFrame(matrix, columns=list('abc'))
#Applyin the user defined function doubleData to columns only
modMatrix = dfObj.apply(doubleData)
print("After applying the user-defined function to each column in dataframe")
print(modMatrix)
Output :
After applying the user-defined function to each column in dataframe
      a      b    c
0   444  68  46
1   666  62  22
2   888  32  42
3  1110  64  44
4  1332  66  54
5  1554  70  22

Apply a user-defined function to each row :

We just have to add axis=1 to the above function to apply it to rows.

#Program :

import pandas as pd
import numpy as np
# Multiply given value by 2 and returns
def doubleData(x):
   return x * 2
#list of tuples
matrix = [(222, 34, 23),
         (333, 31, 11),
         (444, 16, 21),
         (555, 32, 22),
         (666, 33, 27),
         (777, 35, 11)
         ]
#creating an object from Dataframe class
dfObj = pd.DataFrame(matrix, columns=list('abc'))
#Applyin the user defined function doubleData to rows only
modMatrix = dfObj.apply(doubleData,axis=1)
print("After applying the user-defined function to each row in dataframe")
print(modMatrix)
Output :
After applying the user-defined function to each row in dataframe
      a      b    c
0   444  68  46
1   666  62  22
2   888  32  42
3  1110  64  44
4  1332  66  54
5  1554  70  22


Apply a user-defined function to each row or column with arguments :

Let us take a user defined function that takes accepts a series and a number, then returns the series multiplied to the number

#Program :

import pandas as pd
import numpy as np
#Multplies the whole seried with the number and return the series
def multiplyData(x, y):
   return x * y
#list of tuples
matrix = [(222, 34, 23),
         (333, 31, 11),
         (444, 16, 21),
         (555, 32, 22),
         (666, 33, 27),
         (777, 35, 11)
         ]
#creating an object from Dataframe class
dfObj = pd.DataFrame(matrix, columns=list('abc'))
#Applyin the user defined function with a argument
modMatrix = dfObj.apply(multiplyData, args=[4])
print("After applying the user-defined function with argument in dataframe")
print(modMatrix)
Output :
After applying the user-defined function with argument in dataframe
      a       b      c
0   888  136   92
1  1332  124   44
2  1776   64   84
3  2220  128   88
4  2664  132  108
5  3108  140   44

Apply a numpy functions to each row or column of a Dataframe

For this let’s use the numpy function numpy.square( ). (For columns pass the function directly and for rows add axis=1 and pass)

#Program

import pandas as pd
import numpy as np
#list of tuples
matrix = [(222, 34, 23),
         (333, 31, 11),
         (444, 16, 21),
         (555, 32, 22),
         (666, 33, 27),
         (777, 35, 11)
         ]
#creating an object from Dataframe class
dfObj = pd.DataFrame(matrix, columns=list('abc'))
#Applyin the numpy fuction .square()
modMatrix = dfObj.apply(np.square)
print("After applying the numpy function in dataframe")
print(modMatrix)
Output :
After applying the numpy function in dataframe
        a           b     c
0   49284  1156  529
1  110889   961  121
2  197136   256  441
3  308025  1024  484
4  443556  1089  729
5  603729  1225  121

Apply a Reducing functions to a to each row or column of a Dataframe

We passed a series into the user-defined functions and it also returned a series .  However, we can also pass a series and return a single variable. Let’s use numpy.sum( ) for that.

#Program :

import pandas as pd
import numpy as np
#list of tuples
matrix = [(222, 34, 23),
         (333, 31, 11),
         (444, 16, 21),
         (555, 32, 22),
         (666, 33, 27),
         (777, 35, 11)
         ]
#creating an object from Dataframe class
dfObj = pd.DataFrame(matrix, columns=list('abc'))
#Applyin the numpy fuction .sum()
modMatrix = dfObj.apply(np.sum)
print("After applying the numpy function in datframe")
print(modMatrix)
Output :
After applying the numpy function in datframe
a    2997
b     181
c     115
dtype: int64

Want to expert in the python programming language? Exploring Python Data Analysis using Pandas tutorial changes your knowledge from basic to advance level in python concepts.

Read more Articles on Python Data Analysis Using Padas – Modify a Dataframe

numpy.append() – How to append Elements at the end of numpy array in Python

How to append elements at the end on a Numpy Array in python using numpy.append() in python ?

In this article we will discuss about how to append elements at the end on a Numpy array in python using numpy.append() method.

numpy.append() :

In python, numpy.append() is provided by Numpy module, by using which  we can append elements to the end of a Numpy Array.

Syntax : numpy.append(arr, values, axis=None)

where,

  • arr : refers to the numpy array where the values will be added.
  • values : refers to values that needs to be added.
  • axis : refers to axis along which values will be added to array where default value is None. If axis is None then values array will be flattened and values will be added to array. If axis is 0 then value add will occur row wise and if axis is 1 then value add will occur column wise.

Append elements at the end of 1D numpy array :

#Program

import numpy as np
# create a Numpy array from a list
arr = np.array([11, 22, 33])
#appending a single element to the numpy array
new_arr = np.append(arr, 88)
print(new_arr)
Output :
[11 22 33 88]

Append elements from a list to the Numpy array :

#Program 

import numpy as np 
# create a Numpy array from a list 
arr = np.array([11, 22, 33]) 
#appending multiple elements to the numpy array 
new_arr = np.append(arr, [66,77,88]) 
print(new_arr)
Output :
[11 22 33 66 77 88]

Flatten 2D Numpy Array and append items to it :

#Program 

import numpy as np 
# creating a 2D a Numpy array from a list 
arr = np.array( [ [11, 22, 23],
                [ 44, 55, 66] ])
#By flattening adding elements in List to 2D Numpy array 
new_arr = np.append(arr, [77,88,99]) 
print(new_arr)
Output :
[11 22 33 44 55 66 77 88 99]

Add a Numpy Array to another array row wise :

As we will add Numpy array to another array row wise then we have to set axis as 1=0.

So, let’s see an example how actually it works.

#Program 

import numpy as np
# Create two 2D Numpy Array like Matrix
matrix_array1 = np.array([[1, 2, 3],
                        [4, 5, 6]])
matrix_array2 = np.array([[7, 8, 9],
                         [11, 12, 13]])
 
#values will be added row wise as axis is 0                        
new_arr = np.append(matrix_array1, matrix_array2 , axis=0)
print(new_arr)
Output :
[[1, 2, 3]
[4, 5, 6]
[7, 8, 9]
[11, 12, 13]]

Add a NumPy Array to another array – Column Wise :

As we will add Numpy array to another array row wise then we have to set axis as 1=0.

So, let’s see an example how actually it works.

#Program 

import numpy as np
# Create two 2D Numpy Array like Matrix
matrix_array1 = np.array([[1, 2, 3],
                        [4, 5, 6]])
matrix_array2 = np.array([[7, 8, 9],
                         [11, 12, 13]])
 
#values ill be added column wise as axis is 0                        
new_arr = np.append(matrix_array1, matrix_array2 , axis=1)
print(new_arr)
Output :
[[ 1 2 3 7 8 9]
[ 4 5 6 11 12 13]]
Python Convert a 1D array to a 2D Numpy array or Matrix

Python: Convert a 1D array to a 2D Numpy array or Matrix

Python NumPy is the ultimate package in a python programming language that includes multidimensional array objects and a set of operations or routines to execute various operations on the array and process of the array. Where this numpy package is comprised of a function known as numpy.reshape() that performs converting a 1D array into a 2-D array of required dimensions (n x m). This function gives a new required shape without changing the data of the 1-D array.

This tutorial of Convert a 1D array to a 2D Numpy array or Matrix in Python helps programmers to learn the concept precisely and implement the logic in required situations. However, you can also learn how to construct the 2D array row-wise and column-wise, from a 1D array from this tutorial.

How to convert a 1D array to a 2D Numpy array or Matrix in Python

In this section, python learners will find the correct explanation on how to convert a 1D Numpy array to a 2D Numpy array or matric with the help of reshape() function.

One dimensional array contains elements only in one dimension.

program to convert a 1D array to a 2D Numpy array or Matrix in Python

Let’s try with an example:

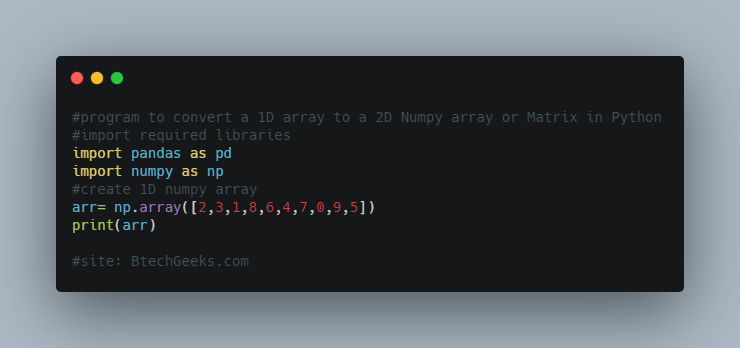
#program

#import required libraries
import pandas as pd
import numpy as np
#create 1D numpy array
arr= np.array([2,3,1,8,6,4,7,0,9,5])
print(arr)
Output :
[2 3 1 8 6 4 7 0 9 5]

Now we will convert it into a 2D array of shape 5X2 i.e 5 rows and 2 columns like shown below:

[[0 1 2 3 4]
[5 6 7 8 9]]

Reshape 1D array to 2D array

First, import the numpy module,

import numpy as np

Program to Reshape 1D array to 2D array

Now to change the shape of the numpy array, we will use the reshape() function of the numpy module,

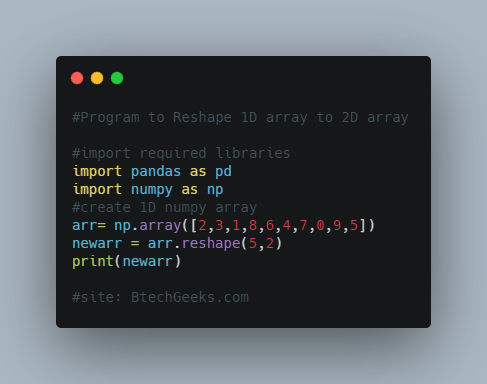
#Program:Reshape 1D array to 2D array

#import required libraries
import pandas as pd
import numpy as np
#create 1D numpy array
arr= np.array([2,3,1,8,6,4,7,0,9,5])
newarr = arr.reshape(5,2)
print(newarr)

Output:

[[2 3]
 [1 8]
 [6 4]
 [7 0]
 [9 5]]

First, we import the numpy module and then passed the 1D array as the first argument and the new shape i.e a tuple (5,2) as the second argument. It returned the 2D array.

Note: The new shape of the array must be compatible with the original shape of the input array, if not then it will raise ValueError.

numpy.reshape() function

  • It is used to give a new shape to an array without changing its data.
  • It returns the new view object(if possible, otherwise returns a copy) of the new shape.

Reshaped 2D array in view of a 1D array

If possible the function returns a view of the original and any modification in the view object will also affect the original input array.

Program to Reshaped 2D array in view of a 1D array

Example:

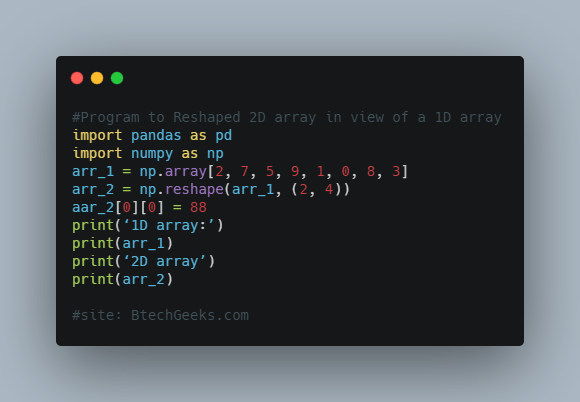
#Program:Reshaped 2D array in view of a 1D array

import pandas as pd
import numpy as np
arr_1 = np.array[2, 7, 5, 9, 1, 0, 8, 3]
arr_2 = np.reshape(arr_1, (2, 4))
aar_2[0][0] = 88
print(‘1D array:’)
print(arr_1)
print(‘2D array’)
print(arr_2)

Output:

1D array:
[88 7 5 9 1 0 8 3]
2D array:
[[88 7 5 9]
[ 1 0 8 3]]

Convert a 1D numpy array to a 3D numpy array using numpy.reshape()

In case, we have 12 elements in a 1D numpy array,

arr = np.array([1, 2, 3, 4, 5, 6, 7, 8, 9, 10, 11, 12])

Program to Convert a 1D numpy array to a 3D numpy array using numpy.reshape()

Now, let’s convert this 1D numpy array to a 3D numpy array:

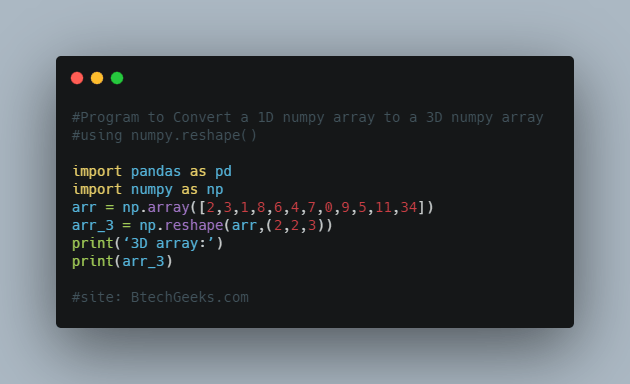
#Program:Convert a 1D numpy array to a 3D numpy array using numpy.reshape()

import pandas as pd
import numpy as np
arr = np.array([2,3,1,8,6,4,7,0,9,5,11,34])
arr_3 = np.reshape(arr,(2,2,3))
print(‘3D array:’)
print(arr_3)

Output:

3D array:
[[[2 3 1]
[8 6 4]]
[[7 0 9]
[5 11 34]]]

Here, the first argument is a 1D array and the second argument is the tuple (2, 2, 3).

It returned a 3D view of the passed array.

Convert 1D numpy array to a 2D numpy array along the column

After converting a 1D array to a 2D array or matrix in the above example, the items from the input array will be shown row-wise i.e.

  • 1st row of a 2D array was created from items at index 0 to 2 in the input array
  • 2nd row of a 2D array was created from items at index 3 to 5 in the input array
  • 3rd row of a 2D array was created from items at index 6 to 8 in the input array

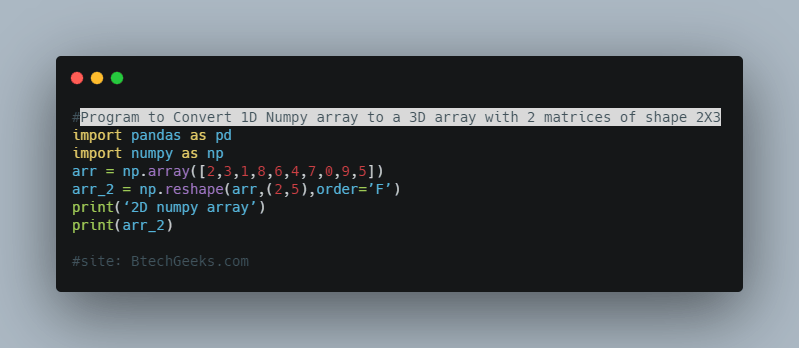
Now suppose we want to convert a 2D array column-wise so we have to pass the order parameter as ‘F’ in the reshape() function.

Program to Convert 1D Numpy array to a 3D array with 2 matrices of shape 2X3

#Program:Convert 1D Numpy array to a 3D array with 2 matrices of shape 2X3

import pandas as pd 
import numpy as np
arr = np.array([2,3,1,8,6,4,7,0,9,5])
arr_2 = np.reshape(arr,(2,5),order=’F’)
print(‘2D numpy array’)
print(arr_2)
Output:
2D numpy array:
[[0 2 4 6 8]
 [1 3 5 7 9]]

Convert 2D array to 1D array as Copy

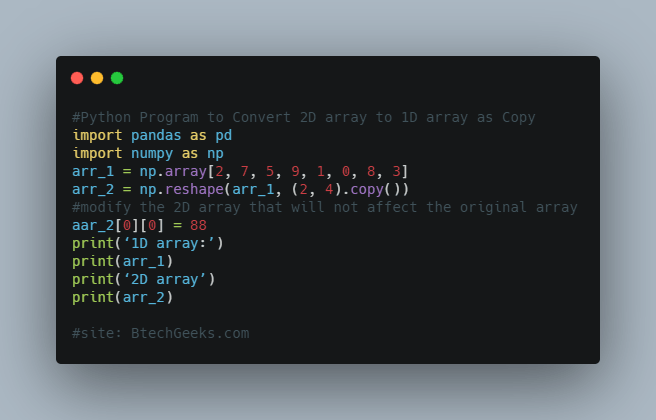
Suppose we want to create a 2D copy of the 1D numpy array then use the copy() function along with reshape() function.

Python Program to Convert 2D array to 1D array as Copy

Let’s try with an example:

#Program:Convert 2D array to 1D array as Copy

import pandas as pd 
import numpy as np
arr_1 = np.array[2, 7, 5, 9, 1, 0, 8, 3]
arr_2 = np.reshape(arr_1, (2, 4).copy())
#modify the 2D array that will not affect the original array
aar_2[0][0] = 88
print(‘1D array:’)
print(arr_1)
print(‘2D array’)
print(arr_2)

Output:

1D array:
[2 7 5 9 1 0 8 3]
2D array:
[[88 7 5 9]
 [ 1 0 8 3]]

Here, the 2D array is created of the 1D array. If you want to change the 2D array without changing the original array, just use the copy() function and the reshape() function.

Python: Check if a list is empty or not

How to check if a list is empty or not in python ?

In this article we will discuss about different ways to check if a list is empty or not. As we know in python, lists are used to store multiple values in an ordered sequence inside a single variable.  Each element inside the list is called an item.

Syntax : my_list = [ element1, element2, element3, .....]

where,

  • elements/items are placed inside square brackets [].
  • items are separated by , symbol.
  • It can contain any number of items.
  • elements can be of different types i.e string, float, integer etc.

Method-1 : Check if a list is empty using ‘not’ operator in python

A sequence object in python is implicitly convertible to bool. If the sequence is empty it will be evaluated to False else True. So just by using an if statement we can check the list is empty or not.

#Program :

# empty list created
my_list = []
# Here empty list object will evaluate to False
if not my_list:
    print('List is empty')
else:
    print('List is not empty')
Output :
List is empty

Method-2 : Check if list is empty using len() function

By using the len(), we can get the size of list. If the size of list is zero then it is empty list.

Example program :

#Program :

# empty list created
my_list = []

# Check if list's size is 0
if len(my_list) == 0:
    print('List is empty')
else:
    print('List is not empty')
Output :
List is empty

Method-3 : Check if list is empty by comparing with empty list

Empty list is denoted by [] this.  So by comparing our list object with [] , we can confirm the list is empty or not.

#Program :

# empty list created
my_list = []

# Check if list object points to literal []
if my_list == []:
    print('List is empty')
else:
    print('List is not empty')
Output :
List is empty

Method-4 : Check if list is empty using __len__()

We can get the size of list by calling __len__() function on the list object.  If the list size is equals to zero then the list is empty.

Let’s see an implementation of it.

#Program :

# empty list created
my_list = []

# Check if list's size is 0
if my_list.__len__() == 0:
    print('List is empty')
else:
    print('List is not empty')
Output :
List is empty

Method-5 : Check if a list is empty using numpy

First convert list inti Numpy array then check the size of Numpy array.

  • If the size of Numpy array is zero then the list is empty
  • If the size of Numpy array is greater than zero then list is not empty.

Let’s see an implementation of it.

#Program :

import numpy as np
# empty list created
list_of_num = []
arr = np.array(list_of_num)
if arr.size == 0:
    print('List is empty')
else:
    print('List is not empty')
Output :
List is empty

Python: Replace multiple characters in a string

How to replace multiple characters in a string in Python ?

In this article we will discuss about different ways to replace multiple characters in a string.

Suppose we have a String variable named my_string. So let’s see how we can replace its letters.

my_string = "You are studying from BTech Geek"

Now, we want to replace 3 characters of it i.e

  • ‘u’ will be replaced with ‘w’
  • ‘s’ will be replaced with ‘p’
  • ‘t’ will be replaced with ‘z’

Method-1 : Replacing multiple characters in a string using the replace() method

In python, the String class provides an inbuilt method replace()  which can be used to replace old character to new character. It replaces all occurrences of that character.

For example if we want to replace ‘a’ in a string to ‘b’ then at all the positions where ‘a’ is present those positions will be replaced with ‘b’ in the string.

Syntax : string_var_name.replace(old char, new char)

Now let’s see the implementation of it.

#Program :

#string 
my_string = "You are studying from BTech Geek"
char_to_replace = {'u': 'w',
                   's': 'p',
                   't': 'z'}
# Iterating over all key-value pairs in the dictionary
for key, value in char_to_replace.items():
    # Replacing matched key character with value character in string
    my_string = my_string.replace(key, value)
print(my_string)
Output :
Yow are pzwdying from BTech Geek

Method-2 : Replace multiple characters in a string using the translate ()

In python, the String class also provides an inbuilt method translate()  which can also be used like replace() to replace old character to new character. It replaces all occurrences of that character.

#Program :

#string 
my_string = "You are studying from BTech Geek"
char_to_replace = {'u': 'w',
                   's': 'p',
                   't': 'z'}
# Iterating over all key-value pairs in the dictionary
for key, value in char_to_replace.items():
    # Replacing matched key character with value character in string
    my_string = my_string.translate(str.maketrans(char_to_replace))
print(my_string)
Output : 
Yow are pzwdying from BTech Geek

Method-3 : Replacing multiple characters in a string using regex

regex module (re) in python provides a function sub() with the help of which we can also replace multiple characters of the string. Just we need to pass the pattern that we want to string.

#Program :

import re
#string 
my_string = "You are studying from BTech Geek"
char_to_replace = {'u': 'w',
                   's': 'p',
                   't': 'z'}
# Iterating over all key-value pairs in the dictionary
for key, value in char_to_replace.items():
    # Replacing characeters
    my_string = re.sub("[ust]",
                       lambda x: char_to_replace[x.group(0)],
                       my_string)
print(my_string)
Output : 
Yow are pzwdying from BTech Geek

Method-4 : Replacing multiple characters in a string using for loop

We can also replace multiple string in a string using for loop. It will iterate over the string character by6 character. When a matching character is found then it will replace the character with new character and will add to the string. If no replacement is found for that character then it ill add the character to the string.

For this we have to take a new string variable as the newly created string will stored in that new string variable.

Let’s see the implementation of it.

#Program :

#string 
my_string = "You are studying from BTech Geek"
char_to_replace = {'u': 'w',
                   's': 'p',
                   't': 'z'}
# Iterating over all key-value pairs in the dictionary
result_str = ''
# Iterating over all characters in string
for element in my_string:
    # Checking if character is in dict as key
    if element in char_to_replace:
        # If yes then it add the value of that char from dict to the new string
        result_str += char_to_replace[element]
    else:
        # If not then add the character in new string
        result_str += element
print(result_str)
Output : 
Yow are pzwdying from BTech Geek

Python: How to get Last N characters in a string?

This article is about finding the last N characters of String where the N represents any number or int value.

How to get the last N characters in a String using Python

In Python, String is a sequence of characters where character can be a string, integer or any symbol. With each character the index numbers are associated with each character.

For example : We have a String variable named String_value which contains a String Technology i.e

String_value = “Digital”

The first character starts with index 0 and it goes on. Like

Index of character ‘D’ = 0

Index of character ‘i’ = 1

Index of character ‘g’ = 2

Index of character ‘i’ = 3

Index of character ‘t’ = 4

Index of character ‘a’ = 5

Index of character ‘l’  = 6

In Python, just by passing the index number in [ ] (Subscript operator or Index Operator) any character of the string can be accessed.

Like String_value[i] will return i-th character of the string, where ‘i’ represents an index position.

For example, String_value[4] will return character ‘t’.

Get last character of the String using negative indexing :

Negative indexing refers to associate negative index value to each character of the string. Like last character of string will be associated with index number -1 then negative index will go on incrementing and characters will go on decrementing so that each character will be associated with a negative index.

Let’s see how actually its implemented

String_value = “Digital”

Where the sequence number/index of the last character starts with -1 and it goes on. Like

Index of character ‘D’ = -7

Index of character ‘i’ = -6

Index of character ‘g’ = -5

Index of character ‘i’ = -4

Index of character ‘t’ = -3

Index of character ‘a’ = -2

Index of character ‘l’  = -1

So let’s see a program to get the last character of the string using negative indexing.

#Program:

String_value = "Digital"
Last_char = String_value[-1]
print('Last character of the string is', Last_char)
Output : 
Last character of the string is l

Here, just by passing -1 in the operator [ ], we fetched the last character of the string.

Get the last character of string using len() function :

Without using negative indexing we can also get the last character of the string just by finding the length of the string and then printing the character at length-1 position.

So let’s see a program to get the last character of the string using len( ) function.

#Program: 

String_value = "Digital" 
#Finding length of String_value
length = len(String_value )
# Finding the last character of string
#Length of the string -1 represents last character
Last_char = String_value[length -1]
print('Last character of the string is', Last_char)
Output :
Last character of the string is l

Get last N characters in a string :

In above examples we only have passed index position in the subscript operator, i.e. [] but it can also accept a range too i.e.

Syntax : string_value[ start_index_position : end_index_position : step_size]

Where,

  • start_index_position: It refers to the index position, from where it will start fetching the characters in a string (Default value is 0).
  • end_index_position: It refers to the index position, upto which it will fetch the characters from string (Default value is end of string).
  • step_size: It refers to the interval between each character (Default value is 1).

When we use the above statement it returns a substring means part of the string.

So let’s see a program to understand the implementation of it.

Approach #1 : Using negative index

#Program: 

String_value = "Digital" 
#Finding length of String_value
length = len(String_value )
# Finding the last 3 characters of string
# Here mention start index i.e -3 
# End index not mentioned, so it will go upto last character
Last_char = String_value[-3:]
print('Last 3 characters of the string is', Last_char)
Output :
Last 3 characters of the string is tal

Approach #2 : Using len( ) function

#Program: 

String_value = "Digital" 
#Finding length of String_value 
length = len(String_value ) 
# Finding the last 3 character of string 
#here start index is length of the string -3 i.e length-3
Last_char = String_value [length - 3 :]
print('Last 3 characters of the string is', Last_char)
Output :
Last 3 characters of the string is tal

How to change current working directory in python ?

How to get and change current working directory in python ?

In python, we use OS module to interact with the operating system. As it comes under Python’s standard utility module, so we do not have to install it externally. During working if we use invalid or inaccessible file names and paths, then all functions in OS module raise OS error.

So at the top of file we have to import os module to use this functions.

While we deal with files in directories in python we use two types of paths i.e

  1. Relative Path : Location begins from the current working directory.
  2. Absolute Path : Location begins from the root directory.

Where, current working directory refers to the folder in which the Python script is operating.

So, in this article we will discuss how we can get and change the current working directory in python.

Get the Current Working Directory in Python :

getcwd() method of the os module is used to get the absolute path of current working directory.

Syntax : os.getcwd()

So, let’s see a program, to understand the implementation of it.

#Program :

import os
  
# Function to Get the current working directory
def current_path():
    print("Current working directory before change")
    print(os.getcwd())
    print()
  
# Printing CWD before change
current_path()
Output :
Current working directory before change
home/linuxize/desktop

Change the Current Working Directory in Python :

os.chdir( ) method is used to change the current working directory in python.

Syntax : os.chdir()

So, let’s see a program, to understand the implementation of it.

#Program :

import os
  
# Function to Get the current working directory
def current_path():
    print("Current working directory after change")
    print(os.getcwd())
    print()
  
  
# Changing the current working directory
os.chdir('/temp')
# Printing current working directory after
current_path()
Output :
Current working directory after change
/temp

Changing the path which does not exist :

Suppose a path does not exist, but we are trying to change that path using os.chdir( ) method. As we are trying to change a false path which does not exist so it will raise an error FileNotFoundError.

So, let’s see a program, to understand the implementation of it.

#Program
# Python program to change the current working directory
 
# importing necessary libraries 
import sys, os 
    
# initial directory 
cwd = os.getcwd() 
    
# This directory does not exist
fd = 'false_dir/temp'
    
# But we are trying to insert to flase directory 
try: 
    print("Inserting inside :", os.getcwd())
    os.chdir(fd) 
        
# Cache the exception  
except: 
    print("Some error associated with specified directory. Exception : ")
    print(sys.exc_info()) 
              
# handling with finally           
finally: 
    print()
    print("Restoring the correct path") 
    os.chdir(cwd) 
    print("So Current directory is :", os.getcwd())
Output :
Inserting inside : home/linuxize/desktop
Some error associated with specified directory. Exception :
(<class ‘FileNotFoundError’>, FileNotFoundError(2, ‘No such file or directory’), <traceback object at 0x7fca10a2e788>)
Restoring the correct path
So Current directory is :
home/linuxize/desktop

Python: Print items of a dictionary line by line (4 ways)

How to print items of a dictionary line by line in python ?

In python a dictionary is one of the important datatype which is used to store data values in key : value pair. Generally keys and values are mapped one-to-one. But it is not impossible that we can not map multiple values to a single key. So in this article we will discuss how we can map multiple values per key in dictionary.

Syntax of dictionary :

dictionary_name = {key1: value1, key2: value2}

where,

  • key1, key2… represents keys in a dictionary. These keys can be a string, integer, tuple, etc. But keys needs to be unique.
  • value1, value2… represents values in dictionary. These values can be strings, numbers, list or list within a list etc.
  • key and value is separated by : (colon) symbol.
  • key-value pair symbol is separated by , (comma) symbol.

Example of a dictionary population where multiple values are associated with single key.

population = {"Odisha": 40000000, "Telangana": 50000000, "Delhi": 80000000, "Goa": 10000000}

So, let’s first create a dictionary and we will see how it prints the dictionary in a single line.

#Program

#dictionary created
population = {"Odisha": 40000000, "Telangana": 50000000, "Delhi": 80000000, "Goa": 10000000} 
#printing dictionary in a line
print("Printing dictionary in a single line :") 
print(population)
Output :
Printing dictionary in a single line :
population = {"Odisha": 40000000, "Telangana": 50000000, "Delhi": 80000000, "Goa": 10000000}

It was very easy to print dictionary in a single line as to print the dictionary we just passed the dictionary name i.e population in the print statement. As the dictionary is small so we printed it in a single line also we understood it easily.

But think about a situation when the dictionary is too big and we need to print the dictionary line by line means one key-value pair in a single line then next key-value pair in next line and so on. It will be very easy for us also to understand a big dictionary very easily. So, in this article we will discuss how we can print items of a dictionary in line by line.

Method -1 : Print a dictionary line by line using for loop & dict.items()

In python there is a function items( ), we can use that along with for loop to print the items of dictionary line by line. Actually dict.items( ) returns an iterable view object of the dictionary which is used to iterate over key-value pairs in the dictionary.

So, let’s take an example to understand it more clearly.

#Program

#dictionary created
population = {"Odisha": 40000000, "Telangana": 50000000, "Delhi": 80000000, "Goa": 10000000} 
#printing dictionary in line by line
# Iterating over key-value pairs in dictionary and printing them
for key, value in population.items():
    print(key, ' : ', value)
Output :
Odisha: 40000000
Telangana: 50000000
Delhi: 80000000
Goa: 10000000

Method -2 : Print a dictionary line by line by iterating over keys

Like in method-1 we did iterate over key-value pair, in method-2 we can only iterate over key and for each key we can access its value and print the respective value.

So, let’s take an example to understand it more clearly.

#Program

#dictionary created
population = {"Odisha": 40000000, "Telangana": 50000000, "Delhi": 80000000, "Goa": 10000000} 
#printing dictionary in line by line
# Iterating over key in dictionary and printing the value of that key
for key in population:
    print(key, ' : ', population[key])
Output :
Odisha: 40000000
Telangana: 50000000
Delhi: 80000000
Goa: 10000000

Method -3 : Print a dictionary line by line using List Comprehension

Using list comprehension and dict.items(), the contents of a dictionary can be printed line by line.

So, let’s take an example to understand it more clearly.

#Program

#dictionary created
population = {"Odisha": 40000000, "Telangana": 50000000, "Delhi": 80000000, "Goa": 10000000} 
#printing dictionary in line by line
[print(key,':',value) for key, value in population.items()]
Output : 
Odisha: 40000000 
Telangana: 50000000 
Delhi: 80000000 
Goa: 10000000

Method -4 : Print a dictionary line by line using json.dumps()

In python, json.dumps( ) is provided by json module  to serialize the passed object to a json like string. So to print the dictionary line by line we can pass that dictionary in json.dumps( ).

So, let’s take an example to understand it more clearly.

#Program

import json
#dictionary created
population = {"Odisha": 40000000, "Telangana": 50000000, "Delhi": 80000000, "Goa": 10000000} 
#printing in json format
print(json.dumps(population, indent=1))
Output : 
Odisha: 40000000 
Telangana: 50000000 
Delhi: 80000000 
Goa: 10000000