Python

how to call a function in python Guide

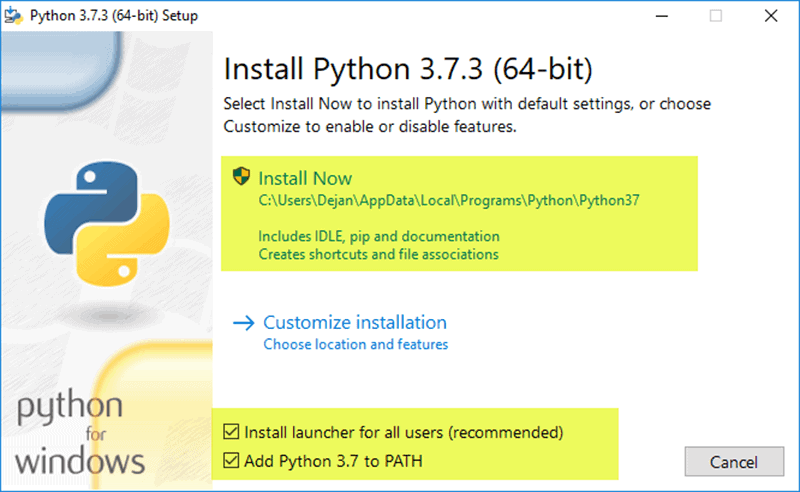
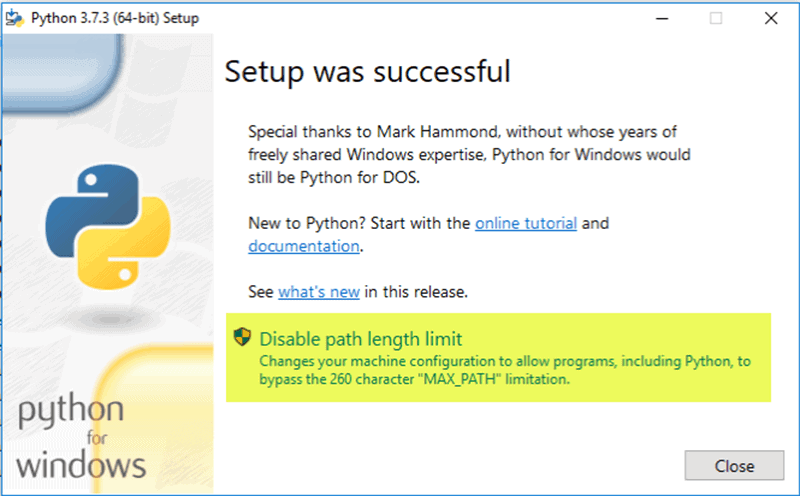
In this article, we will know how to call a function in Python.  You should have Python installed in your machine. You should know the basics of  Python syntax.  if you don’t check our installation guide and get started guide.

Content

  • How to create a function in Python
  • What are the scopes in Python
  • How to call a function in python

In a previous article, we talked more about Python and how it supports many paradigms. One of these Paradigms is a function. The functional programming paradigm is one of the most popular paradigms. Many languages support this paradigm. The functional paradigm in a nutshell is isolating logic into functions. You can call these functions anywhere. What are the benefits of this paradigm?

It helps the code to be easy to read and maintain. Each function performs a single job. This makes it easy to reuse the different functions in different places in the code. It helps to maintain and change business logic easily without the need to refactor the whole code.

How to create a function in Python

Defining a function in Python can be done by adding the def keyword. Python will know that this logic will be inside this function. The variables will be accessible inside the function only. This called scope. we will talk more about it in the next section. Let’s define a function.

def func_name():
    """
    Here is a docstring for the fucntion.
    """
    return True

The above code describes how to define a function in Python. It has the def keyword to tell Python that the next name is a function name. The next part is func_name()the name of the function. It has brackets to accept arguments you need to pass it to this function. The docstring part is a free text area that explains what this function is doing. The final part is the return keyword. It has the value you need to return from the function.

The above was a very simple example of a function. Let’s try to start with more complex examples.

def sum_static():
    return 1 + 2

def sum_dynamic(x, y):
    return x + y

def welcome_msg(name):
    welcome_text = "Dear {name} welcome to our guide to python functions".format(name=name)
    return welcome_text

def check_type(number):
    """
    Function that detrimine the type of integer
    """
    if not isinstance(number, int):
        return "Invalid number"
    if number % 2 == 0:
        return "Even"
    else:
        return "Odd"

def dictify(key, value):
    """
    Return a dict {key: value}
    """
    data = dict()
    data[str(key)] = value
    return data

In the above, we have a couple of functions with different usage and complexity. Le’s explain them.

In the first sun_static function, it’s a static function that doesn’t take any parameters. It will always return the summation of 1 and 2. Python functions can accept parameters. The goal of these parameters is to make Python functions dynamic. In the second sum_dynamic accept two parameters x and y. If you passed them to the function it’ll add them and return the result. The Third function has more complicated logic it’ll return a welcome message with the name argument. In this function, we defined a variable welcome_text. This variable is only in the scope of this function. We need to know more about scopes in Python.

What is the scope in Python?

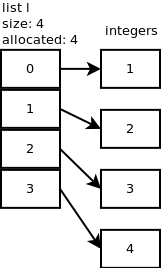
The scope or it can be called a namespace in Python is the area of this variable effect. In a more simple way. It’s the space that if you called this variable it’ll be valid. This means that the variable defined inside the functions is accessible only inside the function. If you tried to call it outside the function it’ll raise an exception. The below diagram explain the types of namespaces in Python.

What is the scope in Python

This means that in our welcome_msg function the welcome_text variable can’t be called outside the function. Let’s see an example.

language = "python"

def welcome_msg(name):
    welcome_text = "Dear {name} welcome to our guide to {language} functions"
    welcome_text.format(name=name, language=language)
    return welcome_text

The language variable can be called inside the function.

To continue with the other functions examples. In previous functions, we didn’t add logic. It was returning a text. In the check_type function, we added conditions to check the type of the number.

The function should have a single goal this requires to validate the function inputs. It’s a necessary part of any function to avoid unwanted behavior. Without the checking type of input, the user can pass a string or a dictionary. The code will try to divide it by 2 it’ll raise an exception. Adding instance type validation will help make this function usable.

The return statement in Python functions can return any type of data. This is what we added in the dictify function. The  Function returns a Python dictionary. This makes it easy to assign the return result of the function to a variable and work with it. Now Let’s call the functions we created and see it’s output.

How to call a function in python

To call a function in python simply mention the function. This will invoke the function logic and return the result. let’s call the above functions.

# print the falue of sum_static
print(sum_static())

# output:
3


x = 2
y = 2

# Passing arguments to the function 
result = sum_dynamic(x, y)
print(result)

# output:
4

# print the welcome message by passing name directly
result = welcome_msg("John")
print(result)

# output:
Dear John welcome to our guide to Python functions


# Apply the function logic multiple time inside a for loop 
numbers = [5, 8, 9, 87, 12, 67]
for number in numbers:
    result = check_type(number)
    print(result)

# output:
Odd
Even
Odd
Odd
Even
Odd


key = "name"
value = "John"

# assign a function to a variable and use it.
data = dictify(key, value)
print(data)
print(data[key])

# output:
{'name': 'John'}
'John'

We called the functions we created and used them in different cases.

conclusion

Python functions are extremely helpful in different Python applications. You can use it to avoid writing the same logic multiple times. A general rule if you’re writing the same code twice add it to a function and call it. To define a function in python we use def. Each function has it’s scope. This will make the variables defined inside the function not accessible outside it. To call the function you just need to write its name with proper arguments if needed. You can assign the return result to a variable and use it. check what we did in the dictify function.

how to call a function in python Guide Read More »

How to install python on windows installation guide

Prerequisites

In this article, we will talk more about how to install python on windows. If you’re new to python. You can check our beginner guide to python to know more about its usage. In this article, we will talk about:

  • Downloading Python
  • How to install it
  • Install Python in windows OS
  • How to uninstall python

First, let’s get started with

Downloading Python

It depends on which operating system you’re using. Downloading Python is an easy process. This is one of Python’s main goal. To be easy to run, easy to install. You can download python from different resources. The official Python website is the go-to to download python. It has the download links for all operating systems. It has detailed release notes for differences between versions. You need to take a look at the release notes if you’re upgrading your python version. It’ll help you know the changes exactly.

To download python you need to

  1. Go to the download page on the official website.
  2. Select your operating system. (WindowsMacUnix)
  3. Click on the exact version you want to download. (latest version is recommended)

Your download will start automatically. Now It’s time to install Python.

Installing Python on windows

After downloading Python. Now we will install it. In this article, we gonna focus on installing python on windows. There are two ways of installing python on windows. The first one if you have Bash ubuntu installed. Bash ubuntu is an ubuntu terminal in the windows operating system. It allows you to run ubuntu commands in windows. It’s very helpful if you need a bash shell to work with. Keep in mind it’s not fully ubuntu terminal. It has some windows restrictions.

To install Python in bash ubuntu. You need first to have to download the ubuntu terminal. You can download it from the Windows store. After downloading it you will need to open the terminal. It might take some time, in the beginning, to download and install terminal necessary packages. After it finished you will find the normal ubuntu terminal. That you can run all the commands you want in it.

  1. Install dependencies.
    $ sudo apt install software-properties-common
    $ sudo add-apt-repository ppa:deadsnakes/ppa
  2. Update the OS package manager
    sudo apt update
  3. Install the latest version
    $ sudo apt install python3.8

To check python is installed. You should type the below command.

python --version

output:

Python 3.8.2

Now you have installed python successfully. Note that you installed Python in this shell. This means it’s not installed globally on the system. which means if you have a python script and tried to run this script outside the terminal. You need to run it from the shell. It’ll not run. Let’s explain why.

Your python is installed only on the Ubuntu subsystem. Ubuntu terminal is a container running in windows. It helps to translate your commands into binary system calls to Windows. By installing python. You install it on the subsystem only.

Install Python in windows OS

If you want to install python Globally on windows. You should follow these steps. After downloading Python. In your downloads, you’ll have a .exe file. Open it will open this screen.

Install Python in windows OS

You can choose to install it now. It will add the python path in your system partition. You can customize the installation path and user access.

The final step of windows installation.

After Finishing the installation. You will have the setup success screen. It’ll have links to documentation and getting start guide. After close this screen you will find a python shortcut on your desktop or windows menu. Now you can run any python script.

How to uninstall python

As you can see installing Python is easy. What about remove it. To remove Python from your device You have two options if you’re using Windows. The simplest way is:

  1. Go-to control panel
  2. Search for python
  3. Right-click and choose uninstall

This will remove python entirely from your system.

If you installed python through the ubuntu subsystem. It means that it’s not globally installed. Now You should open a new terminal window. Run the below command.

$ sudo apt remove python3.8

This will uninstall python from the subsystem. The dependencies package will be installed. This command will not delete the data files of python are still exist on your system. If you want remove it completely from your system. You should run:

$ sudo apt autoremove python3.8

This will remove python dependencies too from your system.

conclusion

Installing or uninstalling python is an easy process. Python was designed to be that from the beginning. You can install it in windows with a simple GUI. Or you can install it using the Ubuntu subsystem. Removing python as easy as installing it. You can uninstall it via the GUI or the terminal.

How to install python on windows installation guide Read More »

what is the string in python

The string is a Python data type. In this article, we will know what is the string in python, How to reverse, concatenate, and compare the string in Python. To get the most out of this article, you need to have the basic knowledge of Python. If you don’t check our intro to python here. Let’s start with what is the string in python.

What is the string in Python?

The Python string is a data type. Python doesn’t have a character data type. That’s why it has a string it’s a list of characters in Unicode representation. Python deals with string as an array of characters.

This means that you can apply all list functions to string too. Declaring a python string is very easy you can simply add the word between single or double-quotes. This will tell Python to create a list in the memory with the string length. Let’s see an example of defining a Python string.

text = 'Hello'
message = "Python string"

print(text)
print(message)

# output
'Hello'
"Python string"

The above example shows how you can define a string in python with single or double-quotes. The Python string has some functions that make use of the string. Let’s say that users registered to your application with their email. You need to validate that this the email string is lowercase. To avoid duplication in the user’s data. Python provides a built-in function lower() that convert string to lowercase.

email = "[email protected]"

print(email)
# output
'[email protected]'

print(email.lower())

# output
'[email protected]'

We mentioned that string is a list and we can execute some of the list functions to it.  This includes the reverse functionality that the list had.

How to reverse a string in Python

To reverse a string in python you need to understand that python read the string as a list of characters. The functionality of the reverse is pretty simple. First, iterate through the string. Create a new string with staring at the end of the original string. You will understand with an example.

text = 'Hello world'
new_text = ''

index = len(text)
while index > 0:
  new_text += text[index -1]
  index -= 1

print(text)
print(new_text)

# output
Hellow world
dlrow olleH

In the above code, we created an index with the length of the string. Use the loop to go through each item in the text from back to front. The final part is to add the characters to the new string and decrease the counter. This solved our problem to reverse the string. Python supports a more efficient way to reverse the string.

How to reverse a string in Python

text = 'Hello world'
new_text = text[::-1]

print(new_text)

# output
dlrow olleH

What the text[::-1] code did? It slices the string to make it starts with the length of the string and ends with a zero index. This reversed the string and stored it in the new_text string. You might have noticed in the previous example that we created an empty string and starts adding to it. This leads us to the question How to concatenate Python’s string?

Concatenate String in Python

Concatenation Python’s string is merging strings together. In a more simple explanation, if you have text_1 = “Hello” and text_2 = “world”. concatenating them will be my merging them to formulate the “Hello world”. There are many ways to concatenate strings in Python. The simplest one is using the plus signs.

text_1 = "Hello"
text_2 = "World"

print(text_1 + " " + text_2)

# output
Hello World

The more your codebase gets bigger the more you need to customize the concatenation. Python provides a couple of functions to help you concatenate the string in a more elegant and readable way. The first method is the format() function.

username = "John"

welcome_message = "Welcome {username} this is a test text".format(username=username)

print(welcome_message)

# output
Welcome John this is a test text

The format function is very handy in the large test if you needed to add spaces and you have multiple variables to add inside the text. All you need to do is to put the variable name between curly brackets. Python will get the value of this variable from the parameters passed to the format function.

The second method is using the join function.  The join function is useful if you have a list and you want to concatenate the list data to a string. Let’s take an example to understand.

full_name_parts = ['John', 'Jack', 'Watson']
full_name = "-"

full_name.join(full_name_parts)

print(full_name)

# output
John-Jack-Watson

You Can see that the join function iterated through the list and added the items to the full_name string. It added the items with a -  between them.

The third method it’s only available in python in Python 3.6 and above. It’s the f-string method. It’s a more improved version of the format function.

name = "Jack"
age = 72

f"Hi, {name}. You is {age}."

# output
'Hello, Eric. You are 74.'

The f-string method allows you to directly get the variable value in the string. If you added the f a character at the start of the string.

Compare two Python strings

Let’s assume that you have an application that stores the username. You want the username of each user to be unique. This means that you need to validate that this name is not matching any of the other registered usernames. Python provides The ability to compare strings. A basic example of this:

name = input('Enter Your Name:')

saved_name = 'Jack'

if name == saved_name:
  print('Sorry the name you entered is taken')
else:
  print('Welcome {name}'.format(name=name))


# output
Sorry the name you entered is taken

# output
Welcome John

Python compares the two string as text. This means that if the user enters a lowercase Jack name the condition will not be valid. This is very important. You need to know that Python doesn’t do automatic validation. You need to implement the validations you need manually. This was a very simple example in a more realistic example you will have a database that makes sure that the name is unique.

Conclusion

Python’s string is very handy and useful to work with. It has clear formating and contamination methods. You can work with it as a list. it supports different most of the Python list built-in functions. To reverse a Python’s string you can slice it and end with index 0. Concatenate strings in  Python provides different concatenation methods to choose from based on your need. Comparing strings in python are similar to compare two integers. You can know more about Python strings in the official documentation. You can get many more details about The string functions here.

what is the string in python Read More »

Lists in Python: How to create a list in Python

The Python lists are widely used in python. Lists are one of the most used data structures in Python. It’s an unordered data store. In this article, we will learn how to work with lists in Python. You should know Python syntax and what is the lists in python. We have talked in a previous article, about the python dictionary data structure.

The lists are a sequential data store. Item saved in the list by its index. The list index starts with 0. This mean that a simple list  x = [1, 2, 3]. To get the 1st item you will need the item by index. This might be confusing. Don’t worry we will explain. Let’s start with

Create a list in Python

To define lists in Python there are two ways. The first is to add your items between two square brackets.

Example:

items = [1, 2, 3, 4]

The 2nd method is to call the Python list built-in function by passing the items to it.

Example:

Items = list(1, 2,3,4)

In both cases, the output will be

[1, 2, 3, 4]

The list can accept any data type. You can have a list of integers and strings. List in python doesn’t enforce to have a single item type in it. You can have a list of different items.

[1, 'name', {"key" : "value"}, list(1, 2, 3)]

his gives you the flexibility to add multiple data types in the list. You can add a list inside this list. This is called a nested list. Now we store our data into a python list it’s time to know how to do more with these data.

Append items to the list in Python

The list is a mutable data structure. This means you can create a list and edit it. You can add, insert, delete items to the created list. To add items to the list you can use the function and passing the value you want to add. The append function will add the item at the end of the list. The function lets you insert data in the place you want on the list. It’ll take two parameters, the index, and the value. Let’s see an example:

items = ["mobile", "laptop", "headset"]

# append the keyboard item to the list 
items.append("keyboard")
print(items)

# output
['mobile', 'laptop', 'headset', 'keyboard']


# insert the mouse item to the list in before the laptop item
items.insert(1, "mouse")
print(items)

# output
['mobile', 'mouse', 'laptop', 'headset', 'keyboard']

Sort lists in Python

We mentioned above that the Python list is unordered. The list is stored in memory like this. You can see a detailed implementation of the Python list here.

Sort lists in Python

This means that to access the value in item inside the list you have to call it by its index. More simply if we have student’s name list `students = [“John”, “Jack”, “Christine”]` and you want to get the name of the 1st student. You will need to know the index of this student’s name. In our case, it’s the zero index. The syntax will be student[0]

Let’s see a real-world example to understands it clearly.

Students = ["John", "Jack", "Christine"]
for i in Students:
    print(Students [i])

# Output
John
Jack
Christine

The list has unordered items. To sort them you can make use of the built-in python function sorted(). It’ll go through the list items and sort them.

The usage of the sorted() function is very simple. You need to pass the list to the sorted function. It’ll return the sorted list and change the original list too.

Example:

x = [4, 5, 1, 8, 2]
print(sorted(x))

# output
[1, 2, 4, 5, 8]

The first question that will come to your mind is how it works? it can sort the integers. What about the other types of the data string, dictionaries..etc. The sort function is more dynamic in sorting. This means that you can pass the sorting mechanism you want the list to be sorted based on. The first argument we can pass it to the sort function is reverse.

Note:  The difference between sorted() and sort() The sort()  change the orginal list. The sorted() doesn’t change the orginal list. It’ll retun the new soted list.

Reverse lists in Python

The sort function can reverse the list order. Set the reverse key to True will make Python automatically reverse the list sort. Let’s see an example.

chars = ["z", "y", "o", "b", "a"]
print(sorted(chars)) 

# output
['a', 'b', 'o', 'y', 'z'] 

chars = ["z", "y", "o", "b", "a"]
print(sorted(chars, reverse=True)) 

# output
['z', 'y', 'o', 'b', 'a']

This example shows you how to reverse a list. In this example, we reverse the alphabetical order of the list.

Advanced sorting

You can add a customized sorting for the list by passing the sorting function in the key parameter.

chars = ["z", "y", "o", "b", "a"]
print(sorted(chars))

# output
['a', 'b', 'o', 'y', 'z']

words = ["aaaa", "a", "tttt", "aa"]
print(sorted(words, key=len))

# output
['a', 'aa', 'aaaa', 'tttt']


engineers = [
    {'name': 'Alan Turing', 'age': 25, 'salary': 10000},
    {'name': 'Sharon Lin', 'age': 30, 'salary': 8000},
    {'name': 'John Hopkins', 'age': 18, 'salary': 1000},
    {'name': 'Mikhail Tal', 'age': 40, 'salary': 15000},
]

# using custom function for sorting different types of data.
def get_engineer_age(engineers):
    return engineers.get('age')

engineers.sort(key=get_engineer_age)
print(engineers)

# output
[
    {'name': 'John Hopkins', 'age': 18, 'salary': 1000},
    {'name': 'Alan Turing', 'age': 25, 'salary': 10000},
    {'name': 'Sharon Lin', 'age': 30, 'salary': 8000},
    {'name': 'Mikhail Tal', 'age': 40, 'salary': 15000}
]

In the above examples, we used the key option to pass a sorting method to the sort function. The default one we used in chars array is sorting based on the order. In this list, the order was alphabetical. In the words list, we have a list of different words length. We want to sort it by the length of the word. The key we passed to the sort function is the built-in len() function. This will tell Python to sort the list based on the word length.

In the engineer’s example. This more likely to be an issue you need to solve in a more real-world example. You have a list of engineers data and you want to sort them based on the customized method. In our example, we sorted it by age.

Conclusion

Python List is a very powerful data structure. Mastering it will get you out of a lot of daily issues in Python. You can create a list with single or multiple data types. You can append the list and insert data in the index you want. The most used function in the list is the sorted method. You can sort the list based on the different criteria you want. You can know more about List form the Python official documentation.

Lists in Python: How to create a list in Python Read More »

How to create dictionary in python

Today we will get more into how to create a dictionary in Python. It requires that you already have basic knowledge of Python syntax. Go check our introduction to python usage to know more about Python. You need to have Python installed in your machine. To know how to install python on your system check our installation guide.

  • What is the dictionary data structure
  • Create a dictionary in Python
  • Python dictionary usage

What is the dictionary data structure

Python dictionary is a key-value pair data structure. Each key has a single value. The key must be unique to avoid the collision. Dictionary is heavily used in python applications. If you have students and classes and each student has a class. Python dictionary will help you define the student name as a key and the class as a value. It will help you know the student course from his name value.

Dictionaries are the hash table implementation in Python. Hash table uses a hash function to map the key to its value. Each slot can store one entry. It’s the same as the python dictionary did. The image below explains how it works.

What is the dictionary data structure

We used Python dictionaries to retrieve the value if we knew it’s key. The same as we did in the above student’s example. Behind the scene What python does is reserve a memory place with a key and point to its value. It helps with memory optimization and efficiency. Now let’s create a python dictionary.

Create a dictionary in Python

To define a Python dictionary you should define it between curly brackets ex: {}. To Assign the value to it’s key you should add columns.

data = {"key": "value"}

continuing with the student’s courses example Let’s check how we can implement this:

class_data = {
    "sam": "Intro to Python",
    "Jack": "Intro to data science",
    "Emma": "Machine Learning course",
    "Wattson": "Web development."
}

The Class dictionary has students’ names. Each name has the course he enrolled in. This is a very basic and simple example of creating a python dictionary. We need to know how to use a python dictionary to insert, delete, retrieve values from it.

We mentioned that it’s a key-value store. This means that to get the item value you need to know it’s key. To get Jack course from the class dictionary you need to do:

print(class_data['Jack'])

# output
"Intro to data science"

What if the key is not in the dictionary. In such a case Python will raise a key error exception.

class_data['holo']

# ourtput
KeyError Traceback (most recent call last)
<ipython-input-4-73376fec291d> in <module>()
----> 1 class_data['holo']

KeyError: 'holo'

You need to handle this exception using the try/catch block. There is another more safe way to access dictionary data without raising an exception if it does not exist.

print(class_data.get('hoho', None))

# output
None

The get() methods provide an easy way to check if the key exists in the dictionary. It’ll return it else it’ll provide a default value. This approach lets you always provide a default value if the key is missing.  Now Let’s insert data into our dictionary.

# add new key and value to dictionary.
class_data['new_student'] = 'Ronaldo'
print(class_data)

# output
{
    'Emma': 'Machine Learning course',
    'Jack': 'Intro to data science',
    'Wattson': 'Web development.',
    'sam': 'Intro to Python',
    'new_student' : 'Ronaldo'
}

You can set the value of any key to none by updating it like above. You can delete the item key and value form the dictionary using the pop() function.

class_data.pop('new_student')
# output
'Ronaldo'

print(class_data)

# output
{
    'Emma': 'Machine Learning course',
    'Jack': 'Intro to data science',
    'Wattson': 'Web development.',
    'sam': 'Intro to Python'
}

Python provides a function to delete all dictionary items. Using the clear() function, you can all dictionary items.

class_data.clear()
print(class_data)

# output
{}

In the next section, we will talk more about the usage of the Python dictionary with some tips.

Python dictionary usage

Dictionary keys and values can be any value type. You can create a key and make its value a dictionary or an array. Some of the dictionary usage in real-world examples is nested dictionaries. check the example below.

school = {
    "students":[
        {
            "id": "1",
            "name": "Sam",
            "classes" : ["Web development"]
        },
        {
            "id": "2",
            "name": "Clark",
            "classes" : ["Machine learning", "Data science"]
        },
        {
            "id": "3",
            "name": "Watson",
            "classes" : ["Game development"]
        }
    ],
    "teachers":[
        {
            "id": "1",
            "name": "Emma",
            "Courses" : ["Data science", "Machine learning"]
        },
        {
            "id": "2",
            "name": "Jack",
            "Courses" : ["Game development", "Web development"]
        }
    ],
    "staff": [
        {
            "id": "1",
            "name": "Jo",
            "Profission" : "Office admin"
        },
        {
            "id": "2",
            "name": "Raj",
            "Profission" : "Cleaning"
        },
        {
            "id": "3",
            "name": "Ronald",
            "Profission" : "sales"
        }
    ]
}

Let’s explain the above code. We have a school, that has teachers, students, and staff. Each one has a name and ID. The student will have a class that he enrolled in. The Student can be enrolled in multiple courses. Teachers have Courses that he teaches them to students. The school staffs have a name and profession. It’s a single profession per user.

This is a simple design for school data arranged in the Python dictionary. If you’re the system manager and you need to get the name and class of each student. Using for loop Python statement. You can do this:

# get all students
students  = school['students']

for student in students:
    print("Studnet name: {0} is enrolled in classes: {1}".format(student['name'], student['classes']))

# output
Studnet name: Sam is enrolled in classes: ['Web development']
Studnet name: Clark is enrolled in classes: ['Machine learning', 'Data Science']
Studnet name: Watson is enrolled in classes: ['Game development']

This will get all the student’s data. If You want to update student’s data to add a new student all you need to do is add a new key and it’s value.

students  = school['students']

# add student dictionary to students list.
students.append({
    "id": "4",
    "name": "Holmes",
    "classes" : ["Web development"]
    })

print(students)

# output
[
    {
        "id": "1",
        "name": "Sam",
        "classes" : ["Web development"]
    },
    {
        "id": "2",
        "name": "Clark",
        "classes" : ["Machine learning", "Data science"]
    },
    {
        "id": "3",
        "name": "Watson",
        "classes" : ["Game development"]
    },
    {
        "id": "4",
        "name": "Holmes",
        "classes" : ["Web development"]
    }
]

You appended a new student dictionary to the student’s list. You can do the same logic to teachers and staff too.

conclusion

Python dictionary is a very powerful data structure. It has a lot of usages. It’s the flexibility to add any key and value types makes it easy to use in different applications. You can easily update and delete data from the Python dictionary easily using its functions. Working with dictionaries in python is a very important skill you need to have. It’ll get you out of a lot of problems. If you’re interested to know more about its implementation you can check the official documentation.

How to create dictionary in python Read More »

How to run Python scripts

In this article, we will learn more about how to run Python scripts. You should be familiar with Python syntax. If you don’t know many about Python check our guide here. You need to have Python installed in your machine. To know how to install python on your system check our installation guide.

We will discuss:

  • How to update python
  • Run Python scripts
  • Run python in the terminal
  • Comments in Python

How to update Python:

We discussed in a previous article how to install Python. It’s always recommended to have the latest version of Python. This will let you avoid a lot of issues. In each update, Python adds new fixes and enhancements. Updating python will let take the advantage or new fixes. To update the Python version you need to first check your operating system.

Updating Python in widows

  1. Visit Python official page
  2. Download the latest Python version
  3. It’ll download a .exe file.
  4. open it and proceed like the installation.
  5. It’ll update the Python version installed on your machine.

Updating Python in widows

Updating Python in Ubuntu

Updating Python in Ubuntu is a simple easy command.

  1. Update apt package manager
    sudo apt update && sudo apt-get upgrade
  2. Install the latest version of Python.
    sudo apt install python3.8.2

This will update the Python version to 3.8.2.

Updating Python in Mac

  1. Visit Python official page
  2. Download the latest Python version
  3. It’ll download a file.
  4. open it and proceed like the installation.
  5. It’ll update the Python version installed on your macOS.

Updating Python globally might not be a good idea. We learned in a previous article that it’s better to use a virtual environment in Python projects. In most cases, you will need to only update the python version in your virtual environment.

python -m venv --upgrade <env_directory>

This will only update the python version inside your virtual environment.

After making sure that you have Python installed. And it is the latest version. Now you can run Python scripts.

Run Python scripts

Usually, a python script will look like this

import os 

def main():
    path = input("Enter folder path: ")
    folder = os.chdir(path)

    for count, filename in enumerate(os.listdir()): 
        dst ="NewYork" + str(count) + ".jpeg"
        os.rename(src, dst) 

if __name__ == '__main__':
    main()

It has the main function that will have the script logic. This code is the main functionality of the script. It actually defines what you need to do. The other part which invokes the main function is

if __name__ == '__main__':
    main()

First, define the function contains your code. Python will enter the if __name__ == ‘__main__’: condition and invoke your main() function. We need to know what happens behind the scene.

  1. The interpreter reads the python source file. interpreter sets the __name__ special variable and assigns it to the “__main__” string.
  2. This will tell the interpreter to run the function called inside it. In our case, it’s the main() function.

Scripting is one of the biggest features of Python. To achieve this Python needs to make its code executable in different places.

Run python scripts in the terminal

You can run Python code from the terminal. You can write python <file_name.py>. This will tell the Python interpreter to run the code in this file.

python my_script.py

This will invoke the main function inside the script and execute the logic. A feature like this is useful if you need to automate some of your work from the terminal. Let’s say that you’re a DevOps and every time you power the machine you need to log the time and the user. You can write Python code that will check the time and the username of logged in user. It’ll update the log file with these data each time someone logs in and run the machine. In such a case, you can’t open the file manually. You will add to system bootup commands the command that will run this script.

You can open a Python shell in the terminal. It’ll help you execute your code directly. With this, you don’t need every time you want to test new changes to run the script again. You can write your script and test it in the same place. It’ll help you develop the script faster.

Comments in Python scripts

Python is shining for its readability. Commenting helps you explain more logic that could be difficult to understand from code. Adding comments helps your colleagues to understand the complex logic. Comments are very helpful in teams. It helps team members to know the reason for each part of the code. This makes it easy to work and make the development process faster. Adding comments in python is simply by adding hash.

# the below code will print items from 1 to 5
for x in range(1, 5):
    print(x)

Notice that the code after the # symbol will not be run. Python sees this code as a comment. It’ll not execute it

conclusion

You can run a Python script from the system GUI or from the terminal. It depends on how you want to use it. The comments in Python used to add human-readable text in the code. Python comments start with a hash symbol. Python interpreter skips the hashed text. Updating python is very important. It makes you up to date with new fixes. You can update Python globally across your entire system. The most efficient is to update the Python version in your virtual environment. It helps in big projects to keep things safe and not break it.

How to run Python scripts Read More »

Python Selenium Tutorial | Selenium Python Training for Beginners

Python is the most famous programming language that helps developers to code any logic for an application or game or website easily and quickly. The most powerful tool to control web browsers via programs and perform browser automation is ‘Selenium‘. This is helpful for all browsers and also operates on all major operating systems. The scripts of selenium are written in different languages ie., Python, Java, C#, etc.

Here, we will be working with Python. This BTech Geeks Python Selenium Tutorial includes all topics related to it like Selenium WebDriver, why learn selenium with python, How to integrate Selenium with Python Unit Tests. Moreover, it covers selenium with python concepts from basics to advanced and professional uses.

Python Selenium | Selenium with Python Tutorial PDF for Beginners

Related Articles:

What is Selenium?

Selenium is the most widely utilized open-source Web UI (User Interface) automation testing suite, that can be downloaded from the internet without spending anything. It can be efficiently deployed on platforms like Windows, Linux, Solaris, and Macintosh.

Selenium is a functional testing tool and also fits with non-functional testing tools as well. Currently, the Selenium Web driver is most familiar with Java and C#. The test scripts of Selenium can be coded in any of the supported programming languages and can be run straight away in most modern web browsers.

what is selenium

Browsers supported by Selenium

The list of most commonly supported browsers by the selenium are included:

  • Internet Explorer,
  • Mozilla Firefox,
  • Google Chrome, and
  • Safari.

Why learn Selenium Python?

  • Easier to understand and implement: The commands of selenium are classified in terms of various classes that make them easy to understand and implement.
  • Open Source and Portable: It is an open-source and portable web testing framework.
  • Cost reduction for Business Clients: By using the automation testing tool, the business can save paying the testers their salary. It saves time, cost benefits to the business.
  • Less burden and stress for testers: As we said earlier, the amount of time needed to do testing on every new build is lessen to zero, almost. Thus, the burden of the tester gets reduced.
  • Combination of tool and DSL: It is a blend of tools and Domain Specific Language (DSL) to perform different types of tests.

Why we use Selenium for automation testing?

The most famous automation testing tool is Selenium. Automation testing means the process of converting any manual test case into test scripts using automation tools like Selenium. If you want to know why we use Selenium for automation testing then make sure to have a look at the following aspects:

  • We can write a Selenium test script in any programming language such as Java, Python, C#, Ruby, Perl, as so on.
  • The test scripts can be performed in various OS platforms like Windows, Mac, Linux, etc.
  • Also, these scripts can be implemented on various browsers like Google Chrome, Mozilla Firefox, Internet Explorer, Safari, etc.
  • The testing tool of selenium can also be associated with various testing tools like TestNG, Junit for managing the test cases, and generating test reports.
  • To do endless testing, Selenium is combined with Maven, Jenkins, and Docker testing tools.

How to integrate Selenium with Python Unit Tests

In this section, we are going to discuss how to integrate Selenium tests with python unit tests and try to understand the concept easily. Thus, we will be using the unit test module in python.

import unittest
from selenium import webdriver
from selenium.webdriver.common.keys import Keys

class ChromeSearch(unittest.TestCase):

def setUp(self):
self.driver = webdriver.Chrome('./chromedriver')

def test_search_in_python_org(self):
driver = self.driver
driver.get("https://www.python.org")
self.assertIn("Python", driver.title)
elem = driver.find_element_by_name("q")
elem.send_keys("getting started with python")
elem.send_keys(Keys.RETURN)
assert "https://www.python.org/search/?q=getting+started+with+python&submit=" == driver.current_url

def tearDown(self):
self.driver.close()

if __name__ == "__main__":
unittest.main()

In this case, you require to set up the driver object when initializing the unit test class via the .Chrome() method. In the single test that we prove, the same text is put on the search bar and the resultant change in URL is compared to the URL that was seen first. You may additionally address a separate test for another browser and reuse the same functionality.

Why to choose Python over Java in Selenium

The important points that support python over java to work with selenium is as follows:

  • Java programs tend to run slower compared to Python programs.
  • Java uses static typing, while Python uses dynamic typing.
  • Python is easier and also extra compact compared to Java.
  • Java employs traditional braces to start and ends blocks, while Python uses indentation.

Selenium with Python

By using python, you can run a Selenium test script in two ways. They are as such:

  1. Configure Selenium using Python
  2. Configure PyDev in Eclipse.

Now, we will observe how we configure Selenium with the help of the Python programing language:

1. Configure Selenium using Python

By following the below steps, we can configure Selenium using Python efficiently:

  • Download and install Python on Windows
  • Install Selenium libraries in Python
  • Download and install PyCharm
  • Create a new project and write the Selenium test script
  • Run and validate the test scripts.

2. Configure PyDev in Eclipse

One more way to perform the Selenium test script using Python is by Configure PyDev in Eclipse. To make it possible, we have to follow these two steps mentioned below:

  • Install PyDev
  • Execute the Selenium test scripts using Python.

Install Selenium Libraries With Python

At the time of python installation, Selenium libraries are not installed by default. In order to perform if the libraries are already present in your python, you have to open a command prompt and navigate to the path where you have installed a python and type “pip list“. By using this command, it will list all the libraries currently available in your Python.

intall selenium libraries with python using pip

List of Python Selenium Interview Questions and Answers

The most commonly asked Interview Question and Answer in Selenium with Python suites for both Freshers and Experienced Candidates are listed here by BTech Geeks :

  1. What Is Python?
  2. What is Selenium?
  3. How Python Can Be Used In Software Testing?
  4. What Python Frameworks Do You Know?
  5.  What is the commands for downloading selenium?
  6. What Tools That Helps Python Development Do You Know?
  7. What Is The Difference Between “xrange” And “range”?
  8. What Is A “unit test” In Python?
  9. How can we implement unittest framework in our scripts?
  10. Define “module” And “package”?

Python Selenium Tutorial | Selenium Python Training for Beginners Read More »

What Can You Do With Python Usage Guide

What can you do with python: Usage guide | 9 Cool Things to do with Python Programming

Python Programming Language is a very familiar programming language among developers. It is simple and enjoyable to write scripts to automate and build stuff. A complete guide on what can you do with python is in front of your eyes. Kindly python learners and newbies are recommended to check out this python usage tutorial and learn what others do with python and what you do with python.

Along with this, you may also gain enough knowledge on how to learn python and what python programmers can make by using this easy and simple programming language. In case, you don’t have any idea how python is used in education then make a move and click on the link provided here itself.

This What Can You Do With Python Usage Guide will helo you learn the following stuff: 

Prerequisites

  • You should know python’s basic syntax.
  • You should have Python installed on your machine.

What can you do with Python?

Python is a general-purpose language. You can use it with any kind of application. You can use it as a scripting language to solve some of your daily problems.

A few of the common use cases are as follows:

  • Creating bots
  • Scraping websites
  • Machine learning, data visualization, and analysis
  • Web Development with frameworks like Django and Flask
  • Game development with Pygame
  • Mobile apps with frameworks like Kivy

Scripting with Python

Let’s take an example. If you’re like photography, you probably have an issue with image naming. After a long day of shooting, you came back to your studio. You filtered the images and put the selected images in a directory. This directory contains different images with different names.

You need to make your work easier by naming all images in a specific format. Let’s say the image name will consist of the place name and sequence numbers. This makes it easy for you to search for images. By using Python you can create a simple script that will go through all files with type JPEG in this folder and rename it.
Scripting with PythonLet’s see an example:

import os 

def main():
    path = input("Enter folder path: ")
    folder = os.chdir(path)

    for count, filename in enumerate(os.listdir()): 
        dst ="NewYork" + str(count) + ".jpeg"
        os.rename(src, dst) 

if __name__ == '__main__':
    main()

As you can see Python is an efficient tool for automation. It helps drive your focus to important things.

What else you can do with Python? You can have an FTP server with python. Using the command

python3 -m http.server 8000

You can run a python server. The server will be accessible over your local network. You can open your browser from a different device. Type your network ip : 8000 . You will have access to all files in this folder. You can use it to transfer files from different devices in the same network.

Such a simple usage of Python in your daily life will make it easier. Talking about servers that leads us to

Python usage in web-based applications

Python is very popular in web development with frameworks like Flask and Django. If you want to build your own eCommerce store. You can use the Django framework. After installing it you will have a ready project structure to build your website. Let’s see how easy it is to install Django.

# checking django version 
$ python -m django --version

# if you don't have django installed you can install it using pip
$ python -m pip install Django

Note: if didn’t have pip installed you should follow our article for installing it.

After installing Django Now you can create your project.

$ django-admin startproject my-eCommerce-Website

You will have a project structure like below

my-eCommerce-Website/
    manage.py
    my-eCommerce-Website/
        __init__.py
        settings.py
        urls.py
        asgi.py
        wsgi.py

To proceed with the Django project. You should install your project applications

$ python manage.py startapp store

Inside your Django project, you would have all your apps. Each app will have a different folder.

my-eCommerce-Website/
    manage.py
    my-eCommerce-Website/
        __init__.py
        settings.py
        urls.py
        asgi.py
        wsgi.py

You can learn more about Django in their official documentation. You can that getting started with Python for web development is pretty easy.

Python has different usage in different fields Like Data science, game, and mobile development. we talked in detail about it in the previous article.

How to learn Python?

Learning Python is a continuous process. Some people prefer Courses, Others prefer hands-on experience. It really doesn’t matter the source you will learn from. You will need to apply what you learned to build useful Python applications. We’ve talked in our previous article about the various resources to learn it. check it here. If you already know it’s basic syntax. Your focus now should be on learning how to build python’s applications.

It depends on the type of application you want to build.  If you’re looking for building a web-based application. The recommendations will be Flask And Django.

Where you can learn Flask?

  • The Flask documentation has a get stating section. It’s very helpful to learn the basics of Flask.
  • Coursera Just released a new Course to learn Flask. It’ll guide you through all Flask details.
  • The tutorial point has a great organized Flask tutorial.

With all the above resources, you’ll build a Flask application. That will give you hands-on experience with Flask.

Where you can learn Django?

  • Django documentation is a detailed resource for learning Django. With its starting guide.
  • Django is the most popular Python framework. Coursera has created a full specialization to learn it.
  • The tutorial point has created an organized source to learn Django. It’s called the Django tutorial.

Again it doesn’t matter what is the source. You need to try writing code and build a project by yourself. It’ll help you build your portfolio.

If you’re looking for building machine learning projects. Udacity and Coursera are great resources to learn it.

Where you can learn Machine Learning?

  • Udacity has an introductory course on machine learning. It’ll guide you through machine learning and artificial intelligence.
  • Stanford has a great course too on Coursera to learn machine learning. It’s presented by Andrew Ng. He is one of the top in the Machine learning and AI fields.
  • If you’re prefer reading. The Tutorial point has a tutorial about Machine learning. It’ll give you the needed knowledge to know more about Machine learning.

What is the time to learn Python?

Learning Python as basics will not take a lot of time. It can be from two to four weeks to be comfortable with it. Learning other frameworks on top of Python might take time. It depends on the field and the difficulty of the framework. Learning how to build an application with Flask or Django might take 4 to 6 weeks. For Machine learning, it can take longer. Machine learning is a more complicated field. It takes more time to learn. Note that time can differ depends on your learning process. Keep in mind that fields Like Machine learning or Data science will require a mathematical background. This might make it longer to learn.

How Much Python programmers make?

Python is used in different industries. This makes it easy to find a job with it. In terms of Your salary, a lot of factors will control this.

  • Your experience
  • Your country
  • Company business size
  • Type of application you’re building

That’s why the more you learn more about it the more is always better. For Exact numbers about your expected salary that matches your experience. You should check Glassdoor. It’ll help you know the average number in your area based on skills.

9 Cool Things You Can Do Using Python

Here we are trying to include various domains that you can do great stuff with python. Have a look at the list of some interesting functionalities that you can do with Python:

  1. For Web Development
  2. Automation and Scripting
  3. Automating your daily routine tasks
  4. Automatically detects what’s in the image
  5. Web Scraping
  6. Data analysis, manipulation, and visualization
  7. Create games with Python
  8. Data Science and Machine Learning
  9. Building robotics applications

Conclusion

Python has a lot of useful usages. It is based on the type of application you want to build. Learning Python is an ongoing process. The more you learn about python the more applications you can build. It’ll help you get a job faster and increase your salary.

What can you do with python: Usage guide | 9 Cool Things to do with Python Programming Read More »

What is Python Installation Guide

What is Python: Installation Guide | How to Install Python3 & Python2 on Windows, Linux, macOS?

Python is the most famous programming language used in various fields. It has two major versions ie., Python 2 and Python 3. To use the Python language on your devices, it is mandatory to install the required version by following all instructions. Python beginners will face some hurdles in installing python in their Operating systems. So, we have come up with the Python Installation tutorial for beginners and experts to use python on their OS. Here, you will learn how to check the current python version, how to install python on Windows, Linux, macOS, and many other.

In this tutorial of what is python installation guide, you’ll learn the basic instructions that you should aware of:

Introduction to Python Installation Guide

Python is a very versatile language. It has thousands of libraries and modules to work with. As a beginner, you have to think that it is very important to start out with a language. It covers a wide range of functions to deal with basic to complex programs.

No matter what operating system you had, we have covered all python installation steps for Windows, macOS, Linux, etc. Installing or updating or setting up python on your device is the initial step to becoming a python programmer. You can discover various methods to install python on different OS. So, checking the python version before downloading or performing the code in python is a must.

Prerequisites

If you’re a beginner to Python ensure to read all the tutorials covered by BtechGeeks and get some idea about the language. It is compatible & flexible with all different operating systems. In fact, the Python programming language is easy to set up. In case, you’re using the Linux system you will have python pre-installed on your OS.

How to check the Python version?

Some operating systems come with Python pre-installed Like macOS or Ubuntu. Other operating systems like Windows don’t have it installed out of the box.

In order to check whether Python is installed or not in open the terminal in macOS or Linux. Write the below command:

python --version

output:

Python 3.7.2

If you’re using windows. Open the CMD and write:

python -v

Another way to check the Python version is to write python. It should open the Python shell or raise an error.
How to check the Python version

If your operating system doesn’t have Python installed.

How to download Python?

One of the best features of Python is its compatibility. It can be easily installed in any operating system. You can install it via command line or GUI.

Python installation in Linux-based operating systems is very easy. In this case, we will check the installation for Ubuntu. It’s almost the same in other Linux distributions.

  1. Install dependencies.
    $ sudo apt-get install software-properties-common
    $ sudo add-apt-repository ppa:deadsnakes/ppa
  2. Update the OS package manager
    sudo apt-get update
  3. Install the latest version
    $ sudo apt-get install python3.8

Note that the version of python will depend on your distribution. For example, installing a Python3.6 the package on Fedora 25 to get Python 3.6.

How to Install Python on windows?

  1. Visit the official website.
  2. Navigate to downloads > windows.
  3. Select your version.
  4. Open the .exe file.
  5. Click install now.
  6. Proceed with next.
  7. Finish the installation and click close.

How to download Python How to download Python 1

How to install Python on macOS?

  1. Do the above steps
  2. From the downloads section select MacOS X
  3. Click on the macOS installer.
  4. Open the downloaded file.
  5. Click to continue with recommended settings.
  6. After finish, you will have it installed.

How to install Python in macOS

Python Installation Tutorial for Linux

One of the best open-source OS is Linux. Also, you can see various Linux-based operating systems. The most commonly used are Ubuntu, Fedora, Linux Mint, Debian. Here, we are going to learn how to perform python installation for both versions 3.x and 2.x. Fedora Linux OS used for Installation of python. Almost all the latest Linux OS have already downloaded Python. You can verify it is installed or not by giving the below commands in the terminal.

For Python 2

$ python2 --version

For Python 3

$ python3 --version

If you saw the python versions as output then you are not allowed to install the python. If no, then you have to install python by following the steps provided here to install successfully:

First, you have to open the terminal or Command prompt from your linux based OS and type the following commands:

$ sudo apt-get update

$ sudo apt-get install python3.6

or

$ sudo apt-get update

$ sudo apt-get install python2.7

If you are using Ubuntu 16.0 or a newer version, then you can easily install Python 3.6 or Python 2.7 by typing the above commands.

What is the difference between Python2.x and 3.x?

If you’re trying to start learning  Python, you’ll find two versions. The 2.x and the 3.x. What is the difference?

Python is like any other language that has versions. The goal of versioning is to track the updates. Each version has its own features. Why are we versioning the updates of any language?

The goal is to be able to track the updates. In the software industry, updating the language can have a side effect. The update can have a deprecated feature or syntax change. An auto-update can lead to project failure. Versioning helps us to specify a version that our project will run with it. This leads to less error and increases the lifetime of the project.

The version number consists of two parts. Like this (2.7 or 3.8). The first number is referring to a Major change. Change that could lead to deprecate some feature or syntax change. The second number is referring to a minor update or fix. Each update has a changelog. With that changelog, developers can track the changes to update their projects. It’s always recommended to work with the latest version of the language.

In Python, there are two versions 2.x and 3.x. The difference is major. Updating the 2.x project to 3.x will lead to a syntax error. What is the difference between 2.x and 3.x? Which one you should learn?

Integer division:

Divide two integers in 2.x  will not have a float value.

# Python 2.x
print 5 / 2

output:
# 2

# Python 3.x
print(5 / 2)

output:
# 2.5

Print function:

The print function in 3.x brackets is mandatory. The print function in Python2.x brackets are optional.

# Python 2.x
print "Hi weclome to python 2.x"

output:
# Hi weclome to python 2.x

# Python 3.x
print("Hi weclome to python 3.x")

output:
# Hi weclome to python 3.x

Unicode:

In 2.x the implicit string type is ASCII. But with 3.x  it’s UNICODE.

print('sample word')
print(b'sample word')

# Python 2.x 
output:
# <type 'str'>
# <type 'str'>

# Python 3.x
output:
# <class 'str'>
# <class 'bytes'>

In 2.x both are the same type. But In 3.x they are different types. This doesn’t mean that Python2.x doesn’t support Unicode. It supports Unicode with different syntax print('this is a text ') .

Range and xrange:

The statement xrange is deprecated in Python3.x. You can check our full article about the range function.

# Python 2.x
for x in xrange(1, 5):
    print(x)

output:
# 1 2 3 4

# Python 3.x
for x in xrange(1, 5):
    print(x)

output:
Traceback (most recent call last):     
  File "<stdin>", line 1, in <module>  
NameError: name 'xrange' is not defined

It should be
for x in range(1, 5):
    print(x)

output:
# 1 2 3 4

Error handling:

Error exception handling in Python3.x should be defined with as.

# Python 2.x
try
    variable_name
except NameError, err:
    print err, 'ops defined before assign.'

# output:
(NameError("name 'variable_name' is not defined",), 'ops defined before assign.')

# Python 3.x
try:
    variable_name
except NameError, err:
    print err, 'ops defined before assign.'

output:
 File "<ipython-input-1-942e89fbf9ab>", line 3
    except NameError, err:
    ^
SyntaxError: invalid syntax

It should be:
try:
    variable_name
except NameError as err:
    print(err, 'ops defined before assign.')

Note: Python2.7 support ended. If you’re new to python It’s recommended to start with Python3.x.

How to set up a ready python environment?

The different versions of python make it not practical to have a single setup for all projects. If you have a python2.x project, it’ll not work on your python3.x environment. You need to isolate each project with its packages. This concept is called a virtual environment. It’s an isolated environment with a specific version to run your project. Using a virtual environment will help you work with different projects easily. All you need it to activate the environment.

How to set up a virtual environment?
Installing a virtual environment ubuntu

How to set up a virtual environment?

Installing a virtual environment ubuntu

  1. Make sure you have it is installed.
  2. Update your package manager
    sudo apt update
  3. Install the pip package manager.
    $ sudo apt install -y python3-pip
  4. Install the essentials tools.
    $ sudo apt install -y build-essential libssl-dev libffi-dev python3-dev
  5. Installing the virtual environment.
    $ sudo apt install -y python3-venv
  6. Create a virtual env.
    $ python3 -m venv <env_name>
  7. Activate the virtual env.
    $ source <env_name>/bin/activate

Now you have an isolated playground. Any installed package will be in this virtual environment. If you are done you can simply write deactivate to deactivate the environment.

Final Thoughts

You can quickly install python on any operating system by following the instructions prevailing in this tutorial. With its versioning system, you can pick the right version for your project. It’s always advised to work with the newest version. You must know the differences between python versions before deciding to choose the python project. Updating the project depends on what version you’re using. It’s suggested to use a virtual environment for each project. It supports you to run multiple projects on the same machine.

What is Python: Installation Guide | How to Install Python3 & Python2 on Windows, Linux, macOS? Read More »

How is python used in education

How is Python Used in Education? | Python in Education | 5 Reasons Why Python is a Popular Teaching Language

Present we have plenty of options in programming languages that help to offer in many roles. But the most common question is which is an excellent artificial language for teaching programming basics for all students in schools and colleges. Python in education industries become a present trend. Numerous universities are selecting a python programming language for teaching basic programming courses. Thus, the education industry utilizing this python language in different ways.

Python is a unique tool to utilize for anyone who needs scripts written easily and fast, stated by Forbes. In this Tutorial on How Used Python in Education, we will look at some specific use case situations that address Python as the perfect language for educational purposes.

Python in Education: A Large Collection of Resources

Python is an open-source project that is popular across the world and incredibly simple to learn and understand. It highlights a clear syntax that produces it easy to find out. As a result, there are many resources available for students who preferred to learn the language. Teachers can surely refer their students to additional texts.

Likewise, students have access to materials online that they can utilize for learning. If assignments can’t be solved quickly, students can easily check online for programming assignment guidance. The language also has a large community of programmers more than willing to help you. Whereas, the education industry uses Python and is easier than other artificial languages like Java or C++.

Scripting and Automation

Automation is one of the most significant applications of Python today. As a scripting language, the educational industry can use Python in automating many processes today. Processes like attendance that are repetitive and require fewer judgments can be handled conveniently with Python. That way, teachers can have more time to attend to better things.

Building Computer Graphics

Presently, many offline and online projects use Python to create various Graphical User Interfaces (GUI). Similarly, the education industry can use Python to build beautiful graphics for its software. Even further, developers can use other Python GUIs to produce easier ways to fit in several applications.

Machine Learning and Artificial Intelligence

Today, Python is extensively used in Artificial intelligence and machine learning ahead of all other world programming languages. That is because the algorithms in Python use data information that allows computer systems to perform various functions.

In the Educational industry, teachers and students can use Python in performing some of these functions. For instance, Keras, a library in Python, can facilitate network experimentation. There is also TensorFlow, with which developers can train computer systems to handle tasks that require judgments.

Portable and Extensible Properties

Python is one of the many programming languages that has portability and extensibility. With these two properties, one can cross-check the operations of Python consistently. Notably, the extensible ability of Python means it can be integrated with other languages. These languages include Java and even C and C++ because of their .Net components.

Data Science

A python is an essential tool that every data scientist must-have. The language supports many frameworks, including Django, Pyramid, and many more. With Python through data science, educationists can create the outputs they want using given inputs.

Students can quickly learn better ways of handling and processing data as well from their school days. These will prepare them ahead of time for the demand for data and information in the future.

Readable and Maintainable Code

In the educational environment, one of the uses of Python is coding. With Python’s syntax, you can quickly write specific concepts without having to write in other codes. Unlike most languages out there, code readability is essential.

Python’s syntax is just like the English language. However, the language allows you to use keywords instead of punctuation. With a readable and clean code base, you can take good care of software updates without too much work or wasted energy.

5 reasons why Python is a popular teaching language

The following five are the best reasons to use python in education:

  1. Code readability
  2. Obvious simplicity
  3. Open extensibility
  4. Cross-platform runability
  5. Humanity

How is Python Used in Education? | Python in Education | 5 Reasons Why Python is a Popular Teaching Language Read More »