In this Page, We are Providing Python Programming – Set Methods. Students can visit for more Detail and Explanation of Python Handwritten Notes Pdf.
Python Programming – Set Methods
Set methods
Below are the methods of both set and frozenset objects. Note that the non-operator versions of these methods accept any iterable as an argument, while their operator-based counterparts require their arguments to be set (set and frozenset).
isdisjoint ( other )
Return True, if the set has no elements in common with other. Sets are disjoint, if and only if their intersection is the empty set.
>>> s1=set ( [ 5 , 10 , 15 , 20] )
>>> s2=set ( [ 30 , 35 , 40 ] )
>>> s1 . isdisjoint ( s2 )
True
>>> s1=frozenset ( [ 5 , 10 , 15 , 20 ] )
>>> s2=frozenset ( [ 30 , 35 , 40 ] )
>>> s1 . isdisjoint ( s2 )
True
>>> s1=set ( [ 5 , 10 , 15 , 20 ] )
>>> s2=frozenset ( [30 , 35 , 40 ] )
>>> s1 . isdisjoint ( s2 )
True
issubset ( other )
Test whether every element in the set is in other.
>>> s1=set ( [ 5 , 15 ] )
>>> s2=set ( [ 5 , 10 , 15 , 20 ] )
>>> s1 . issubset ( s2 )
True
>>> s1 . issubset ( ( 5 , 10 , 15 , 20 ) )
True
>>> s1=frozenset ( [ 5 , 15 ] )
>>> s2=frozenset ( [ 5 , 10 , 15 , 20 ] )
>>> s1 . issubset ( s2 )
True
>>> s1 . issubset ( ( 5 , 10 , 15 , 20 ) )
True
The operator based version of the the above method is set<=other.
>>> s1=set ( [ 5 , 15 ] )
>>> s2=frozenset ( [ 5 , 10 , 15 , 20 ] )
>>> s1<=s2
True
The operator based version setcother test whether the set is a proper subset of other, that is, set<=other and set!=other.
>>> s1=set ( [ 5 , 15 ] )
>>> s2=frozenset ( [ 5 , 10 , 15 , 20 ] )
>>> s1<s2
True
issuperset (other).
Test whether every element in other is in the set.
>>> s1=set ( [ 5 , 15 ] )
>>> s2=set ( [ 5 , 10 , 15 , 20 ] )
>>> s2 . issuperset ( s1 )
True
>>> s2 . issuperset ( ( 5 , 15 ) )
True
>>> s1=frozenset ( [ 5 , 15 ] )
>>> s2=frozenset ( [ 5 , 10 , 15 , 20 ] )
>>> s2 . issuperset ( s1 )
True
>>> s2 . issuperset ( ( 5 , 15 ) )
The operator based version of the the above method is set >=other.
>>> s1=set ( [ 5 , 15 ] )
>>> s2=frozenset ( [ 5 , 10 , 15 , 20 ] )
>>> s1>=s2
False
The operator-based version set> another test whether the set is a proper superset of other, that is, set>=other and set! =other.
>>> s1=set ( [ 5 , 15 ] )
>>> s2=frozenset ( [ 5 , 10 , 15 , 20 ] )
>>> s1<s2
False
union ( other, . . . )
Return a new set with elements from the set and all others.
>>> s1=set ( [ 5 , 15 ] )
>>> s2= [ 15 , 20 , 25 ]
>>> s3=frozenset ( [ 30 , 35 , 40 ] )
>>> s1 . union ( s2 , s3 )
set ( [ 35 , 20 , 5 , 40 , 25 , 30 , 15 ] )
The operator based version of the above method is set | other. . .
>>> s1=set ( [ 5 , 15 ] )
>>> s2=set ( [ 15 , 20 , 25 ] )
>>> s3=frozenset ( [ 30 , 35 , 40 ] )
>>> s1 | s2 | s3
set ( [ 35 , 20 , 5 , 40 , 25 , 30 , 15 ] )
intersection ( other , . . .)
Return a new set with elements common to the set and all others .
>>> s1=set ( [ 5 , 10 , 15 ] )
>>> s2= [ 15 , 20 , 25 , 10 ]
>>> s3=frozenset ( [ 30 , 15 , 35 , 40 , 10 ] )
>>> s4= ( 40 , 50 , 10 , 15 , 20 )
>>> si . intersection ( s2 , s3 , s4 )
set ( [ 10 , 15 ] )
The operator based version of the above method is set&other . . .
>>> s1=set ( [ 5 , 10 , 15] )
>>> s2=set ( [ 15 , 20 , 25 , 10 ] )
>>> s3=frozenset ( [ 30 , 15 , 35 , 40 , 10 ] )
>>> s4=frozenset ( [ 40 , 50 , 10 , 15 , 20 ] )
>>> s1&s2&s3&s4
set ( [ 10 , 15 ] )
difference ( other, . . . )
Return a new set with elements in the set that are not in the others.
>>> s1=set ( [ 5 , 10 , 15 ] )
>>> s2= [ 15 , 20 , 25 , 10 ]
>>> s3=frozenset ( [ 30 , 15 , 35 , 40 , 10 ] )
>>> s4= ( 40 , 50 , 10 , 15 , 20 )
>>> s3.difference ( s1 , s2 , s4 )
frozenset ( [ 35 , 30 ] )
The operator based version of the above method is set-other- . . .
>>> s1-set ( [ 5 , 10 , 15 ] )
>>> s2=set ( [ 15 , 20 , 25 , 10 ] )
>>> s3=frozenset ( [ 30 , 15 , 35 , 40 , 10 ] )
>>> s4=frozenset ( [ 40 , 50 , 10 , 15 , 20 ] )
>>> s1 - s2 - s3 - s4
set ( [ 5 ] )
>>> s3 - s1 - s2 - s4
frozenpet ( [ 35 , 30 ] )
symmetric_difference ( other )
Return a new set with elements in either the set or other but not both.
>>> s1=set ( [ 5 , 10 , 15 ] )
>>> s2= [ 15 , 20 , 25 , 10 ]
>>> s1 . symmetric_difference ( s2 )
set ( [ 25 , 20 , 5 ] )
The operator based version of the the above method is set Aother.
>>> s1=set ( [ 5 , 10 , 15 ] )
>>> s2=frozenset ( [ 15 , 20 , 25 , 10 ] )
>>> s1∧ s2
set ( [ 25 , 20 , 5 ] )
>>> s2∧s1
frozenset ( [ 25 , 20 , 5 ] )
copy ( )
Return a copy of the set.
>>> s=set ( [ 5 , 10 , 15 , 20 ] )
>>> a=s.copy ( )
>>> a
set ( [ 10 , 20 , 5 , 15 ] )
>>> s=frozenset ( [ 5 , 10 , 15 , 20] )
>>> a=s.copy ( )
>>> a
frozenset ( [ 10 , 20 , 5 , 15 ] )
The following methods are available for set and do not apply to immutable instances of frozenset.
update ( other , . . . )
Update the set, adding elements from all others.
>>> s1=set ( [ 5 , 15 ] )
>>> s2= ( 15 , 20 , 25 )
>>> s3=frozenset ( [ 30 , 35 , 40] )
>>> s1 . update ( s2 , s3 )
>>> s1
set ( [ 35 , 20 , 5 , 40 , 25 , 30 , 15 ] )
The operator based version of the above method is set | =other | . . .
>>> s1=set ( [ 5 , 15 ] )
>>> s2=set ( [ 15 , 20 , 25 ] )
>>> s3=frozenset ( [ 30 , 35 , 40 ] )
>>> s1|= s2 | s3
>>> s1
set ( ' [ 35 , 5 , 40 , 15 , 20 , 25 , 30 ] )
intersection_update ( other , . . .)
Update the set, keeping only elements found in it and all others.
>>> s1=set ( [ 5 , 10 , 15 ] )
>>> s2= [ 15 , 20 , 25 , 10 ]
>>> s3=set ( [ 30 , 15 , 35 , 40 , 10 ] )
>>> s4= ( 40 , 50 , 10 , 15 , 20 )
>>> s1 . intersection_update ( s2 , s3 , s4 )
>>> s1
set ( [ 10 , 15 ] )
The operator based version of the the above method is set&=other& . . .
>>> s1=set ( [ 5 , 10 , 15] )
>>> s2=set ( [ 15 , 20 , 25 , 10] )
>>> s3=frozenset ( [ 30 , 15 , 35 , 40 , 10 ] )
>>> s4=frozenset ( [ 40 , 50 , 10 , 15 , 20 ] )
>>> s1&=s2&s3&s4
>>> s1
set ( [10 , 15 ] )
difference_update(other, . . .)
Update the set, removing elements found in others.
>>> s1=frozenset ( [ 5 , 10 , 15 ] )
>>> s2= [ 15 , 20 , 25 , 10 ]
>>> s3=set ( [ 30 , 15 , 35 , 40 , 10 ] )
>>> s4= ( 40 , 50 , 10 , 15 , 20 )
>>> s3 . difference_update ( s1 , s2 , s4 )
>>> s3
set ( [ 35 , 30 ] )
The operator based version of the above method is set-=other | . . .
>>> s1=frozenset ( [ 5 , 10 , 15 ] )
>>> s2=frozenset ( [ 15 , 20 , 25 , 10 ] )
>>> s3=set ( [ 30 , 15 , 35 , 40 , 10 ] )
>>> s4=frozenset ( [ 40 , 50 , 10 , 15 , 20 ] )
>>> s3-=s1 | s2 | s4
>>> s3
set ( [ 35 , 30 ] )
symmetric_difference_update(other)
Update the set, keeping only elements found in either set, but not in both.
>>> s1=set ( [ 5 , 10 , 15 ] )
>>> s2= [ 15 , 20 , 25 , 10 ]
>>> s1 . symmetric_dif ference_update ( s2 )
>>> s1
set ( [ 25 , 20 , 5 ] )
The operator based version of the the above method is set/’=other.
>>> s1=set ( [ 5 , 10 , 15 ] )
>>> s2=frozenset ( [ 15 , 20 , 25 , 10 ] )
>>> s1 A=s2
>>> s1
set ( [ 25 , 20 , 5 ] )
add ( elem )
The method adds element elem to the set.
>>> s=set ( [ 5 , 10 , 15 , 20 ] )
>>> s.add ( 25 )
>>> s
set ( [ 25 , 10 , 20 , 5 , 15 ] )
remove ( elem )
Remove element elem from the set. Raises KeyError, if elem is not contained in the set.
>>> s=set ( [ 5 , 10 , 15 , 20 ] )
>>> s.remove ( 15 )
>>> s
set ( [ 10 , 20 , 5 ] )
>>> s=set ( [ 5 , 10 , 15 , 20 ] )
>>> s . remove ( 100 )
Traceback ( most recent call last ) :
File " <stdin> " , line 1 , in <module>
KeyError: 100
discard ( elem )
Remove element elem from the set if it is present. It is difference from remove () in a way that it does not raise KeyError if elem is not present in the set.
>>> s=set ( [ 5 , 10 , 15 , 20 ] )
>>> s . discard ( 15 )
>>> s
set ( [ 10 , 20 , 5 ] )
>>> s . discard ( 100 )
>>> s
set ( [ 10 , 20 , 5 ] )
pop ( )
Remove and return an arbitrary element from the set. Raises KeyError, if the set is empty.
>>> s=set ( [ 5 , 10 , 15 , 20] )
>>> s . pop ( )
10
>>> s
set ( [ 20 , 5 , 15 ] )
>>> s . pop ( )
20
>>> s
set ( [ 5 , 15 ] )
clear ( )
Remove all elements from the set.
>>> s=set ( [ 5 , 10 , 15 , 20 ] )
>>> s . clear ( )
>>> s
set ( [ ] )


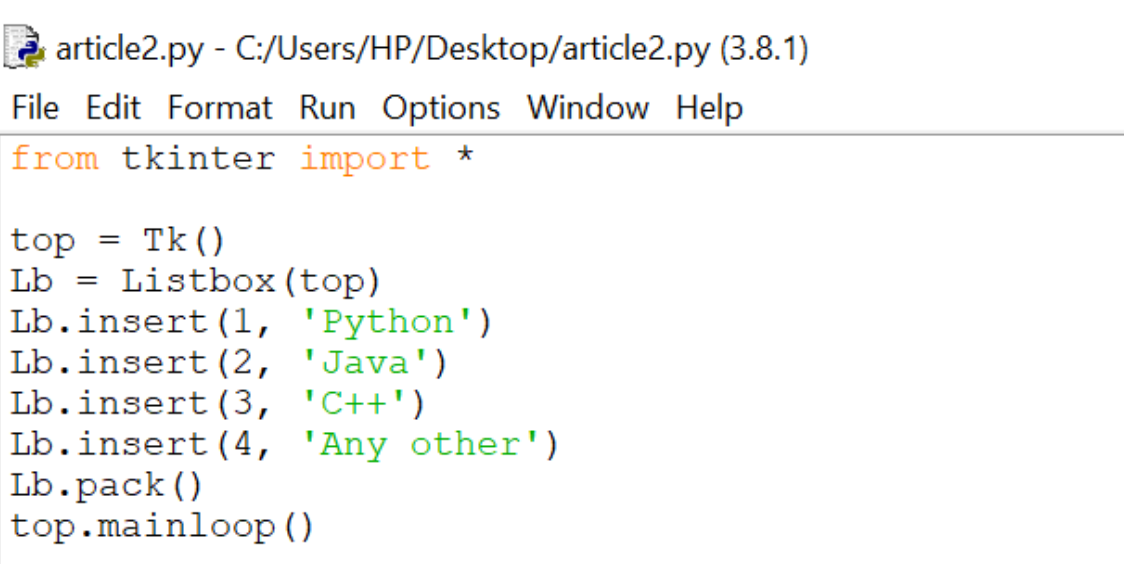
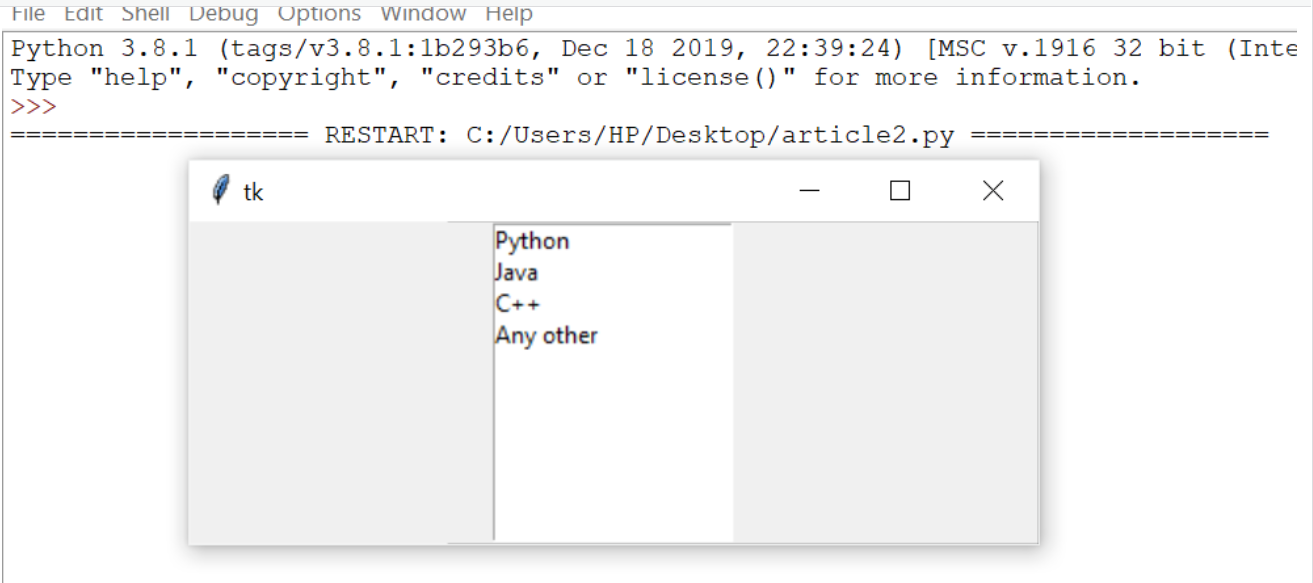
 Code:
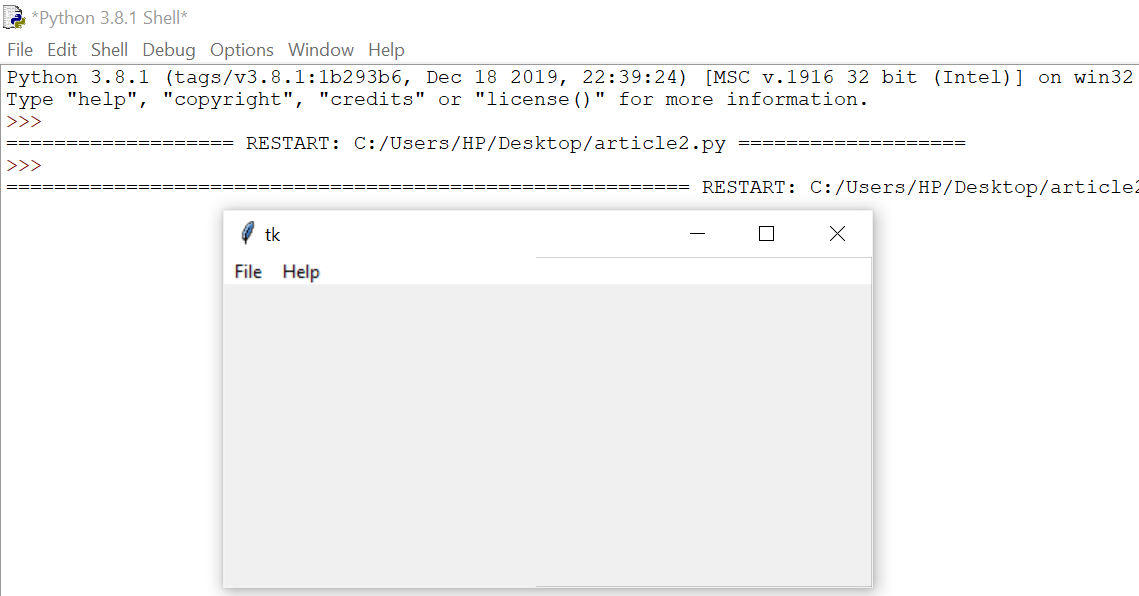
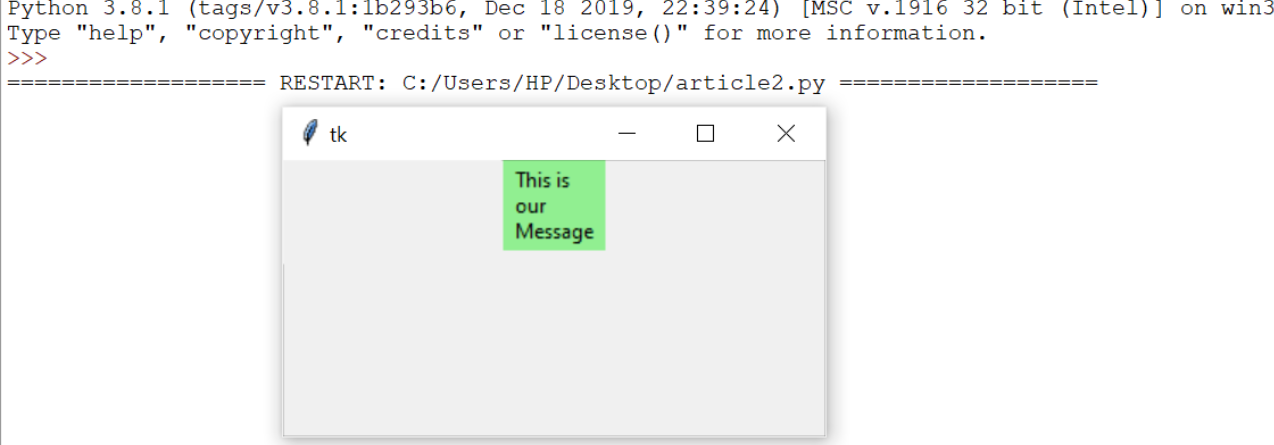
Code:
