Python

How to Create and Initialize a List of Lists

How to Create and Initialize a List of Lists in Python?

Lists are similar to dynamically sized arrays, which are declared in other languages(e.g., vector in C++ and ArrayList in Java). Lists do not have to be homogeneous all of the time, which makes it a very useful tool in Python. DataTypes such as Integers, Strings, and Objects can all be included in a single list. Lists are mutable, which means they can be changed after they’ve been created.

In Python, a list of lists is a list object with each list element being a separate list.

Given the size,

The task is to create and Initialize a list of lists  of given size in Python using different methods.

Examples:

Input :

Size=4

Output :

[ [ ] , [ ] , [ ] , [ ] ]

Creating list of lists with the same ID(Not Preferable):

Below is the fastest way to build and initialize a list of lists with the same ID.

# Let us take size as 4
listoflists = [[]]*4 
# print the listoflists 
print("List of Lists : ", listoflists) 
# Print the ID's of all elements in this listoflists 
print("ID's : ") 
for element in listoflists: 
    print(id(element))

Output:

List of Lists :  [[], [], [], []]
ID's : 
140398466447368
140398466447368
140398466447368
140398466447368

Explanation:

Here List of Lists of size 4 is created but we can see all are having same Id. This will result in the list containing the same list object repeated N times and cause referencing errors.

Creating list of lists with the different ID’s:

It is most preferable because all the lists will have different ID’s such that we can access and refer them separately.

There are several ways to create list of lists some of them are:

Method #1: Using List Comprehension , range() and Append()

Using list comprehensions is the most Pythonic way to build an empty list of lists.

This can be accomplished in the following way:

# Driver code
# let us take size of list as 4
size = 4
# Creating listoflists using list comprehension
listoflists = [[] for i in range(size)]
# Printing empty listoflists
print("List of Lists :", listoflists)

print("ID : ")

# Printing the ID's of all sublists
for element in listoflists:
    print(id(element))

# Initializing list of lists
# let us initialize element in 2 nd sublist
listoflists[1].append(3)

# printing list after initialization
print("List of Lists :", listoflists)

Output:

List of Lists : [[], [], [], []]
ID : 
140259187390280
140259187390024
140259187390088
140259187390152
List of Lists : [[], [3], [], []]

Explanation:

Here we created list of lists of size 4, with different IDs for each sublist.  As a result, we can refer to them and initialise them separately.

We initialized second sublist with element 3.

Method #2 :  Using For loop and Append()

Let’s say we want to make a list that includes 4 separate sub-lists.

To do so, we’ll first construct a new empty list, then use a for loop to iterate from 0 to 3 and add an empty list

to the new list for each iteration.

Below is the implementation:

# Driver code
# let us take size of list as 4
size = 4
# Taking empty listoflists
listoflists = []
# Iterate over a sequence of numbers from 0 to size
for i in range(size):
    listoflists.append([])

# Printing empty listoflists
print("List of Lists :", listoflists)

print("ID : ")

# Printing the ID's of all sublists
for element in listoflists:
    print(id(element))

# Initializing list of lists
# let us initialize element in 2 nd sublist
listoflists[1].append(3)

# printing list after initialization
print("List of Lists :", listoflists)

Output :

List of Lists : [[], [], [], []]
ID : 
140629449111368
140629449111240
140629449111304
140629449111176
List of Lists : [[], [3], [], []]

Method #3: Using Itertools

The repeat() function in the itertools module can be used to replace the range() function in the above list comprehension.

Below is the implementation

# import repeat from itertools
from itertools import repeat
# let us take size of list as 4
size = 4
# Creating listoflists using list comprehension
listoflists = [[] for i in repeat(None, size)]
# Printing empty listoflists
print("List of Lists :", listoflists)

print("ID : ")

# Printing the ID's of all sublists
for element in listoflists:
    print(id(element))

# Initializing list of lists
# let us initialize element in 2 nd sublist
listoflists[1].append(3)

# printing list after initialization
print("List of Lists :", listoflists)

Output:

List of Lists : [[], [], [], []]
ID : 
140551299438408
140551299438152
140551299438216
140551299438280
List of Lists : [[], [3], [], []]

Method #4 : Using empty() in Numpy

The empty() function in the Numpy module in Python creates an empty Numpy array of a given shape

numpy.empty(shape, dtype=float, order='C')

It creates a new Numpy array of the specified shape.
Now, to generate a list of lists, we’ll use the empty() function to create a 2D Numpy array, which we’ll then transform to a list of lists using the numpy.tolist() function.

Below is the implementation:

# importing numpy module
import numpy

# let us take size of list as 4
size = 4

# Create a 2D Numpy array of shape (4, 0) and convert it to list of lists
listoflists = numpy.empty((size, 0)).tolist()

# Printing empty listoflists
print("List of Lists :", listoflists)

print("ID : ")

# Printing the ID's of all sublists

for element in listoflists:
    print(id(element))

# Initializing list of lists

# let us initialize element in 2 nd sublist

listoflists[1].append(3)

# printing list after initialization

print("List of Lists :", listoflists)

Note: This method performance is often slower than the list comprehension.
Related Programs:

How to Create and Initialize a List of Lists in Python? Read More »

Introduction to Python – Python Download and Installation

In this Page, We are Providing Introduction to Python – Python Download and Installation. Students can visit for more Detail and Explanation of Python Handwritten Notes Pdf.

Introduction to Python – Python Download and Installation

Python download and installation

There are many different ways to install Python, the best approach depends upon the operating system one is using, what is already installed, and how the person intends to use it. To avoid wading through all the details, the easiest approach is to use one of the pre-packaged Python distributions that provide built-in required libraries. An excellent choice for Windows operating system users is to install using a binary file which can be downloaded from the official Python’s website (http://www.python.org/download/).

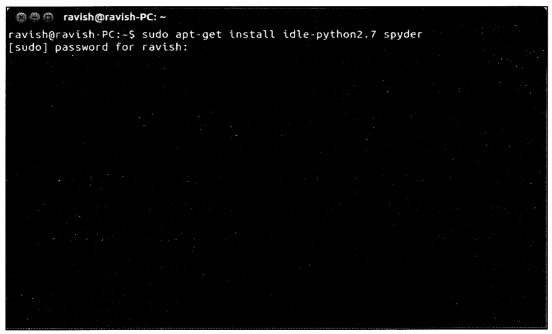
One can install IDLE and Spyder in Ubuntu (Linux) operating system by executing the following commands in the terminal (as shown in Figures 1-4).

sudo apt-get install idle-python2.7 spyder

These can be independently installed using separate commands.

sudo apt-get install idle-python2.7 
sudo apt-get install spyder

Python Handwritten Notes Chapter 1 img 4

Introduction to Python – Python Download and Installation Read More »

How to Run a Python Script

Python is not just one of the leading programming languages, but also a top choice for dealing with big data and data science projects. The fact that it is among the easiest languages to learn makes the high-level, interpreted, general-purpose programming language even more lucrative.

For using Python on a system, the user first needs to install the Python environment. It will also install the Python interpreter, which is responsible for carrying out Python code execution. It is possible to run Python code directly from the terminal using the Python interpreter.

Python is a well known high-level programming language. The Python script is basically a file containing code written in Python. The file containing python script has the extension ‘.py’ or can also have the extension ‘.pyw’ if it is being run on a windows machine. To run a python script, we need a python interpreter that needs to be downloaded and installed.

Scripts vs Modules:

A Python script is a collection of commands in a file designed to be executed like a program. The file can of course contain functions and import various modules, but the idea is that it will be run or executed from the command line or from within a Python interactive shell to perform a specific task. Often a script first contains a set of function definitions and then has the main program that might call the functions.

Scripts are always processed by some kind of interpreter, which is responsible for executing each command sequentially.

A plain text file containing Python code that is intended to be directly executed by the user is usually called script, which is an informal term that means top-level program file.

On the other hand, a plain text file, which contains Python code that is designed to be imported and used from another Python file, is called module.

So, the main difference between a module and a script is that modules are meant to be imported, while scripts are made to be directly executed.

Different ways to run Python Script:

  1. Interactive Mode
  2. Command Line
  3. Text Editor
  4. IDE (PyCharm)


1.Interactive Mode:

Interactive mode, also known as the REPL provides us with a quick way of running blocks or a single line of Python code. The code executes via the Python shell, which comes with Python installation. Interactive mode is handy when you just want to execute basic Python commands or you are new to Python programming and just want to get your hands dirty with this beautiful language.

To access the Python shell, open the terminal of your operating system and then type “python”. Press the enter key and the Python shell will appear. This is the same Python executable you use to execute scripts, which comes installed by default on Mac and Unix-based operating systems.

How to Run a Python Script_interactive mode
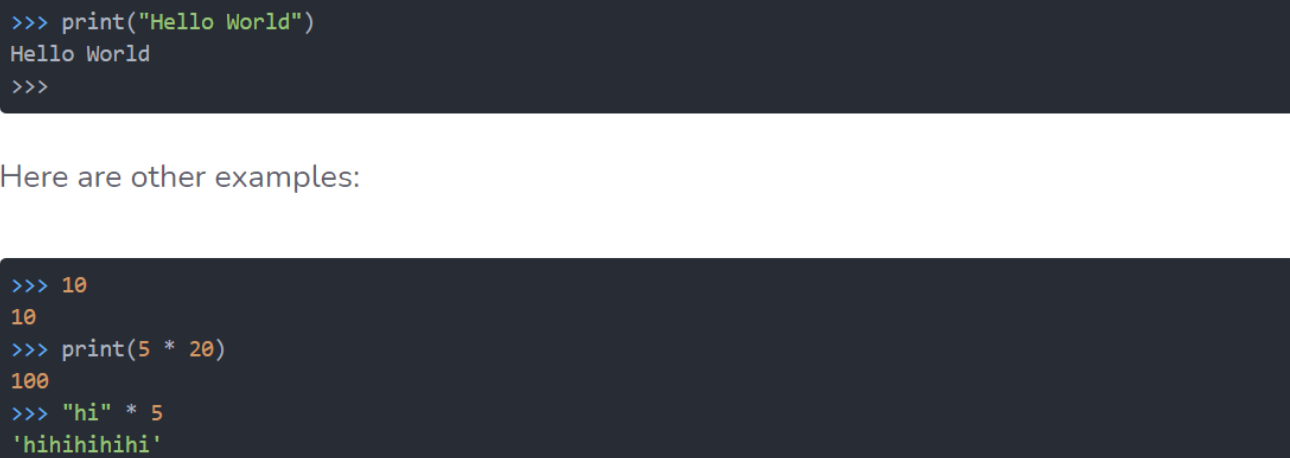
The >>> indicates that the Python shell is ready to execute and send your commands to the Python interpreter. The result is immediately displayed on the Python shell as soon as the Python interpreter interprets the command.

To run your Python statements, just type them and hit the enter key. You will get the results immediately, unlike in script mode. For example, to print the text “Hello World”, we can type the following:

Interactive Mode output

2.Command Line:

To run a Python script store in a ‘.py’ file in command line, we have to write ‘python’ keyword before the file name in the command prompt.

python hello.py

You can write your own file name in place of ‘hello.py’.

Using command line
3.Text Editor :

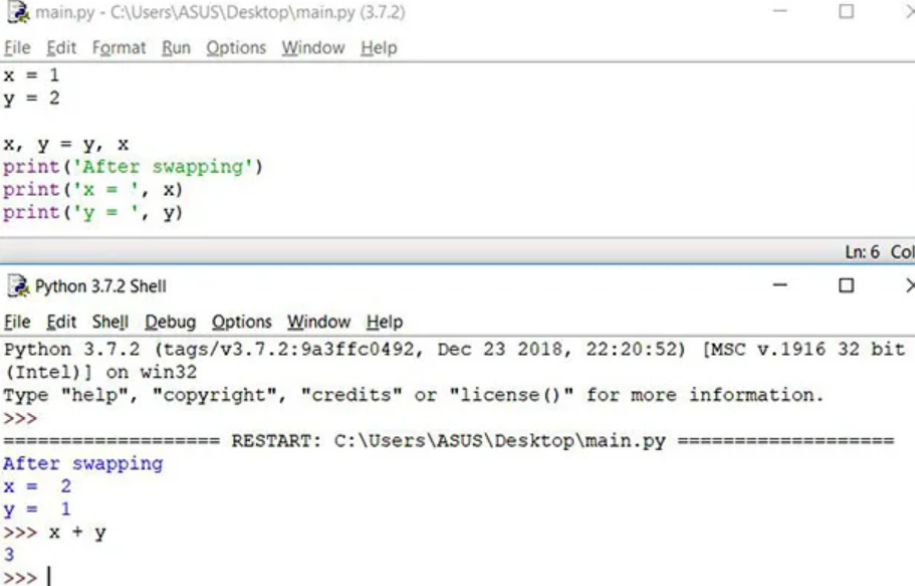
Python’s standard distribution includes IDLE as the default IDE, and you can use it to write, debug, modify, and run your modules and scripts.

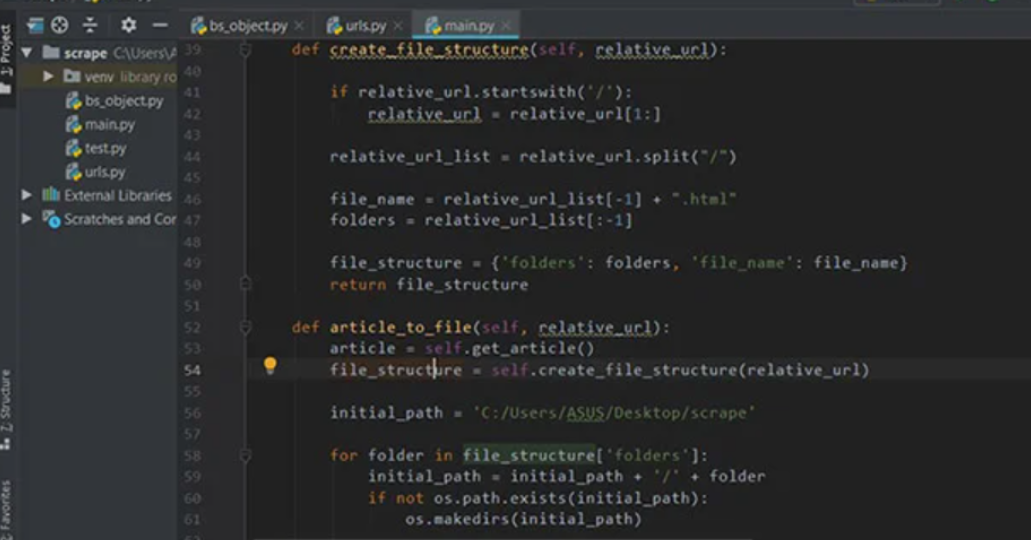
Other IDEs such as Eclipse-PyDev, PyCharm, Eric, and NetBeans also allow you to run Python scripts from inside the environment.

Advanced text editors like Sublime Text andVisual Studio Code also allow you to run your scripts.

4.IDE (PyCharm):

To run Python script on a IDE like PyCharm you will have to do the following:

  • Create a new project.
  • Give a name to that project as ‘NewProject’ and click on Create.
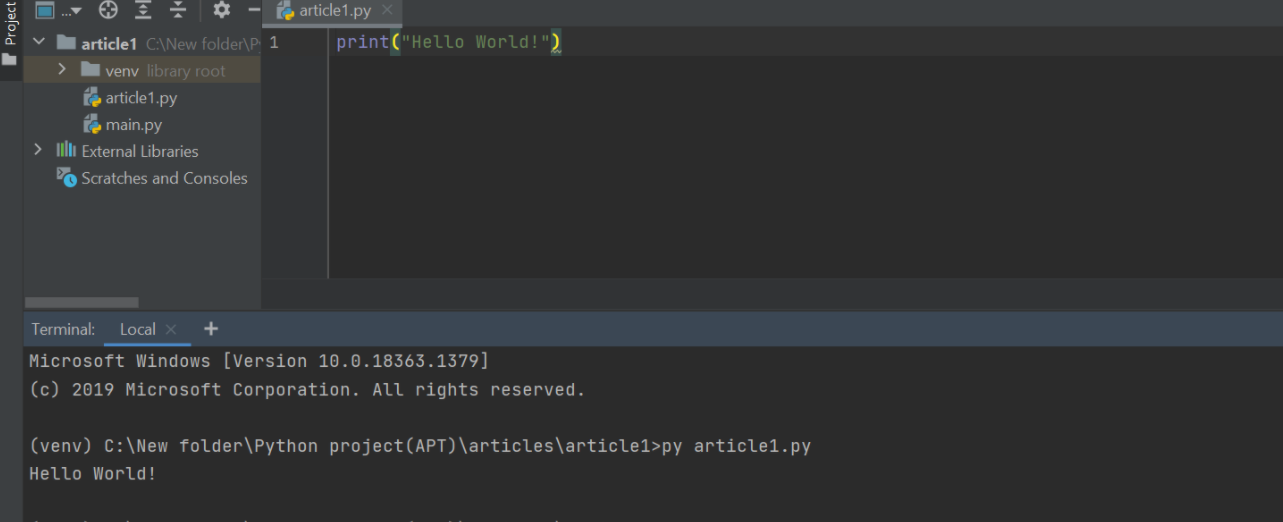
  • Select the root directory with the project name we specified in the last step. Right click on it, go in New and click on ‘Python file’ option. Then give the name of the file as ‘hello’ (you can specify any name as per your project requirement). This will create a ‘hello.py’ file in the project root directory.
    Note: You don’t have to specify the extension as it will take it automatically.

Using IDE (PyCharm)
Now write the below Python script to print the message:

print('Hello World !')

Using IDE (PyCharm) output

Conclusion:

With the reading of this tutorial, you have acquired the knowledge and skills you need to be able to run Python scripts and code in several ways and in a variety of situations and development environments.

How to Run a Python Script Read More »

Introduction to Python – Integrated Development Environment

In this Page, We are Providing Introduction to Python – Integrated Development Environment. Students can visit for more Detail and Explanation of Python Handwritten Notes Pdf.

Introduction to Python – Integrated Development Environment

Introduction to Python – Integrated development environment

An Integrated Development Environment (IDE) is an application that provides comprehensive facilities for software development. An IDE normally consists of a source code editor, compiler and/or interpreter, and a debugger.

Introduction to Python – IDLE

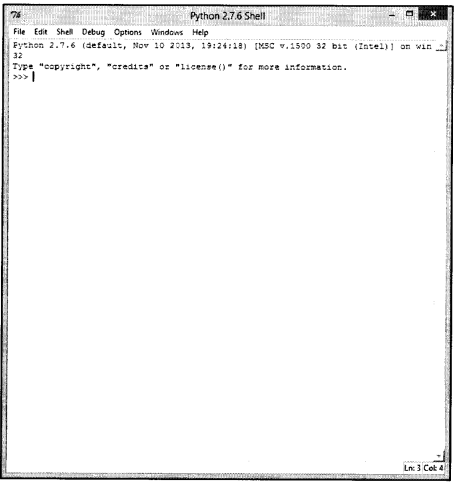
IDLE is an IDE, and it is the basic editor and interpreter environment which ships with the standard distribution of Python. IDLE is the built using “Tkinter” GUI toolkit, and has the following features:

  • Coded in Python, using the Tkinter GUI toolkit.
  • Cross-platform i.e. works on Windows and Unix.
  • Has source code editor with multiple undo, text highlighting, smart indent, call tips, and many other features (shown in figure 1-2).
  • Has Python shell window, also known as “interactive interpreter” (shown in figure 1-1).

Python Handwritten Notes Chapter 1 img 1
Python Handwritten Notes Chapter 1 img 2

Introduction to Python – Spyder

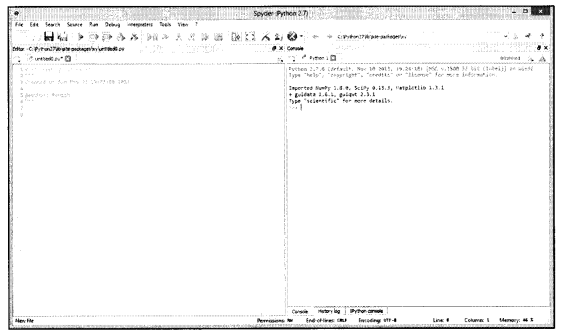
“Spyder” (previously known as “Pydee”) stands for “Scientific PYthon Development EnviRonment” (shown in figure 1-3), and it is a powerful IDE for the Python language with advanced editing, interactive testing, debugging, and introspection features. This IDE also has the support of “IPython” (enhanced interactive Python interpreter) and popular Python libraries such as NumPy, Matplotlib (interactive 2D/-3D plotting), etc. Some of the key features are:

  • Syntax coloring (or highlighting).
  • Typing helpers like automatically inserting closing parentheses etc.
  • Support IPython interpreter.
  • Contains a basic terminal command window.

Spyder runs on all major platforms (Windows, Mac OSX, Linux), and the easiest way to install Spyder in Windows is through Python(x,y) package (visit http://www.pythonxy.com).

Python Handwritten Notes Chapter 1 img 3
The expressions/codes discussed in this book are written and tested in Spyder IDE.

Introduction to Python – Integrated Development Environment Read More »

Python IDEs and Code Editors (Guide)

Python code editors are designed for the developers to code and debug program easily. Using these Python IDEs(Integrated Development Environment), you can manage a large codebase and achieve quick deployment.

Developers can use these editors to create desktop or web application. The Python IDEs can also be used by DevOps engineers for continuous Integration.

What are IDEs and Code Editors?

Whether you are new to this game or you are a veteran player, you need an IDE (Integrated Development Environment) or a code editor to showcase your coding skills and talent. An IDE is a software that consists of common developer tools into a single user-friendly GUI (Graphical User interface). An IDE majorly consists of a source code editor for writing software code, local build automation for creating a local build of the software like compiling computer source code. Lastly, it has a debugger, a program for testing other programs. An IDE can have many more features apart from these & those vary for each IDE.

Code editors are also software; it is like a text editor with some added functionalities. It is not an IDE as an IDE has many developer tools. Depending upon the language one codes on the editor, it highlights special keywords and gives some suggestions. Sublime Text, Atom, Visual Studio Code are some of the popular code editors.

Requirements for a Good Python Coding Environment:

We have listed some major and standard features and requirements required by every project in its build phase and after. A project can have more requirements than mentioned below, but these are the basic ones, and IDE must possess.

  • Save and Reload Source Code

An IDE or editor must save your work and reopen everything later, in the same state it was in when you left, thus saving time for development.

  • Execution from Within the Environment

It should have a built-in compiler to execute your code. If you are not executing it in the same software, then probably it is a text editor.

  • Debugging Support

The debugger in most IDEs provides stepping through your code and applying breakpoints for the code’s partial execution.

  • Syntax Highlighting

Being able to spot keywords, variables quickly, and symbols in your code make reading and understanding code much easier.

  • Automatic Code Formatting

This is an interesting feature; the code indents itself as the developer uses loops, functions, or any other block code.

Top Python IDEs and Code Editors:

1.Pycharm:

PyCharm is an IDE for professional developers. It is created by JetBrains, a company known for creating great software development tools.

There are two versions of PyCharm:

  • Community – free open-source version, lightweight, good for Python and scientific development
  • Professional – paid version, full-featured IDE with support for Web development as well

PyCharm provides all major features that a good IDE should provide: code completion, code inspections, error-highlighting and fixes, debugging, version control system and code refactoring. All these features come out of the box.

Personally speaking, PyCharm is my favorite IDE for Python development.

The only major complaint I have heard about PyCharm is that it’s resource-intensive. If you have a computer with a small amount of RAM (usually less than 4 GB), your computer may lag.

Python IDEs and Code Editors_using Pycharm
2.IDLE:

When you install Python, IDLE is also installed by default. This makes it easy to get started in Python. Its major features include the Python shell window(interactive interpreter), auto-completion, syntax highlighting, smart indentation, and a basic integrated debugger.

IDLE is a decent IDE for learning as it’s lightweight and simple to use. However, it’s not for optimum for larger projects.

Python IDEs and Code Editors_using idle
3.Sublime Text 3:

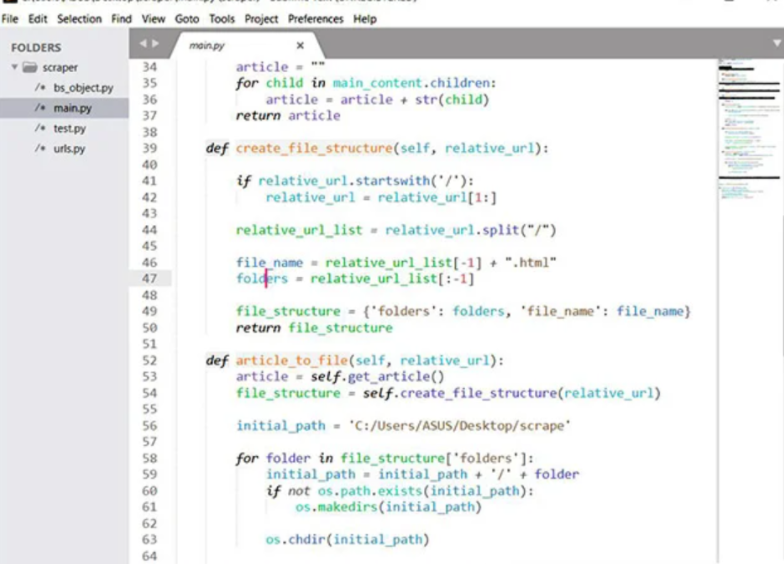
Sublime Text is a popular code editor that supports many languages including Python. It’s fast, highly customizable and has a huge community.

It has basic built-in support for Python when you install it. However, you can install packages such as debugging, auto-completion, code linting, etc. There are also various packages for scientific development, Django, Flask and so on. Basically, you can customize Sublime text to create a full-fledged Python development environment as per your need.

You can download and use evaluate Sublime text for an indefinite period of time. However, you will occasionally get a pop-up stating “you need to purchase a license for continued use”.

Python IDEs and Code Editors_using sublime text
4.Atom:

Atom is an open-source code editor developed by Github that can be used for Python development (similar Sublime text).

Its features are also similar to Sublime Text. Atom is highly customizable. You can install packages as per your need. Some of the commonly used packages in Atom for Python development are autocomplete-python, linter-flake8, python-debugger, etc.

Personally speaking, I prefer Atom to Sublime Text for Python development.

Python IDEs and Code Editors_using atom

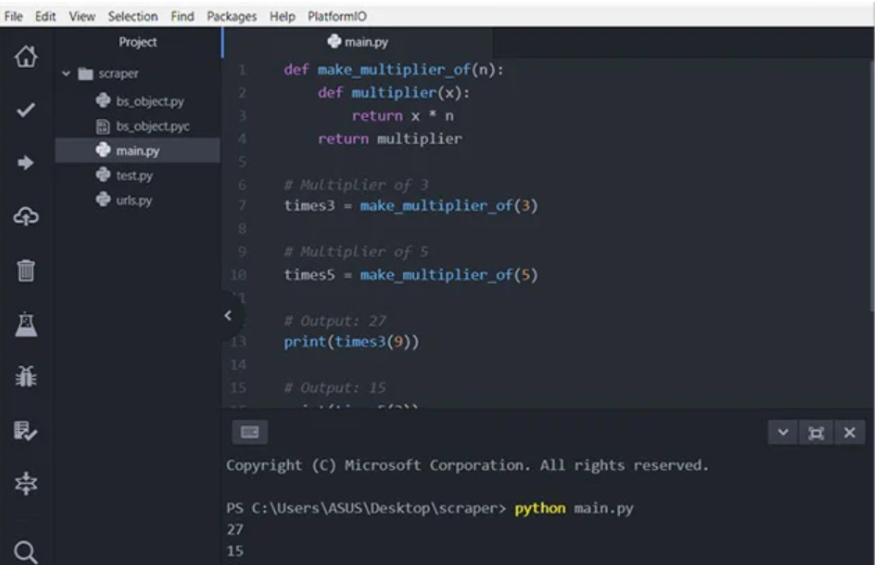
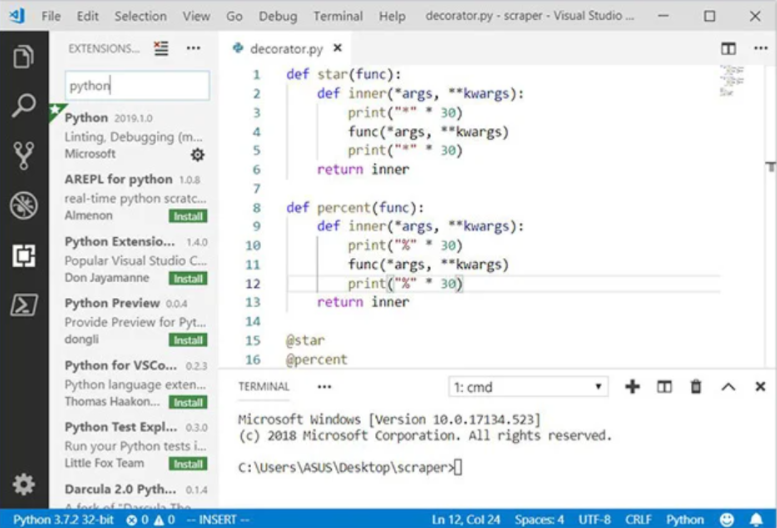
5.Visual Studio Code:

Visual Studio Code (VS Code) is a free and open-source IDE created by Microsoft that can be used for Python development.

You can add extensions to create a Python development environment as per your need in VS code. It provides features such as intelligent code completion, linting for potential errors, debugging, unit testing and so on.

VS Code is lightweight and packed with powerful features. This is the reason why it becoming popular among Python developers.

Python-IDEs-and-Code-Editors_using-vs-code
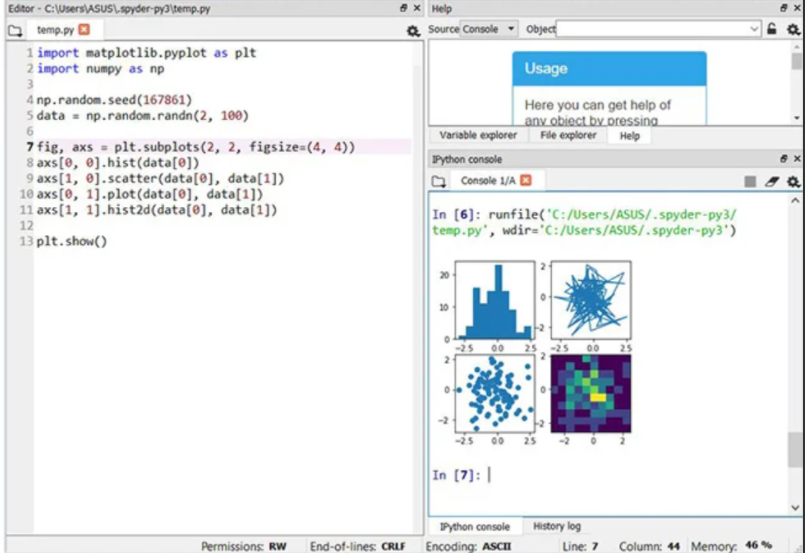
6.Spyder:

Spyder is an open-source IDE usually used for scientific development.

The easiest way to get up and running up with Spyder is by installing Anaconda distribution. If you don’t know, Anaconda is a popular distribution for data science and machine learning. The Anaconda distribution includes hundreds of packages including NumPy, Pandas, scikit-learn, matplotlib and so on.

Spyder has some great features such as autocompletion, debugging and iPython shell. However, it lacks in features compared to PyCharm.

Python-IDEs-and-Code-Editors_using-spyder
7.Thonny:

Thonny is an integrated development environment (IDE). Developed by the University of Tartu in Estonia, this software has been designed mainly to make life easier for beginners in Python by providing them with a simple, lightweight IDE. Still, with excellent features, it is a bit like the beginner’s kit. This software is therefore particularly suitable for beginners who wish to start programming and development in Python and is therefore not at all suitable for development experts.

The user interface is isolated from all features that may distract beginners. It is a well-thought-out pedagogical course for beginners who want to develop in Python quickly, easily, and simply.

Advantage:

  • IDE adapted for beginners’ learning
  • Basic and functional user interface
  • Does not require a large amount of memory to run

Disadvantage:

  • If you are an experienced developer, this software is certainly not for you.
  • Only basic functionalities

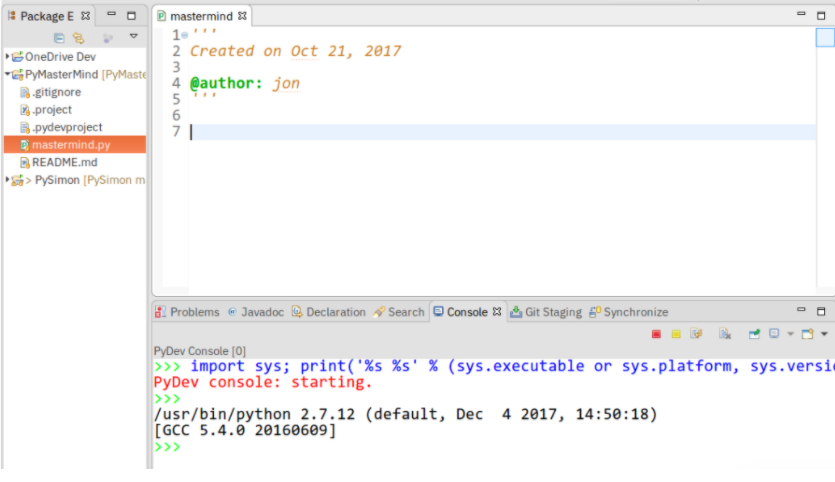
8.Eclipse + PyDev:

If you’ve spent any amount of time in the open-source community, you’ve heard about Eclipse. Available for Linux, Windows, and OS X at, Eclipse is the de-facto open-source IDE for Java development. It has a rich marketplace of extensions and add-ons, which makes Eclipse useful for a wide range of development activities.

One such extension is PyDev, which enables Python debugging, code completion, and an interactive Python console. Installing PyDev into Eclipse is easy: from Eclipse, select Help, Eclipse Marketplace, then search for PyDev. Click Install and restart Eclipse if necessary.

Python-IDEs-and-Code-Editors_using-eclipse.

Which Python IDE is Right for You?

Only you can decide that, but here are some basic recommendations:

  • New Python developers should try solutions with as few customizations as possible. The less gets in the way, the better.
  • If you use text editors for other tasks (like web pages or documentation), look for code editor solutions.
  • If you’re already developing other software, you may find it easier to add Python capabilities to your existing toolset.

Conclusion:

Python is one of the most well-known languages and perhaps even the most popular. As with most major languages, you have a multitude of useful, practical, and powerful IDEs, whether they are paid or free.

Python IDEs and Code Editors (Guide) Read More »

How to Check if a Key Exists in Dictionary

Python How to Check if a Key Exists in Dictionary

A Python dictionary is a list of objects that are not in any particular order i.e Unordered.

A dictionary is made up of a collection of key-value pairs. Each key-value pair corresponds to a specific value.

Curly braces { } can be used to describe a dictionary by enclosing a comma-separated list of key-value pairs.

Every key is separated from its associated value by a colon “:”.

Given a dictionary, the task is to determine whether the given key exists in the dictionary.

Examples:

Input :

dictionary = {'This': 100, 'is':200, 'python':300} , key = is

Output:

Yes

Check whether given Key already exists in a Python Dictionary

There are several ways to check whether the given key exists in the dictionary some of them are:

Method #1: Using keys() function

The keys() method returns a list of all the available keys in the dictionary. Using the inbuilt method keys(), use an if statement and the ‘in’ operator to determine whether or not the key exists in the dictionary.

# Given Dictionary

dictionary = {'this': 100, 'is': 200, 'python': 300}

# Given key
key = 'is'

# Checking if key is exist in dictionary using keys() method
if key in dictionary.keys():
  # If the key exits then print yes
    print("Yes")
# If the  key do not exist then print no
else:
    print("No")

Output:

Yes

Method #2: Using if-in Statements

To verify if a key exists in the dictionary, we can use the ‘in operator’ directly with the dictionary.

The expression:

key in dictionary

If the key exists in the dictionary, it will evaluate to True; otherwise, it will evaluate to False.

Let’s use this to see if the key is in the dictionary.

# Given Dictionary

dictionary = {'this': 100, 'is': 200, 'python': 300}

# Given key
key = 'is'

# Using if and in to check whether the key is present in dictionary
if key in dictionary:
  # If the key exits then print yes
    print("Yes")
# If the  key do not exist then print no
else:
    print("No")

Output:

Yes

Method #3: Using List and if statement

  • Convert the dictionary keys to list.
  • Check if the key present in this list using if statement.

Below is the implementation:

# Given Dictionary
dictionary = {'this': 100, 'is': 200, 'python': 300}

# Given key
key = 'is'
# Converting dictionary keys to list
keyslist = list(dictionary.keys())

# Checking if key is exist in list using if
if key in keyslist:
  # If the key exits then print yes
    print("Yes")
# If the  key do not exist then print no
else:
    print("No")

Output:

Yes

Method #4: Using Exceptional Handling

It will raise a KeyError if we try to access a value of key that does not exist in the dictionary. This can also be used to see if anything exists in the dict.

This can also be a way to check if exist in dictionary or not .

Below is the implementation:

# Given Dictionary
dictionary = {'this': 100, 'is': 200, 'python': 300}

# Given key
key = 'is'
# Using try and except
try:
    # If the key exist in dictionary its value is assigned to test and then it prints yes
    test = dictionary[key]
    print("Yes")
# If the key do not exist in dictionary it prints no
except KeyError:
    print("No")

Output:

Yes

Method #5: Using get() function

The dict class in Python has a get() method that accepts a key and a default value.

dictionary.get(keyname, value)

The function’s behaviour,

  • If the given key is found in the dictionary, it returns the value associated with that key.
  • If the given key does not exist in the dictionary, the passed default value argument is returned.
  • If the given key does not exist in the dictionary and the default value is not provided, it returns None.

Below is the implementation:

# Given Dictionary
dictionary = {'this': 100, 'is': 200, 'python': 300}

# Given key
key = 'is'
# Using get()
if dictionary.get(key) is not None:
    print("Yes")
else:
    print("No")

Output:

Yes

Method #6 : Using ‘if not in’ statement

We’ve just verified whether the key exists in the dictionary so far.

However, if we want to verify if a key does not exist in the dictionary, we can use ‘if not in’ with the dictionary directly.

Below is the implementation:

# Given Dictionary
dictionary = {'this': 100, 'is': 200, 'python': 300}

# Given key
key = 'is'
# Using if not in
if key not in dictionary:
  # if the key not in dictionary then we print no
    print("No")
else:
    print("Yes")

Output:

Yes

Related Programs:

Python How to Check if a Key Exists in Dictionary Read More »

Introduction to Python – Python, Pythonic, History, Documentation

In this Page, We are Providing Introduction to Python – Python, Pythonic, History, Documentation. Students can visit for more Detail and Explanation of Python Handwritten Notes Pdf.

Introduction to Python – Python, Pythonic, History, Documentation

Python

Python is a high-level general-purpose programming language that is used in a wide variety of application domains. Python has the right combination of performance and features that demystify program writing. Some of the features of Python are listed below:

  • It is simple and easy to learn.
  • Python implementation is under an open-source license that makes it freely usable and distributable, even for commercial use.
  • It works on many platforms such as Windows, Linux, etc.
  • It is an interpreted language.
  • It is an object-oriented language.
  • Embeddable within applications as a scripting interface.
  • Python has a comprehensive set of packages to accomplish various tasks.

Python is an interpreted language, as opposed to a compiled one, though the distinction is blurry because of the presence of the bytecode compiler (beyond the scope of this book). Python source code is compiled into bytecode so that executing the same file is faster the second time (recompilation from source to bytecode can be avoided). Interpreted languages typically have a shorter development/debug cycle than compiled ones, and also their programs generally also run slowly. Please note that Python uses a 7-bit ASCII character set for program text.

The latest stable releases can always be found on Python’s website (http://www.python.org/). There are two recommended production-ready Python versions at this point in time because at the moment there are two branches of stable releases: 2.x and 3.x. Python 3.x may be less useful than 2.x since currently there is more third-party software available for Python 2 than for Python 3. Python 2 code will generally not run unchanged in Python 3. This book focuses on Python version 2.7.6.

Python follows a modular programming approach, which is a software design technique that emphasizes separating the functionality of a program into independent, interchangeable modules, such that each contains everything necessary to execute only one aspect of the desired functionality. Conceptually, modules represent a separation of concerns and improve maintainability by enforcing logical boundaries between components.

More information on the module is provided in chapter 5. Python versions are numbered in the format A.B.C or A.B, where A is the major version number, and it is only incremented for major changes in the language; B is the minor version number, and incremented for relatively lesser changes; C is the micro-level, and it is incremented for bug-fixed release.

Pythonic

“Pythonic” is a bit different idea/approach of the writing program, which is usually not followed in other programming languages. For example, to loop all elements of an iterable using for statement, usually, the following approach is followed:

food= [ 'pizza', 'burger',1 noodles']
for i in range(len(food)):
print(food[i])

A cleaner Pythonic approach is:

food=['pizza','burger','noodles']
for piece in food:
print(piece)

History

Python was created in the early 1990s by Guido van Rossum at Centrum Wiskunde & Informatica (CWI, refer http://www.cwi.nl/) in the Netherlands as a successor of a language called “ABC”. Guido remains Python’s principal author, although it includes many contributions from others. When he began implementing Python, Guido van Rossum was also reading the published scripts from “Monty Python’s Flying Circus”,.a BBC comedy series from the 1970s. Van Rossum thought he needed a name that was short, unique, and slightly mysterious, so he decided to call the language “Python”. In 1995, Guido continued his work on Python at the Corporation for National Research Initiatives (CNRI, visit http://www.cnri.reston.va.us/) in Reston, Virginia, where he released several versions of the software.

In May 2000, Guido and the Python core development team moved to “BeOpen.com” to form the BeOpen PythonLabs team. In October of the same year, the PythonLabs team moved to Digital Creations (now Zope Corporation, visit http://www.zope.com/). In 2001, the Python Software Foundation (PSF, refer http://www.python.org/psf/) was formed, a non-profit organization created specifically to own Python-related intellectual property. Zope Corporation is a sponsoring member of the PSF.

Documentation

Official Python 2.7.6 documentation can be accessed from the website link: http://docs.python.Org/2/. To download an archive containing all the documents for version 2.7.6 of Python in one of the various formats (plain text, PDF, HTML), follow the link: http://docs.python.Org/2/download.html.

Introduction to Python – Python, Pythonic, History, Documentation Read More »

Remove Elements from List by Index or Indices

Python: Remove Elements from List by Index or Indices

Lists are ordered sequences that can contain a wide range of object types. Lists can also have duplicate members. Lists in Python can be compared to arrays in other programming languages. But there is one significant difference. Arrays can only contain elements of the same data type, whereas Python lists can contain items of various data types.

Python Lists include a number of methods for removing items from the list.

This article will go over various methods for removing a single or multiple elements from a list.

Examples:

Input:

givenlist=["hello", "this", "is", "Btech", "Geeks"] , index=2

Output:

["hello", "this", "Btech", "Geeks"]

Remove values from the List Using Indexes or Indices

There are several ways to remove elements from the list using Indexes or Indices some of them are:


>Method#1: Using del keyword

“del list object [index]” can be used to exclude an item from a list based on its index location.

The del keyword, on the other hand, will raise IndexError if the list is empty or the specified index is out of range.

# Function which removes the element at given index and returns list
def removeIndex(givenlist, index):
    # deleting the index
    del givenlist[index]
    # return the list
    return givenlist

# Driver code


# given list
givenlist = ["hello", "this", "is", "Btech", "Geeks"]
# given index which is to be removed
index = 2
# passing list and index to removeIndex function to remove the element
print(removeIndex(givenlist, index))

Output:

['hello', 'this', 'Btech', 'Geeks']

It removed the element at position 2 . But what if we try to delete an element with an out-of-range index?

As an example,

we will delete the element at index 10(which doesn’t in this list) the output is:

del givenlist[index]
IndexError: list assignment index out of range

Because the given index was out of bounds, it raised an IndexError. The index position was greater than the

list’s length. To avoid this index error, we should always check to see if the given index is valid.

Below is the implementation:

# Function which removes the element at given index and returns list
def removeIndex(givenlist, index):
    # deleting the index
    if(index < len(givenlist)):
        del givenlist[index]
    # return the list
    return givenlist

# Driver code


# given list
givenlist = ["hello", "this", "is", "Btech", "Geeks"]
# given index which is to be removed
index = 2
# passing list and index to removeIndex function to remove the element
print(removeIndex(givenlist, index))

Output:

['hello', 'this', 'Btech', 'Geeks']

>Method #2: Using pop() function

The list class in Python has a function pop(index) that removes an item from the list at the given index.

However, if the list is empty or the given index is out of range, the pop() function may throw an IndexError.

As a result, we should exercise caution when using this function to delete an item from a list based on its index position.

We wrote a function that deletes an element from a list based on its index. It uses the pop() function internally,

but first checks to see if the given index is valid. Let us illustrate with an example:

# Function which removes the element at given index and returns list
def removeIndex(givenlist, index):
  # using pop() function
    if index < len(givenlist):
        givenlist.pop(index)
   # returning the list
    return givenlist


# Driver code


# given list
givenlist = ["hello", "this", "is", "Btech", "Geeks"]
# given index which is to be removed
index = 2
# passing list and index to removeIndex function to remove the element
print(removeIndex(givenlist, index))

Output:

['hello', 'this', 'Btech', 'Geeks']

The function removeIndex() accepts two arguments,

  • A givenlist from which an element must be removed.
  • An index that represents the place in the given list where an element must be removed.

>Method #3: Using slicing

In each of the previous solutions, we changed the list while it was still in place. Slicing, on the other hand, can be used to create a new list by removing the element at a given index from the original list.

To delete an element at index N, for example, divide the list into three parts.

  1. Elements ranging from 0 to N-1
  2. Element at index position N
  3. Elements starting at index position N+1 and continuing to the end of the list.

Below is the implementation:

# Function which removes the element at given index and returns list
def removeIndex(givenlist, index):
  # using slicing
    givenlist = givenlist[:index] + givenlist[index+1:]
  # returning the list
    return givenlist


# Driver code


# given list
givenlist = ["hello", "this", "is", "Btech", "Geeks"]
# given index which is to be removed
index = 2
# passing list and index to removeIndex function to remove the element
print(removeIndex(givenlist, index))

Output:

['hello', 'this', 'Btech', 'Geeks']

>Method #4 : Using indices to remove multiple elements

Assume we have a list of 7 elements and want to remove the elements at indexes 1, 5, and 6. We can’t just name the pop after iterating over the specified index positions (index). The element at a given index will be removed by the pop() function, and the index location of all elements after the deleted elements will change as a result (decrease by 1).

The best approach is to sort the index positions in decreasing order and then call the pop() function on the highest to lowest index positions. To make this process as simple as possible, we’ve built a function.

Based on the specified index positions, it may remove multiple elements from a list.

# Function which removes the element at given index and returns list
def removeIndex(givenlist, indices):
    # sorting indices list in reverse order
    indices = sorted(indices, reverse=True)
    # Traverse the indices list
    for index in indices:
        if index < len(givenlist):
            givenlist.pop(index)

    # returning the list
    return givenlist


# Driver code
# given list
givenlist = ["hello", "this", "is", "Btech", "Geeks"]
# given indices list which are to be removed
indices = [1, 2, 3]
# passing list and indices list to removeIndex function to remove the element
print(removeIndex(givenlist, indices))

Output:

['hello', 'Geeks']

Related Programs:

Python: Remove Elements from List by Index or Indices Read More »

How to Create a Directory in Python?

In this article, we will discuss how to create a directory in python.

Directory

The directory or simply say folder is a collection of files and sub-directory. A directory or folder is created to store our files in an organized manner.

Ways to create Directory in python

Using the Python os module we can easily work with directories. Let us see different ways to create a directory or folder in python.

  • Method 1-using os. mkdir()

First, let us discuss os. mkdir() function or method because this is the base of this whole concept.

os.mkdir()

This method is used to create a directory with a name path and a specified numeric mode. The default mode is 0777(octal). But we don’t need to focus on the mode part.

syntax:  os.mkdir(path[, mode])  or os.mkdir(path)

Here the path is the path which we need to be created. For example, C:\Users\HP\Desktop\python this is a path. Let us see how we can make a directory with this method.

For creating a directory with this method we have to give the name of our directory which we want to be created in the mkdir() method as an argument. In this way, our directory will be created in the current directory. Let us see this with the help of an example.

import os
print("Original directory Structure")
print(os.listdir())
#create new directory with name myDir
os.mkdir("myDir")
print("New directory structure")
print(os.listdir())

Output

Original directory Structure
['.vscode', '02_railway_oops.py', 'directory.py', 'file_handling.py', 'first.cpp', 'first.exe', 'hello.py', 'HelloWorld.class', 'newDir'] 
New directory structure
['.vscode', '02_railway_oops.py', 'directory.py', 'file_handling.py', 'first.cpp', 'first.exe', 'hello.py', 'HelloWorld.class', 'myDir', 'newDir']

Explanation:

In this example, we clearly see that first, we have no directory name “myDir” in the current directory but after we use os. mkdir() function our directory is created.

Note: If the directory already exists in the current directory then it will raise FileExistsError Error. To cope with this exception we can use try-except block.

  • Method 2-using os. makedirs()

First, let us discuss os. makedirs() function or method because this is the base of this whole concept.

os.makedirs()

This method is used to create a directory recursively with a name path and a specified numeric mode. But we don’t need to focus on the mode part.

For example, suppose we want to make a directory with this path /home/User/Documents/dir1/dir2 but in this path our directory Documents and dir1 not exist then it will not throw any error. It will create that missing directory also. The working will be the same as that of os. mkdir()

syntax:  os.makedirs(path[, mode])  or os.makedirs(path)

import os
print("Original directory Structure")
print(os.listdir())
#create new directory with name makeDir
os.makedirs("makeDir")
print("New directory structure")
print(os.listdir())

Output

Original directory Structure
['.vscode', '02_railway_oops.py', 'directory.py', 'file_handling.py', 'first.cpp', 'first.exe', 'hello.py', 'HelloWorld.class', 'myDir', 'newDir']
New directory structure
['.vscode', '02_railway_oops.py', 'directory.py', 'file_handling.py', 'first.cpp', 'first.exe', 'hello.py', 'HelloWorld.class', 'makeDir', 
'myDir', 'newDir']

So by these methods, we can create a directory in python.

How to Create a Directory in Python? Read More »
How to Create a List and Initialize with Same Values

Python : How to Create a List and Initialize with Same Values

In Python Data Structures, a list is a type of container that is used to store multiple pieces of data at the same time. In Python, unlike Sets, the list is ordered and has a definite count. A list’s elements are indexed in a specific order, and the indexing of a list begins with 0 as the first index.

This article will go over various methods to create a list and Initialize with same values.

Examples:

Input:

size=5 , value="BTechGeeks"

Output:

['BTechGeeks', 'BTechGeeks', 'BTechGeeks', 'BTechGeeks', 'BTechGeeks']

Make a list and fill it with the same values

There are several ways create a list and initialize with same values some of them are:

Method #1:Using [] and multiply operator

Assume we want to make a list of strings that contains 5 identical strings, such as ‘BTechGeeks’.

You can do the following to initialize a list of immutable items, such as None, strings, tuples, or frozensets, with the same value:

# Function which converts list to string
def createList(size, value):
    # Using multiply operator
    requiredlist = [value]*size
    # return the list
    return requiredlist


# Driver code
# given value and size
size = 5
value = "BTechGeeks"
# passing value and size to createList function
print(createList(size, value))

Output:

['BTechGeeks', 'BTechGeeks', 'BTechGeeks', 'BTechGeeks', 'BTechGeeks']

[‘BTechGeeks’] will generate a list with a single value, which we can then multiply by 5. It will loop through the contents of the list 5 times.

Note: Never use [e]*n for mutable items. As a result, the list will contain the same object e repeated N times, as well as referencing errors.

Method #2:Using List Comprehension and range()

List comprehension is a simple and compact syntax for creating a list from a string or another list in Python. It’s a quick way to make a new list by performing an operation on each item in the existing one. List comprehension is much faster than using the for loop to process a list.

The for loop in this list comprehension will iterate over the range object 5 times, adding ‘BTechGeeks’ to the list with each iteration.

Below is the implementation:

# Function which converts list to string
def createList(size, value):
    # Using list comprehension and range
    requiredlist = [value for i in range(size)]
    # return the list
    return requiredlist


# Driver code
# given value and size
size = 5
value = "BTechGeeks"
# passing value and size to createList function
print(createList(size, value))

Output:

['BTechGeeks', 'BTechGeeks', 'BTechGeeks', 'BTechGeeks', 'BTechGeeks']

Method #3: Using itertools repeat() function

The itertools package contains a repeat() function that creates an iterator that returns the object repeatedly. This has the same issue as [e]*n and should be avoided when dealing with mutable items.

Below is the implementation:

#importing itertools
import itertools

# Function which converts list to string
def createList(size, value):
    # Using repeat()
    requiredlist = list(itertools.repeat(value, size))
    # return the list
    return requiredlist


# Driver code
# given value and size
size = 5
value = "BTechGeeks"
# passing value and size to createList function
print(createList(size, value))

Output:

['BTechGeeks', 'BTechGeeks', 'BTechGeeks', 'BTechGeeks', 'BTechGeeks']

Related Programs:

Python : How to Create a List and Initialize with Same Values Read More »