Shikha Mishra

Python IDEs and Code Editors (Guide)

Python code editors are designed for the developers to code and debug program easily. Using these Python IDEs(Integrated Development Environment), you can manage a large codebase and achieve quick deployment.

Developers can use these editors to create desktop or web application. The Python IDEs can also be used by DevOps engineers for continuous Integration.

What are IDEs and Code Editors?

Whether you are new to this game or you are a veteran player, you need an IDE (Integrated Development Environment) or a code editor to showcase your coding skills and talent. An IDE is a software that consists of common developer tools into a single user-friendly GUI (Graphical User interface). An IDE majorly consists of a source code editor for writing software code, local build automation for creating a local build of the software like compiling computer source code. Lastly, it has a debugger, a program for testing other programs. An IDE can have many more features apart from these & those vary for each IDE.

Code editors are also software; it is like a text editor with some added functionalities. It is not an IDE as an IDE has many developer tools. Depending upon the language one codes on the editor, it highlights special keywords and gives some suggestions. Sublime Text, Atom, Visual Studio Code are some of the popular code editors.

Requirements for a Good Python Coding Environment:

We have listed some major and standard features and requirements required by every project in its build phase and after. A project can have more requirements than mentioned below, but these are the basic ones, and IDE must possess.

  • Save and Reload Source Code

An IDE or editor must save your work and reopen everything later, in the same state it was in when you left, thus saving time for development.

  • Execution from Within the Environment

It should have a built-in compiler to execute your code. If you are not executing it in the same software, then probably it is a text editor.

  • Debugging Support

The debugger in most IDEs provides stepping through your code and applying breakpoints for the code’s partial execution.

  • Syntax Highlighting

Being able to spot keywords, variables quickly, and symbols in your code make reading and understanding code much easier.

  • Automatic Code Formatting

This is an interesting feature; the code indents itself as the developer uses loops, functions, or any other block code.

Top Python IDEs and Code Editors:
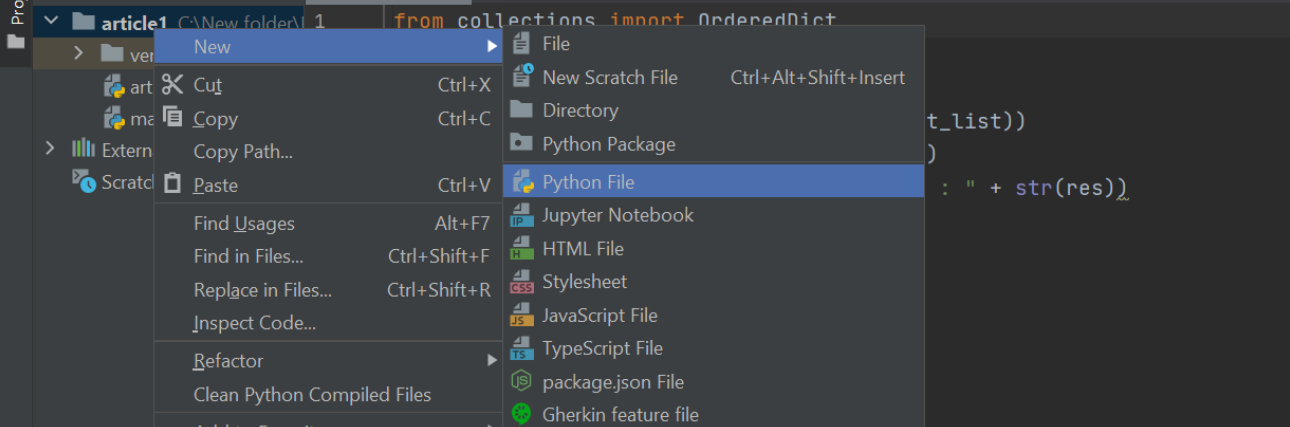
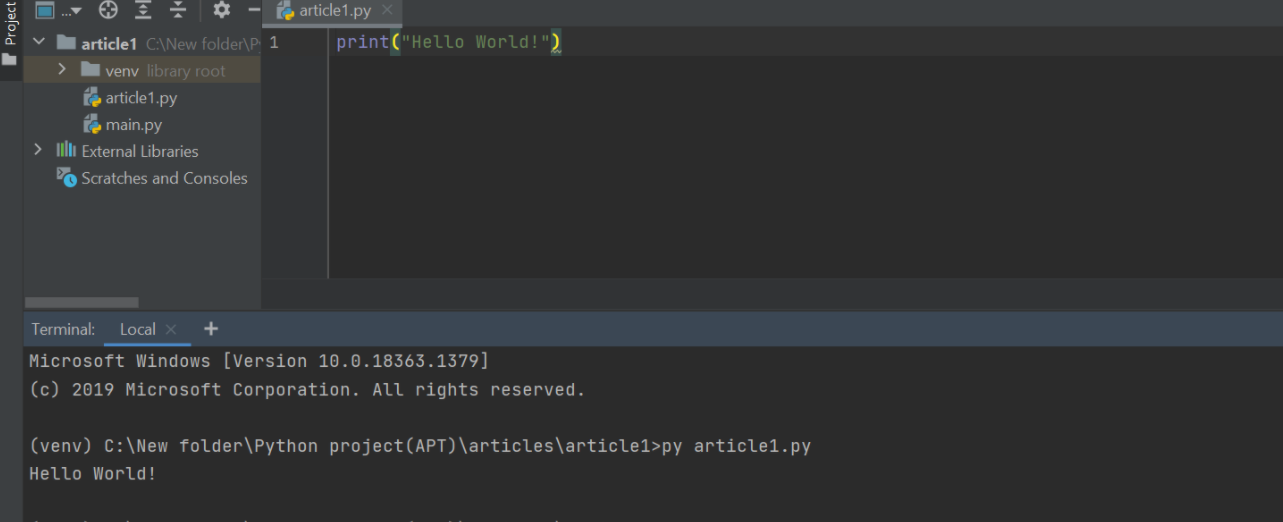
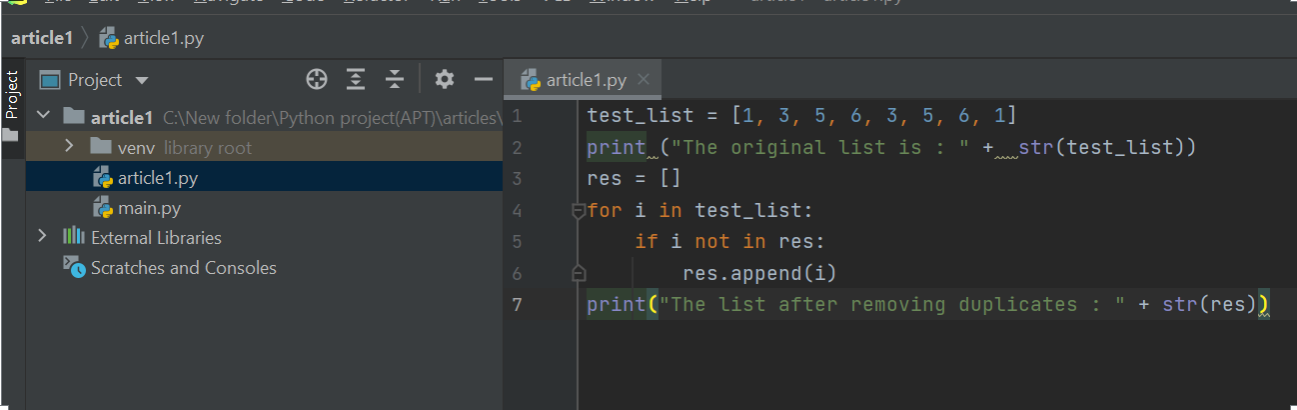
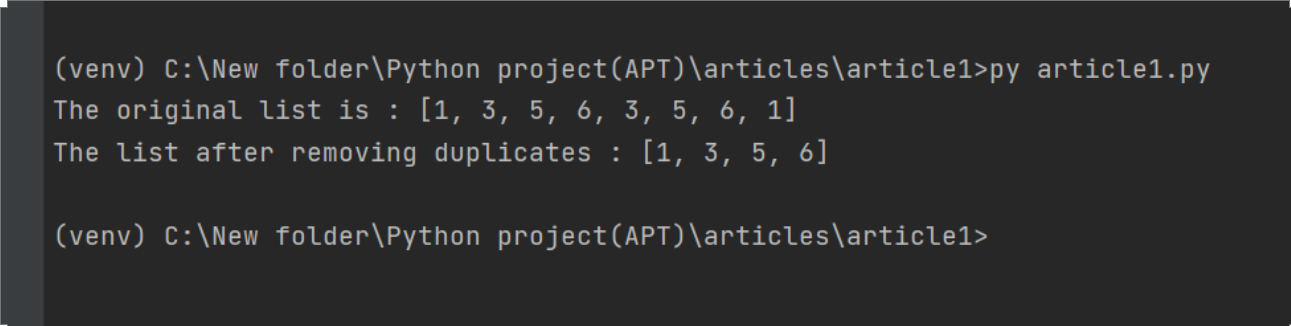
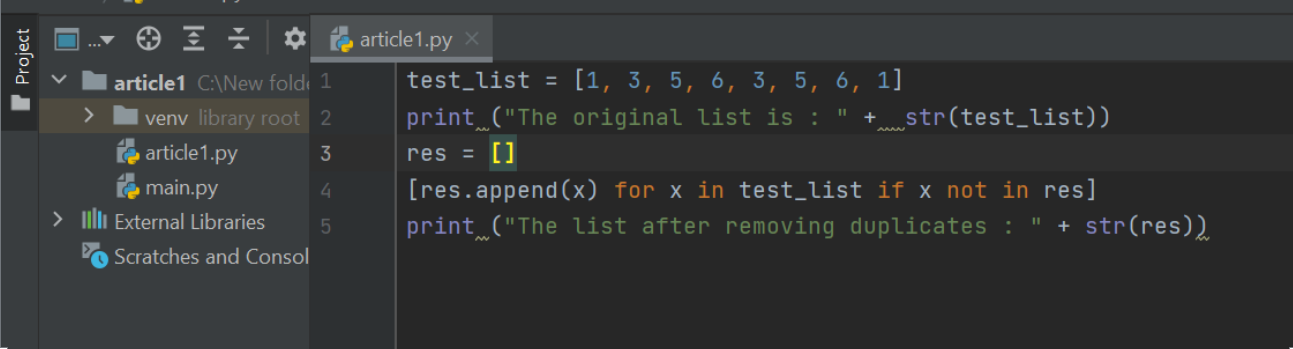
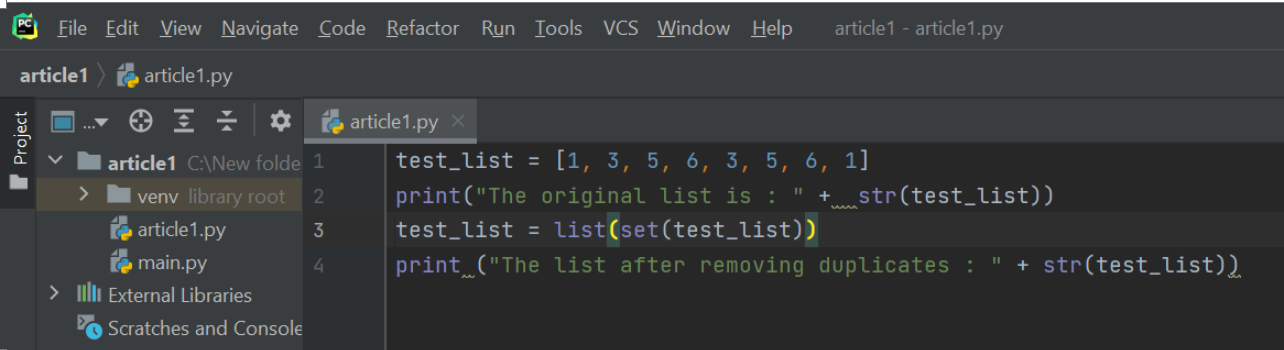
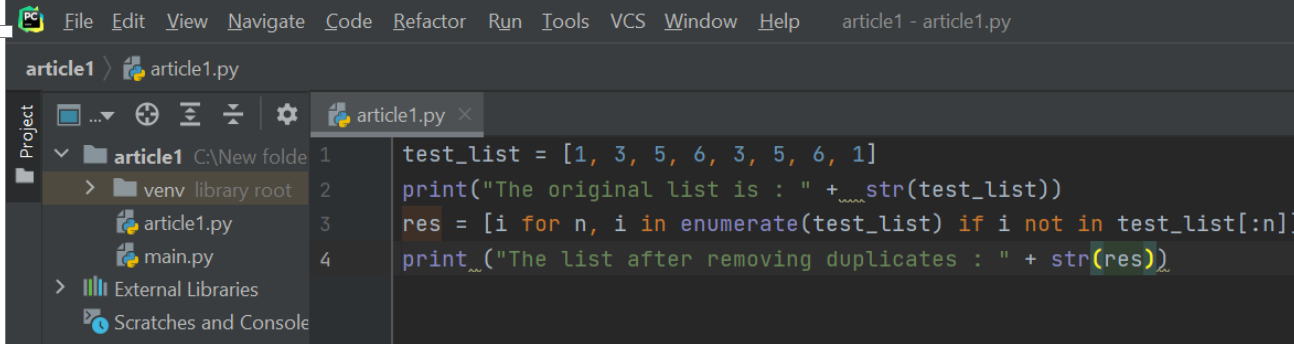
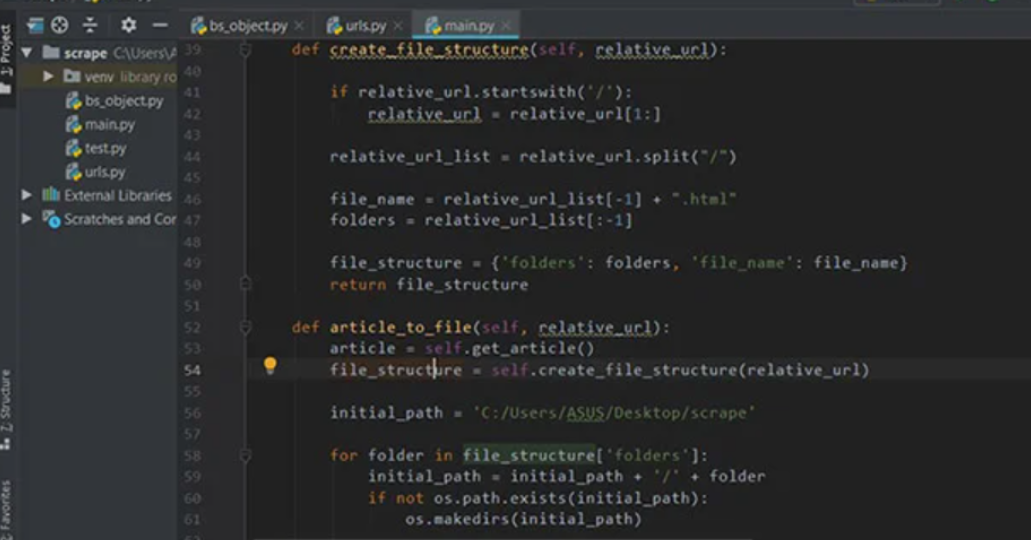
1.Pycharm:

PyCharm is an IDE for professional developers. It is created by JetBrains, a company known for creating great software development tools.

There are two versions of PyCharm:

  • Community – free open-source version, lightweight, good for Python and scientific development
  • Professional – paid version, full-featured IDE with support for Web development as well

PyCharm provides all major features that a good IDE should provide: code completion, code inspections, error-highlighting and fixes, debugging, version control system and code refactoring. All these features come out of the box.

Personally speaking, PyCharm is my favorite IDE for Python development.

The only major complaint I have heard about PyCharm is that it’s resource-intensive. If you have a computer with a small amount of RAM (usually less than 4 GB), your computer may lag.
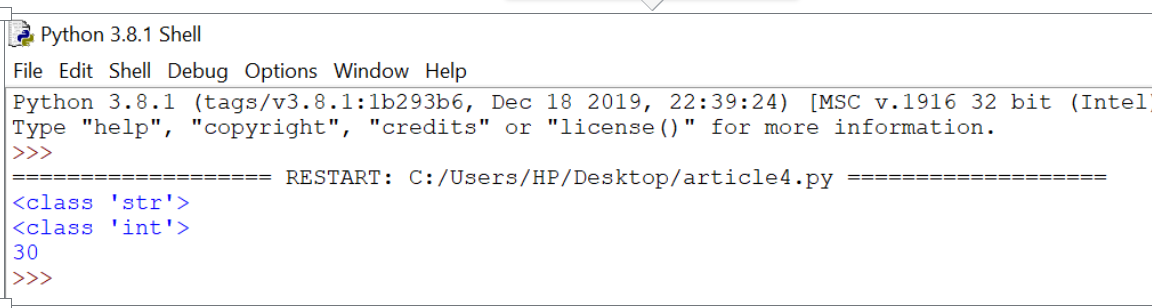
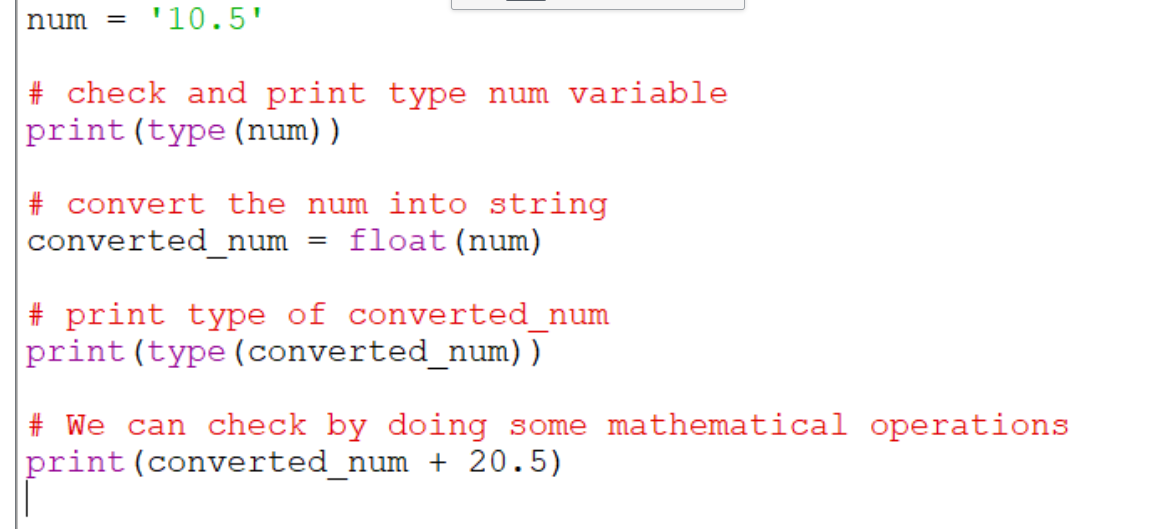
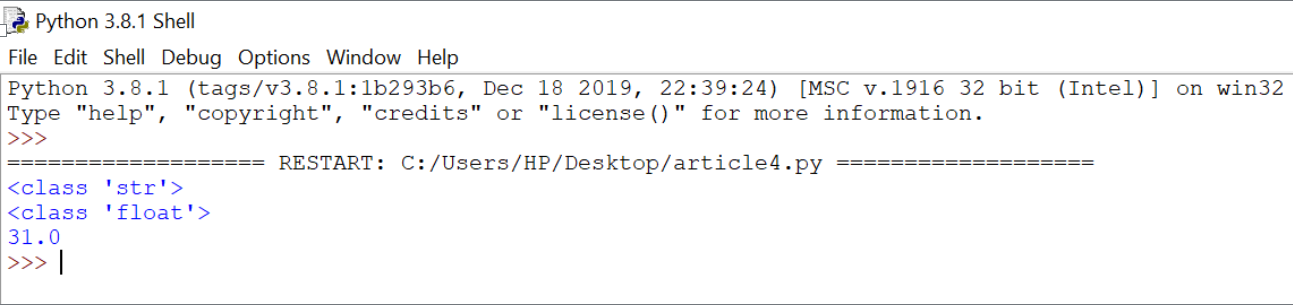
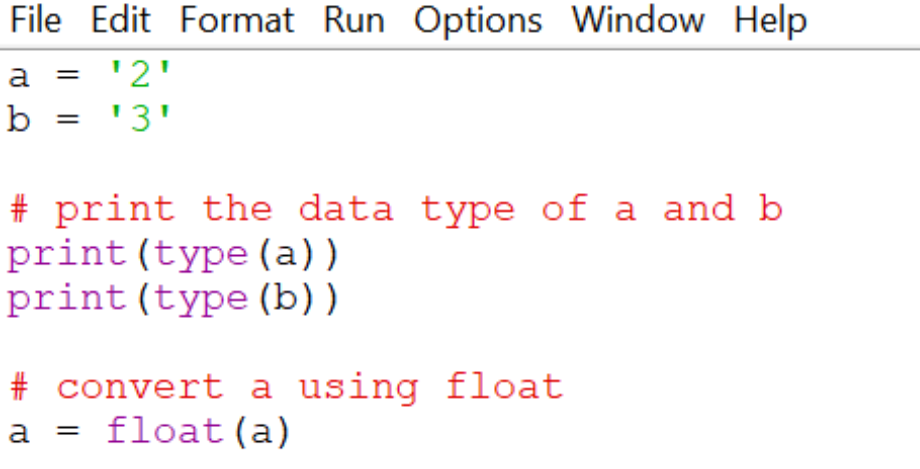
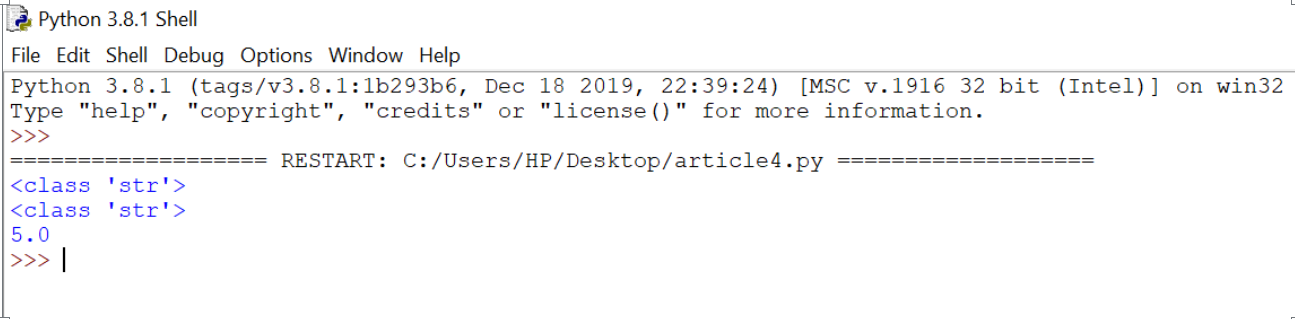
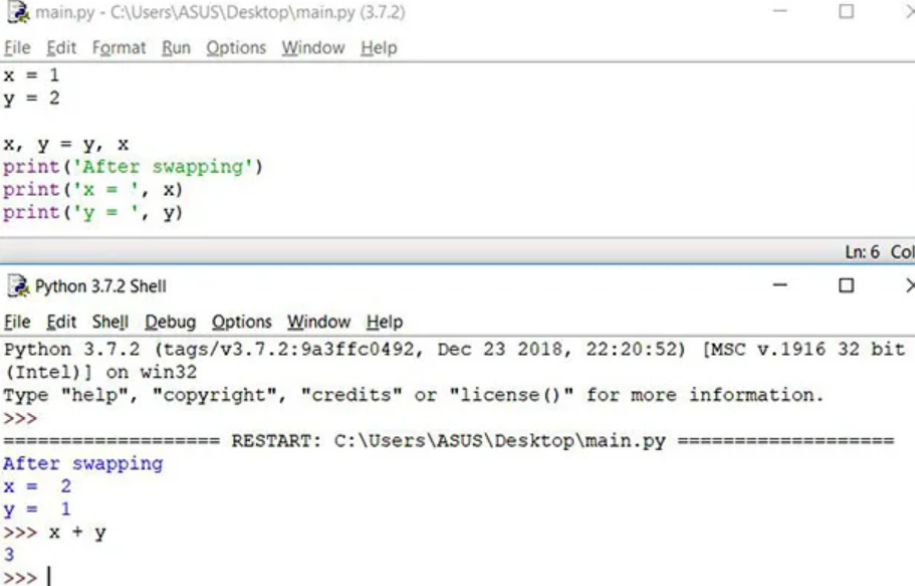
Python IDEs and Code Editors_using Pycharm
2.IDLE:

When you install Python, IDLE is also installed by default. This makes it easy to get started in Python. Its major features include the Python shell window(interactive interpreter), auto-completion, syntax highlighting, smart indentation, and a basic integrated debugger.

IDLE is a decent IDE for learning as it’s lightweight and simple to use. However, it’s not for optimum for larger projects.
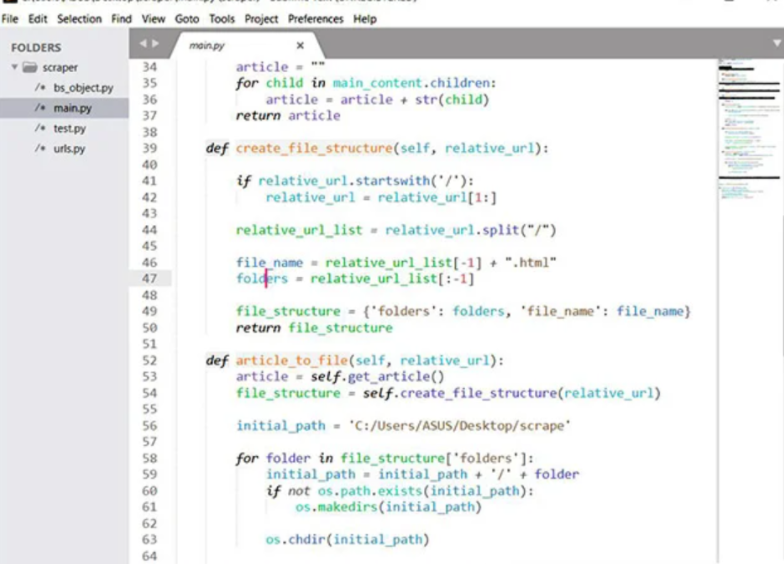
Python IDEs and Code Editors_using idle
3.Sublime Text 3:

Sublime Text is a popular code editor that supports many languages including Python. It’s fast, highly customizable and has a huge community.

It has basic built-in support for Python when you install it. However, you can install packages such as debugging, auto-completion, code linting, etc. There are also various packages for scientific development, Django, Flask and so on. Basically, you can customize Sublime text to create a full-fledged Python development environment as per your need.

You can download and use evaluate Sublime text for an indefinite period of time. However, you will occasionally get a pop-up stating “you need to purchase a license for continued use”.

Python IDEs and Code Editors_using sublime text
4.Atom:

Atom is an open-source code editor developed by Github that can be used for Python development (similar Sublime text).

Its features are also similar to Sublime Text. Atom is highly customizable. You can install packages as per your need. Some of the commonly used packages in Atom for Python development are autocomplete-python, linter-flake8, python-debugger, etc.

Personally speaking, I prefer Atom to Sublime Text for Python development.

Python IDEs and Code Editors_using atom

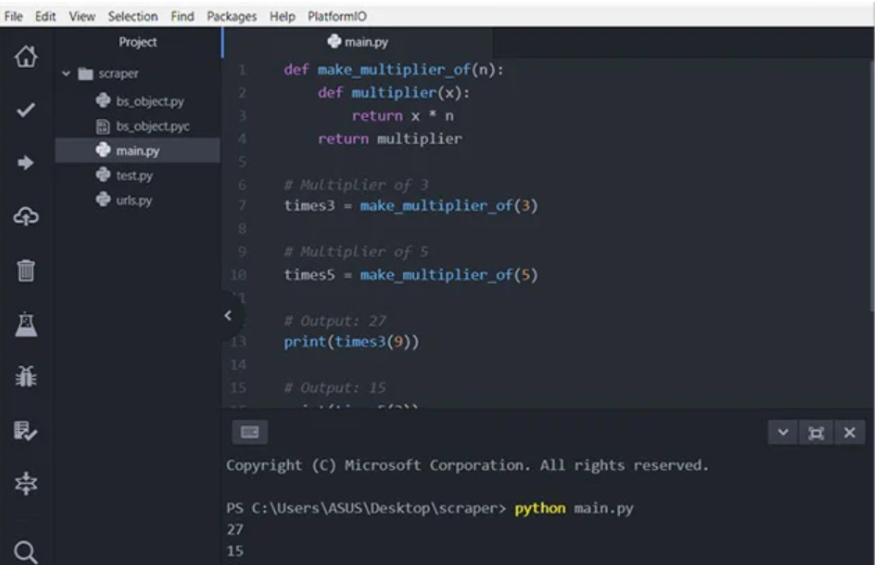
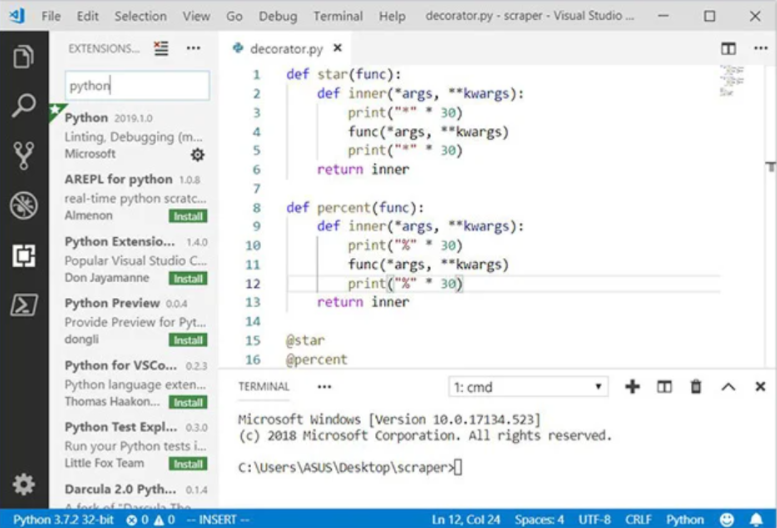
5.Visual Studio Code:

Visual Studio Code (VS Code) is a free and open-source IDE created by Microsoft that can be used for Python development.

You can add extensions to create a Python development environment as per your need in VS code. It provides features such as intelligent code completion, linting for potential errors, debugging, unit testing and so on.

VS Code is lightweight and packed with powerful features. This is the reason why it becoming popular among Python developers.
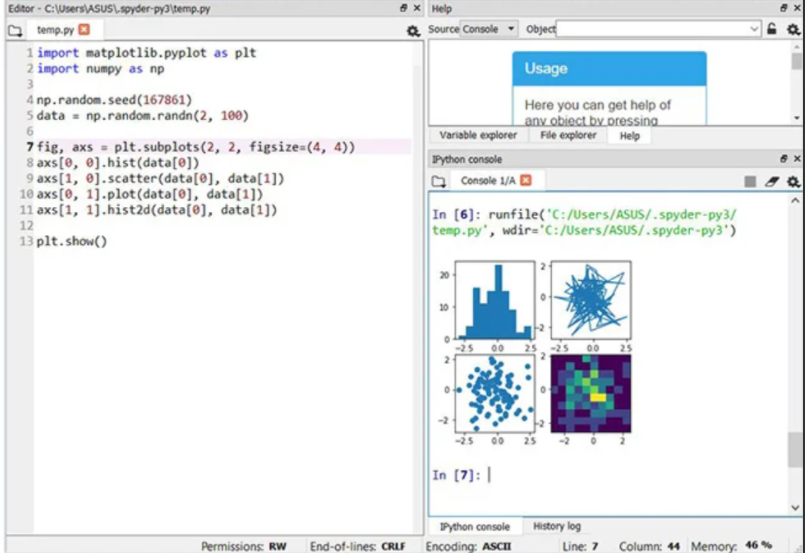
Python-IDEs-and-Code-Editors_using-vs-code
6.Spyder:

Spyder is an open-source IDE usually used for scientific development.

The easiest way to get up and running up with Spyder is by installing Anaconda distribution. If you don’t know, Anaconda is a popular distribution for data science and machine learning. The Anaconda distribution includes hundreds of packages including NumPy, Pandas, scikit-learn, matplotlib and so on.

Spyder has some great features such as autocompletion, debugging and iPython shell. However, it lacks in features compared to PyCharm.

Python-IDEs-and-Code-Editors_using-spyder
7.Thonny:

Thonny is an integrated development environment (IDE). Developed by the University of Tartu in Estonia, this software has been designed mainly to make life easier for beginners in Python by providing them with a simple, lightweight IDE. Still, with excellent features, it is a bit like the beginner’s kit. This software is therefore particularly suitable for beginners who wish to start programming and development in Python and is therefore not at all suitable for development experts.

The user interface is isolated from all features that may distract beginners. It is a well-thought-out pedagogical course for beginners who want to develop in Python quickly, easily, and simply.

Advantage:

  • IDE adapted for beginners’ learning
  • Basic and functional user interface
  • Does not require a large amount of memory to run

Disadvantage:

  • If you are an experienced developer, this software is certainly not for you.
  • Only basic functionalities
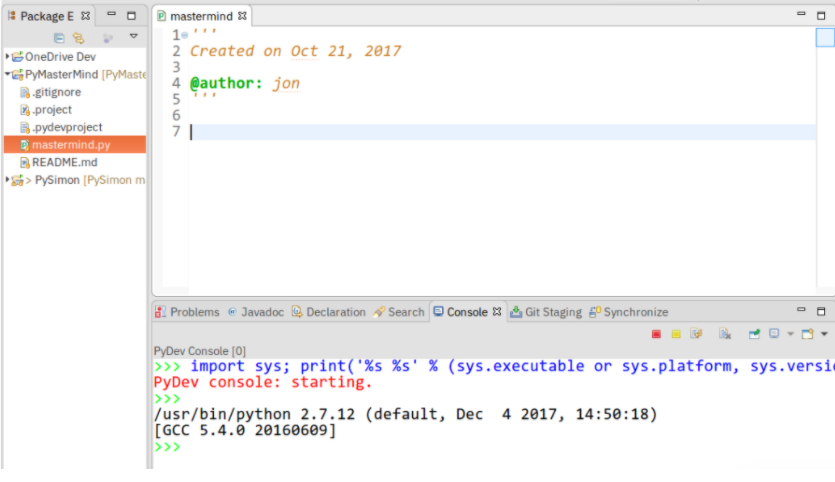
8.Eclipse + PyDev:

If you’ve spent any amount of time in the open-source community, you’ve heard about Eclipse. Available for Linux, Windows, and OS X at, Eclipse is the de-facto open-source IDE for Java development. It has a rich marketplace of extensions and add-ons, which makes Eclipse useful for a wide range of development activities.

One such extension is PyDev, which enables Python debugging, code completion, and an interactive Python console. Installing PyDev into Eclipse is easy: from Eclipse, select Help, Eclipse Marketplace, then search for PyDev. Click Install and restart Eclipse if necessary.

Python-IDEs-and-Code-Editors_using-eclipse.

Which Python IDE is Right for You?

Only you can decide that, but here are some basic recommendations:

  • New Python developers should try solutions with as few customizations as possible. The less gets in the way, the better.
  • If you use text editors for other tasks (like web pages or documentation), look for code editor solutions.
  • If you’re already developing other software, you may find it easier to add Python capabilities to your existing toolset.

Conclusion:

Python is one of the most well-known languages and perhaps even the most popular. As with most major languages, you have a multitude of useful, practical, and powerful IDEs, whether they are paid or free.

Convert integer to string in Python

We can convert an integer data type using the python built-in str() function. This function takes any data type as an argument and converts it into a string. But we can also do it using the “%s” literal and using the .format() function.

How to convert an integer to a string in Python

Below is the list of possible ways to convert an integer to string in python:

1. Using str() function :

Syntax: str(integer_value)

Convert Integer to String in Python Using str() function
Output:
Convert Integer to String in Python Using str() function Output

2. Using “%s” keyword:

Syntax: “%s” % integer

Convert Integer to String in Python Using s keyword

Output:

Convert Integer to String in Python Using str() function Output
3. Using .format() function:

Syntax: ‘{}’.format(integer)

Convert Integer to String in Python Using format function
Output:

Using .format() function op

4. Using f-string:

Syntax: f'{integer}’

Convert-Integer-to-String-in-Python-Using-f-string
Output:

Convert Integer to String in Python Using f string output

Conclusion:

We have defined all methods of converting the integer data type to the string type. You can use one of them according to your requirement.

Python – Ways to remove duplicates from list

List is an important container and used almost in every code of day-day programming as well as web-development, more it is used, more is the requirement to master it and hence knowledge of its operations is necessary. This article focuses on one of the operations of getting the unique list from a list that contains a possible duplicated. Remove duplicates from list operation has large number of applications and hence, its knowledge is good to have.

How to Remove Duplicates From a Python List

Method 1 : Naive method

In Naive method, we simply traverse the list and append the first occurrence of the element in new list and ignore all the other occurrences of that particular element.

# Using Naive methods:

Using Naive method

Output :

Remove duplicates from list using Naive method output

Method 2 : Using list comprehension

List comprehensions are Python functions that are used for creating new sequences (such as lists, tuple, etc.) using previously created sequence. This makes code more efficient and easy to understand. This method has working similar to the above method, but this is just a one-liner shorthand of longer method done with the help of list comprehension.

# Using list comprehension

Remove duplicates from list using list comprehension
Output :

Remove duplicates from list using list comprehension output

Method 3 : Using set():

We can remove duplicates from a list using an inbuilt function called set(). The set() always return distinct elements. Therefore, we use the set() for removing duplicates.But the main and notable drawback of this approach is that the ordering of the element is lost in this particular method.

# Using set()

Remove duplicates from list using set method
Output :

Remove duplicates from list using set method output

Method 4 : Using list comprehension + enumerate():

Enumerate can also be used for removing duplicates when used with the list comprehension.It basically looks for already occurred elements and skips adding them. It preserves the list ordering.

# Using list comprehension + enumerate()

Using list comprehension + enumerate()
Output :

Using list comprehension + enumerate() output
Method 5 : Using collections.OrderedDict.fromkeys():

This is fastest method to achieve the particular task. It first removes the duplicates and returns a dictionary which has to be converted to list. This works well in case of strings also.

# Using collections.OrderedDict.fromkeys()

Using collections.OrderedDict.fromkeys()
Output :

Using collections.OrderedDict.fromkeys() output

Conclusion :

In conclusion, nowyou may know “how to remove duplicates from a list in python?“. There are different ways but the using collections.OrderedDict.fromkeys() method is the best in accordance with the programming efficiency of the computer.

Python – Keywords and Identifiers

In this article we are going to discuss about keywords and identifiers in Python.

Keywords are prearranged and predefined words in python. Every keywords are written in lower case except True and False. If we count there are 33 keywords in python. Keywords are case sensitive. We can not create any function or identifiers with matching keyword name. I python these keywords are  made for particular purpose.

All Python Keywords are listed below:

1 and It is a logical operator. If both the operands are true it returns true otherwise false.
2 Or It is also a logical operator. Returns true if anyone operand is true otherwise return false.
3 not This is again a logical operator. Returns True if the operand is false else return false.
4 if  Conditional statement.
5 elif Elif is a condition statement used with if statement the elif statement is executed if the previous conditions were not true
6 else Else is used with if and elif conditional statement the else block is executed if the given condition is not true.
7 for This is created for a loop.
8 while This keyword is used to create a while loop.
9 break This is used to terminate the loop.
10 as This is used to create an alternative.
11 def It helps us to define functions.
12 lambda It used to define the anonymous function.
13 pass This is a null statement that means it will do nothing.
14 return It will return a value and exit the function.
15 True This is a Boolean value.
16 False This is also a Boolean value.
17 try It makes a try-except statement.
18 with The with keyword is used to simplify exception handling.
19 assert This function is used for debugging purposes. Usually used to check the correctness of code
20 class It helps us to define a class.
21 continue It continues to the next iteration of a loop
22 del It deletes a reference to an object.
23 except Used with exceptions, what to do when an exception occurs
24 finally Finally is use with exceptions, a block of code that will be executed no matter if there is an exception or not.
25 from The form is used to import specific parts of any module.
26 global This declares a global variable.
27 import This is used to import a module.
28 in It’s used to check if a value is present in a list, tuple, etc, or not.
29 is This is used to check if the two variables are equal or not.
30 None This is a special constant used to denote a null value or avoid. It’s important to remember, 0, any empty container(e.g empty list) do not compute to None
31 nonlocal It’s declared a non-local variable.
32 raise This raises an exception
33 yield It’s ends a function and returns a generator.

Python Identifiers

Python identifiers are generally used to recognize a variable, function, class etc. There are some rules which we should follow while choosing a name for identifier-

1.Identifier should start with a character or Underscore after that use digit.

2.Characters are A-Z or a-z, an Underscore ( _ ) , and digit (0-9).

  • For example, value_count, dataLoader etc. are some valid identifier names.

3.We should not use special characters ( #, @, $, %, ! ) in identifiers.

4.No limitation on the length of the identifier.

5.Identifiers are case sensitive, i.e., ‘define & ‘Define are two different identifiers in Python.

6.Avoid using two underscore while giving identifiers name  like __len__ or _load__

Conclusion:

In this article we have discussed all about keywords and identifiers in Python in details. Thank You!


Python Pandas- How to display full Dataframe i.e. print all rows & columns without truncation

Python Pandas: How to display full Dataframe i.e. print all rows & columns without truncation

In this tutorial, we will discuss the different methods to display full Dataframe i.e. print all rows & columns without truncation. So, get into this page and learn completely about Pandas dataframe in python i.e. how to print all rows & columns without truncation. Also, you can get a clear idea of how to display full dataframe from here. Pandas will be displayed column in the full dataframe.

Display Full Contents of a Dataframe

Pandas implement an operating system to customize the behavior & display similar stuff. By applying this benefits module we can configure the display to show the complete dataframe rather than a truncated one. A function set_option()is provided in pandas to set this kind of option,

pandas.set_option(pat, value)

It sets the value of the defined option. Let’s use this to display the full contents of a dataframe.

Setting to display All rows of Dataframe

In pandas when we print a dataframe, it displays at max_rows number of rows. If we have more rows, then it truncates the rows.

pandas.options.display.max_rows

This option outlines the maximum number of rows that pandas will present while printing a dataframe. The default value of max_rows is 10.

In case, it is set to ‘None‘ then it implies unlimited i.e. pandas will display all the rows in the dataframe. Let’s set it to None while printing the contents of above-created dataframe empDfObj,

# Default value of display.max_rows is 10 i.e. at max 10 rows will be printed.
# Set it None to display all rows in the dataframe
pd.set_option('display.max_rows', None)

Let’s examine the contents of the dataframe again,

print(empDfObj)

Output: 

    A B ... Z AA
0 jack 34 ... 122 111
1 Riti 31 ... 222 211
2 Aadi 16 ... 322 311
3 Sunil 41 ... 422 411
4 Veena 33 ... 522 511
5 Shaunak 35 ... 622 611
6 Shaun 35 ... 722 711
7 jack 34 ... 122 111
8 Riti 31 ... 222 211
9 Aadi 16 ... 322 311
10 Sunil 41 ... 422 411
11 Veena 33 ... 522 511
12 Shaunak 35 ... 622 611
13 Shaun 35 ... 722 711
14 jack 34 ... 122 111
15 Riti 31 ... 222 211
16 Aadi 16 ... 322 311
17 Sunil 41 ... 422 411
18 Veena 33 ... 522 511
19 Shaunak 35 ... 622 611
20 Shaun 35 ... 722 711
21 jack 34 ... 122 111
22 Riti 31 ... 222 211
23 Aadi 16 ... 322 311
24 Sunil 41 ... 422 411
25 Veena 33 ... 522 511
26 Shaunak 35 ... 622 611
27 Shaun 35 ... 722 711
28 jack 34 ... 122 111
29 Riti 31 ... 222 211
30 Aadi 16 ... 322 311
31 Sunil 41 ... 422 411
32 Veena 33 ... 522 511
33 Shaunak 35 ... 622 611
34 Shaun 35 ... 722 711
35 jack 34 ... 122 111
36 Riti 31 ... 222 211
37 Aadi 16 ... 322 311
38 Sunil 41 ... 422 411
39 Veena 33 ... 522 511
40 Shaunak 35 ... 622 611
41 Shaun 35 ... 722 711
42 jack 34 ... 122 111
43 Riti 31 ... 222 211
44 Aadi 16 ... 322 311
45 Sunil 41 ... 422 411
46 Veena 33 ... 522 511
47 Shaunak 35 ... 622 611
48 Shaun 35 ... 722 711
49 jack 34 ... 122 111
50 Riti 31 ... 222 211
51 Aadi 16 ... 322 311
52 Sunil 41 ... 422 411
53 Veena 33 ... 522 511
54 Shaunak 35 ... 622 611
55 Shaun 35 ... 722 711
56 jack 34 ... 122 111
57 Riti 31 ... 222 211
58 Aadi 16 ... 322 311
59 Sunil 41 ... 422 411
60 Veena 33 ... 522 511
61 Shaunak 35 ... 622 611
62 Shaun 35 ... 722 711

[63 rows x 27 columns]

Also Check:

How to print an entire Pandas DataFrame in Python?

When we use a print large number of a dataset then it truncates. In this article, we are going to see how to print the entire pandas Dataframe or Series without Truncation.

The complete data frame is not printed when the length exceeds.

import numpy as np
from sklearn.datasets import load_iris
import pandas as pd
  
# Loading irirs dataset
data = load_iris()
df = pd.DataFrame(data.data,columns = data.feature_names)
print(df)

Output:

How-to-print-an-entire-Pandas-DataFrame-in-Python.png

By default our complete contents of out dataframe are not printed, output got truncated. It printed only 10 rows all the remaining data is truncated. Now, what if we want to print the full dataframe without any truncation.

Four Methods to Print the entire pandas Dataframe

  1. Use to_string() Method
  2. Use pd.option_context() Method
  3. Use pd.set_options() Method
  4. Use pd.to_markdown() Method

1. Using to_string()

This is a very simple method. That is why it is not used for large files because it converts the entire data frame into a string object. But this works very well for data frames for size in the order of thousands.

import numpy as np
from sklearn.datasets import load_iris
import pandas as pd
  
data = load_iris()
df = pd.DataFrame(data.data,
                  columns = data.feature_names)
  
# Convert the whole dataframe as a string and display
print(df.to_string())

Output:

How-to-display-full-Dataframe-i.e.-print-all-rows-columns-without-truncation_output.pn

So in the above example, you have seen it printed all columns without any truncation.

2. Using pd.option_context()

option_context() and set_option() both methods are identical but there is only one difference that is one changes the settings and the other do it only within the context manager scope.

import numpy as np
from sklearn.datasets import load_iris
import pandas as pd
  
data = load_iris()
df = pd.DataFrame(data.data, 
                  columns = data.feature_names)
  
with pd.option_context('display.max_rows', None,'display.max_columns', None,
    'display.precision', 3,
                       ):
print(df)

Output:

How-to-display-full-Dataframe-i.e.-print-all-rows-columns-without-truncation_output.pn

In the above example, we are used ‘display.max_rows‘ but by default its value is 10 & if the dataframe has more rows it will truncate. So it will not be truncated we used None so all the rows are displayed.

3. Using pd.set_option()

This method is similar to pd.option_context() method and takes the same parameters. pd.reset_option(‘all’) used to reset all the changes.

import numpy as np
from sklearn.datasets import load_iris
import pandas as pd
  
data = load_iris()
df = pd.DataFrame(data.data,
                  columns = data.feature_names)
  
# Permanently changes the pandas settings
pd.set_option('display.max_rows', None)
pd.set_option('display.max_columns', None)
pd.set_option('display.width', None)
pd.set_option('display.max_colwidth', -1)
  
# All dataframes hereafter reflect these changes.
print(df)
  
print('**RESET_OPTIONS**')
  
# Resets the options
pd.reset_option('all')
print(df)

Output:

How-to-display-full-Dataframe-i.e.-print-all-rows-columns-without-truncation_output.pn

**RESET_OPTIONS**

: boolean
use_inf_as_null had been deprecated and will be removed in a future
version. Use `use_inf_as_na` instead.

How-to-print-an-entire-Pandas-DataFrame-in-Python.png

4. Using to_markdown()

This method is similar to the to_string() method as it also converts the data frame to a string object and also adds styling & formatting to it.

import numpy as np
from sklearn.datasets import load_iris
import pandas as pd
  
data = load_iris()
df = pd.DataFrame(data.data,
                  columns=data.feature_names)
  
# Converts the dataframe into str object with fromatting
print(df.to_markdown())

Output:
How-to-display-full-Dataframe-i.e.-print-all-rows-columns-without-truncation_output.pn

Want to expert in the python programming language? Exploring Python Data Analysis using Pandas tutorial changes your knowledge from basic to advance level in python concepts.

Read more Articles on Python Data Analysis Using Padas

Pandas-Delete last column of dataframe in python

Pandas: Delete last column of dataframe in python | How to Remove last column from Dataframe in Python?

In this article, we will discuss different ways to delete the last column of a pandas dataframe in python or how to drop the last columns in Pandas Dataframe. Along with that, you may also study what is Dataframe and How to Remove a Column From a Python Dataframe? Also, you can find all these methods of a pandas dataframe to remove last column of a dataframe in the form of images for quick reference & easy sharing with friends and others learners.

What is Dataframe?

A Data structure provided by the Python Pandas module is known as a DataFrame. It stores values in the form of rows and columns. So, we can have the data in the form of a matrix outlining the entities as rows and columns. A DataFrame relates an Excel or CSV file to the real world.

Different Methods to Drop last columns in Pandas Dataframe

Here are few methods that are used to remove the last columns of DataFrame in Python.

  1. Use iloc()
  2. Use drop()
  3. Use del()
  4. Use pop()

Use iloc to drop last column of pandas dataframe

In this method, we are going to use iloc to drop the last column of the pandas dataframe. In python, pandas have an attribute iloc to select the specific column using indexing.

Syntax:

df.iloc[row_start:row_end , col_start, col_end]

So we will be using the above syntax which will give rows from row_star to row_end and columns from col_start to col_end1.

Use iloc to drop last column of pandas dataframe

import pandas as pd
employees = [('Abhishek', 34, 'Sydney') ,
             ('Sumit', 31, 'Delhi') ,
             ('Sampad', 16, 'New York') ,
             ('Shikha', 32,'Delhi') , ]
#load data into a DataFrame object:
df = pd.DataFrame(employees, columns=['Name', 'Age', 'City'], index=['a', 'b', 'c', 'd'])
print("Contents of the Dataframe : ")
print(df)
# Drop last column of a dataframe
df = df.iloc[: , :-1]
print("Modified Dataframe : ")
print(df)

Output:

Contents of the Dataframe :
        Name       Age   City
a     Abhishek   34     Sydney
b     Sumit        31     Delhi
c     Sampad     16     New York
d    Shikha        32     Delhi

Modified Dataframe :
        Name     Age
a     Abhishek 34
b     Sumit      31
c     Sampad  16
d     Shikha    32

So in the above example, we have to remove last column from dataframe which is ‘city’, so we just selected the column from position 0 till one before the last one…means from column 0 to -2 we selected 0 to -1, this deleted last column.

Must Check:

Python drop() function to remove a column

In this, we are going to use drop() to remove the last column of the pandas dataframe.

This function accepts a sequence of column names that need to delete from the dataframe. Here we ‘axis=1’ for delete column only and ‘inplace=True’ we use to pass arguments.

Python drop() function to remove a column

import pandas as pd
employees = [('Abhishek', 34, 'Sydney') ,
             ('Sumit', 31, 'Delhi') ,
             ('Sampad', 16, 'New York') ,
             ('Shikha', 32,'Delhi') , ]
#load data into a DataFrame object:
df = pd.DataFrame(employees, columns=['Name', 'Age', 'City'], index=['a', 'b', 'c', 'd'])
print("Contents of the Dataframe : ")
print(df)
# Drop last column
df.drop(columns=df.columns[-1], axis=1, inplace=True)
print("Modified Dataframe : ")
print(df)

Output:

Contents of the Dataframe :

       Name        Age   City
a     Abhishek   34     Sydney
b     Sumit        31     Delhi
c     Sampad     16     New York
d    Shikha        32     Delhi

Modified Dataframe :

       Name      Age
a     Abhishek   34
b     Sumit        31
c     Sampad    16
d     Shikha      32

Python del keyword to remove the column

Here we are going to use a del() keyword to drop last column of pandas dataframe.

So in this method, we are going to use del df[df.columns[-1]]for deleting the last column. We will use -1 because we are selecting from last.

Python del keyword to delete the column of a dataframe

import pandas as pd
employees = [('Abhishek', 34, 'Sydney') ,
             ('Sumit', 31, 'Delhi') ,
             ('Sampad', 16, 'New York') ,
             ('Shikha', 32,'Delhi') , ]
#load data into a DataFrame object:
df = pd.DataFrame(employees, columns=['Name', 'Age', 'City'], index=['a', 'b', 'c', 'd'])
print("Contents of the Dataframe : ")
print(df)
# Delete last column
del df[df.columns[-1]]
print("Modified Dataframe : ")
print(df)

Output:

Contents of the Dataframe :
       Name     Age   City
a     Abhishek 34    Sydney
b      Sumit     31    Delhi
c     Sampad   16    New York
d     Shikha     32    Delhi
Modified Dataframe :
     Name      Age
a Abhishek    34
b Sumit          31
c Sampad      16
d Shikha        32

Drop last columns of Pandas Dataframe Using Python dataframe.pop() method

In this, we are going to use the pop(column_name) method to drop last column of pandas dataframe. It expects a column name as an argument and deletes that column from the calling dataframe object.

Drop last columns of Pandas Dataframe Using Python dataframe.pop() method

import pandas as pd
employees = [('Abhishek', 34, 'Sydney') ,
             ('Sumit', 31, 'Delhi') ,
             ('Sampad', 16, 'New York') ,
             ('Shikha', 32,'Delhi') , ]
#load data into a DataFrame object:
df = pd.DataFrame(employees, columns=['Name', 'Age', 'City'], index=['a', 'b', 'c', 'd'])
print("Contents of the Dataframe : ")
print(df)
df.pop(df.columns[-1])
print("Modified Dataframe : ")
print(df)

Output:

Contents of the Dataframe :

        Name    Age    City
a    Abhishek  34   Sydney
b    Sumit       31   Delhi
c    Sampad   16    New York
d   Shikha      32    Delhi

Modified Dataframe :

     Name      Age
a   Abhishek 34
b   Sumit      31
c   Sampad  16
d  Shikha     32

Conclusion to delete the last column of the dataframe

In the above tutorial, we have discussed different ways to delete last column of the dataframe in python. Also, you can learn how to drop last n rows in pandas dataframe by performing import pandas as pd. Thank you & Happy Learnings!

Pandas skip rows while reading csv file to a Dataframe using read_csv() in Python

Pandas: skip rows while reading csv file to a Dataframe using read_csv() in Python

In this tutorial, we will discuss how to skip rows while reading a csv file to a Dataframe using aread_csv()method of Pandas library in Python. If you want you can learn more about the read_csv() method along with syntax, parameters, and various methods to skip rows while reading specific rows from csv in python pandas

How to skip rows while reading CSV file using Pandas?

Python is a very useful language in today’s time, its also very useful for data analysis because of the different python packages. Python panda’s library implements a function to read a csv file and load data to dataframe quickly and also skip specified lines from csv file. Here we will use theread_csv()method of Pandas to skip n rows. i.e.,

pandas.read_csv(filepath_or_buffer, skiprows=N, ....)

Parameters:

Parameter Use
filepath_or_buffer URL or Dir location of file
sep Stands for separator, default is ‘, ‘ as in csv(comma separated values)
index_col This parameter is used to make the passed column as index instead of 0, 1, 2, 3…r
header This parameter is use to make passed row/s[int/int list] as header
use_cols This parameter is only used the passed col[string list] to make a data frame
squeeze If True and only one column is passed then returns pandas series
skiprows This parameter is used to skip passed rows in a new data frame
skipfooter This parameter is used to skip the Number of lines at bottom of the file

Let’s, import the pandas’ module in python first:

Import pandas as pd

Let’s see the examples mentioned below and learn the process of Pandas: skip rows while reading csv file to a Dataframe using read_csv() in Python. Now, create one simple CSV file instru.csv

Name,Age,City
Tara,34,Agra
Rekha,31,Delhi
Aavi,16,Varanasi
Sarita,32,Lucknow
Mira,33,Punjab
Suri,35,Patna

Also Check:

Let’s load this csv file to a dataframe using read_csv() and skip rows in various ways,

Method 1: Skipping N rows from the starting while reading a csv file

When we pass skiprows=2 it means it will skip those rows while reading csv file. For example, if we want to skip 2 lines from the top while readingusers.csvfile and initializing a dataframe.

import pandas as pd
# Skip 2 rows from top in csv and initialize a dataframe
usersDf = pd.read_csv("C:\\Users\HP\Desktop\instru.csv", skiprows=2)
print('Contents of the Dataframe created by skipping top 2 lines from csv file ')
print(usersDf)

Skipping N rows from the starting while reading a csv file

Output:

Contents of the Dataframe created by skipping top 2 lines from csv file
  Rekha 31 Delhi
0 Aavi   16 Varanasi
1 Sarita 32 Lucknow
2 Mira   33 Punjab
3 Suri    35 Patna

Method 2: Skipping rows at specific index positions while reading a csv file to Dataframe

For skipping rows at specific index positions we have to give index positions like if we want to skip lines at index 0, 2, and 5 in dataframe ‘skiprows=[0,2,5]’.

import pandas as pd

# Skip  rows at specific index
usersDf = pd.read_csv("C:\\Users\HP\Desktop\instru.csv", skiprows=[0,2,5])
print('Contents of the Dataframe created by skipping specifying lines from csv file ')
print(usersDf)

Output:

Contents of the Dataframe created by skipping specifying lines from csv file
   Tara    34    Agra
0 Aavi   16     Varanasi
1 Sarita 32    Lucknow
2 Suri    35    Patna

It skipped all the lines at index positions 0, 2 & 5 from csv and loaded the remaining rows from csv.

Skipping N rows from top except header while reading a csv file to Dataframe

In the earlier example, we have seen that it removes the header also. In this, we want to remove 2 rows from starting but not the header one.

import pandas as pd
# Skip 2 rows from top except header
usersDf = pd.read_csv("C:\\Users\HP\Desktop\instru.csv", skiprows=[i for i in range(1,3)])
print('Contents of the Dataframe created by skipping 2 rows after header row from csv file ')
print(usersDf)

Output:

Contents of the Dataframe created by skipping 2 rows after header row from csv file
     Name Age City
0   Aavi    16   Varanasi
1  Sarita   32   Lucknow
2  Mira     33   Punjab
3  Suri      35   Patna

Skip rows from based on condition while reading a csv file to Dataframe

Here we will give some specific conditions using the lambda function for skipping rows in the dataframe.

Skip rows from based on condition while reading a csv file to Dataframe

import pandas as pd

def logic(index):
    if index % 3 == 0:
       return True
    return False
# Skip rows from based on condition like skip every 3rd line
usersDf = pd.read_csv("C:\\Users\HP\Desktop\instru.csv", skiprows= lambda x: logic(x) )
print('Contents of the Dataframe created by skipping every 3rd row from csv file ')
print(usersDf)

Output:

Contents of the Dataframe created by skipping every 3rd row from csv file
      Tara    34 Agra
0    Rekha 31 Delhi
1    Sarita 32 Lucknow
2    Mira   33 Punjab

Skip N rows from bottom/footer while reading a csv file to Dataframe

So here we use skipfooter & engine argument in pd.read_csv() to skip n rows from the bottom.

import pandas as pd

# Skip 2 rows from bottom
usersDf = pd.read_csv("C:\\Users\HP\Desktop\instru.csv", skipfooter=2, engine='python')
print('Contents of the Dataframe created by skipping bottom 2 rows from csv file ')
print(usersDf)

Output:

Contents of the Dataframe created by skipping bottom 2 rows from csv file
   Name Age City
0 Tara    34 Agra
1 Rekha 31 Delhi
2 Aavi    16 Varanasi
3 Sarita  32 Lucknow

Conclusion

In this article, you have learned different ways of how to skip rows while reading csv file to a Dataframe using the Python pandas read_csv() function.

Want to expert in the python programming language? Exploring Python Data Analysis using Pandas tutorial changes your knowledge from basic to advance level in python concepts.

Similar Tutorials:

How to get first key in Dictionary – Python

How to get first key in Dictionary – Python | Get the First Key in Python Dictionary

How to get First Key in a Dictionary Python: In this tutorial, we will discuss different ways to get the first key in a dictionary. Later, we will see & learn how to choose the first N Keys of a dictionary in Python.

Get the first key from a dictionary using keys() method

Dictionary stores elements in key-value pairs.Dictionary act as a container in python. Dictionary provided keys() function which we will use to fetch all keys in it and after that we select the first key from a sequence.

# Dictionary of string and int
word_freq = {
    'Anni': 56,
    "is": 23,
    'my': 43,
    'Fav': 78,
    'Person': 11
}
# Get the first key in a dictionary
first_key = list(word_freq.keys())[0]
print('First Key of dictionary:')
print(first_key)

Output:

First Key of dictionary:
Anni

In the above example, you can see that first we have fetched all dictionary elements and by using indexing we find out the first key value.

Do Refer:

Here is another way to do the same,

Another Way for How to get First Key in Dictionary Python

By using this method, it will convert all keys of the dictionary to a list and then we can select the first element from the list.

# Dictionary of string and int
word_freq = {
    'Anni': 56,
    "is": 23,
    'my': 43,
    'Fav': 78,
    'Person': 11
}
# Get the first ket in a dictionary
first_key = list(word_freq)[0]
print('First Key of dictionary:')
print(first_key)

Output:

First Key of dictionary:
Anni

In the above example, we didn’t call the keys() function. We created a list of keys from the dictionary and selected the first item from it.

Get first key in a dictionary using iter() & next()

What we have done above that was not a perfect solution because first, we created a list and then fetch the first key in a dictionary. It is very difficult to apply that method in a large number of dictionaries. First, we iterate the object of keys using the iter() function then we apply the next() function on it for getting the first element.

Get first key in a dictionary using iter() & next()

This is an efficient solution because didn’t iterate over all the keys in a dictionary, we just selected the first one.

# Dictionary of string and int
word_freq = {
    'Anni': 56,
    "is": 23,
    'my': 43,
    'Fav': 78,
    'Person': 11
}
# Get the first key in a dictionary
first_key = next(iter(word_freq))
print('First Key of dictionary:')
print(first_key)

Output:

First Key of dictionary:
Anni

Get the First Key in Dictionary Using list() Function

Also, there is a possible way to convert the dict type into a list using thelist() function at first and later get the first key at the 0th index of the dictionary.

my_dict = { 'Russia': 2, 'New York': 1, 'Lahore': 6, 'Tokyo': 11}

print(list(my_dict.keys())[0])

Result:

Russia

Get the First Key in Dictionary Using for Loop

One more easiest way to get the initial key in a dictionary is using theforloop. After getting the first key of the dictionary break the loop.

Let’s see an example on it:

my_dict = { 'London': 2, 'New York': 1, 'Lahore': 6, 'Tokyo': 11}

for key, value in my_dict.items():
  print(key)
  break

Output:

London

Get first N keys from a Dictionary in Python

To select the first N keys from a dictionary, convert the keys of a dictionary to a list and then select the first N entries from that. For example, let’s see how to select the first 3 keys from a dictionary,

# Dictionary of string and int
word_freq = {
    'Anni': 56,
    "is": 23,
    'my': 43,
    'Fav': 78,
    'Person': 11
}
# Get the first ket in a dictionary
first_key = list(word_freq)[0]
print('First Key of dictionary:')
print(first_key)

Output:

First Key of dictionary:
Anni

Conclusion on Get First value in a dictionary of string and int

In this article, we have seen discuss different ways to find out the first key of a dictionary in python. All these dictionary keys methods in python help to find easily the key value in a dictionary of string and int word_freq. Get first key of the dictionary in python information completely from this article.

Python- How to remove files by matching pattern, wildcards, certain extensions only

Python: How to remove files by matching pattern | wildcards | certain extensions only?

In this ultimate tutorial, we are going to discuss how to remove files from a directory based on a matching pattern or wildcard, or specific extensions.

How to delete text files using different techniques?

Let’s discuss how to delete text files using different techniques, Suppose we have a directory that contains some log files and some text files and we want to delete all .txt files from that directory.

Then, continue your read so that you can successfully learn to remove files by matching patterns or wildcards by the following methods and techniques.

Remove files by pattern using glob.glob() & os.remove()

First, we will get a list of all file paths that match the specified patterns using glob.glob() and then delete all text files.

import os
import glob
# Get a list of all the file paths that ends with .txt from in specified directory
fileList = glob.glob('C://Users/HP/Desktop/A plus topper/*.txt')
# Iterate over the list of filepaths & remove each file.
for filePath in fileList:
    try:
        os.remove(filePath)
    except:
        print("Error while deleting file : ", filePath)

So you can see that it will remove all ‘.txt’ files in the directory ‘C:\\Users\HP\Desktop\A plus topper\*.txt’. It will remove all text files because we mention” *.txt “.

Get the list of files using glob.glob()

glob.glob() accepts path name and finds the path of all the files that match the specified pattern. By default recursive parameter is False, which means that it will find files in the main directory, not in a subdirectory.

glob.glob(pathname, *, recursive=False)

As we have seen by this approach we can not recursively delete files from subdirectories. For that, we will find another solution,

Read More:

Recursively Remove files by matching pattern or wildcard

It will search all the ‘txt’ files including files in subdirectories because we will use 'C://Users/HP/Desktop/A plus topper/**/*.txt'‘ **  ‘ in it.

Then we can iterate over the list and delete each file one by one using os.remove().

import os
import glob
# get a recursive list of file paths that matches pattern including sub directories
fileList = glob.glob('C://Users/HP/Desktop/A plus topper/**/*.txt', recursive=True)
# Iterate over the list of filepaths & remove each file.
for filePath in fileList:
    try:
        os.remove(filePath)
    except OSError:
        print("Error while deleting file")

It will delete all the text files from the directory and its sub-directories.

Recursively Remove files by matching pattern or wildcard using os.walk()

In this, we are going to use os.walk(). It generates filename in the given directory by walking over the tree structure in a top-down or bottom-up approach.

os.walk(top, topdown=True, onerror=None, followlinks=False)

It will return a tuple consisting of the main directory, a list of all subdirectories, and a list of all file names in the main directory.

Let’s use this os.walk() to get a list of all files in a given directory that matches a pattern. Then delete those files,

import os
import fnmatch
# Get a list of all files in directory
for rootDir, subdirs, filenames in os.walk('C://HP/Users/Desktop/A plus topper'):
    # Find the files that matches the given patterm
    for filename in fnmatch.filter(filenames, '*.txt'):
        try:
            os.remove(os.path.join(rootDir, filename))
        except OSError:
            print("Error while deleting file")

It will delete all the text files from the directory and also from its subdirectories.

Now we are going to create a Generic function to delete all the files from a given directory based on a matching pattern and it will also return the names of the files that were not deleted due to some error.

import os
import fnmatch
'''
Generic function to delete all the files from a given directory based on matching pattern
'''
def removeFilesByMatchingPattern(dirPath, pattern):
    listOfFilesWithError = []
    for parentDir, dirnames, filenames in os.walk(dirPath):
        for filename in fnmatch.filter(filenames, pattern):
            try:
                os.remove(os.path.join(parentDir, filename))
            except:
                print("Error while deleting file : ", os.path.join(parentDir, filename))
                listOfFilesWithError.append(os.path.join(parentDir, filename))
    return listOfFilesWithError
listOfErrors = removeFilesByMatchingPattern('/home/varung/Documents/python/logs/', '*.txt')
print('Files that can not be deleted : ')
for filePath in listOfErrors:
    print(filePath)

So in the above code, you can see that it will also return file names that can not be deleted.

Conclusion:

In this article, we have seen how to remove files from a directory based on matching patterns or wildcards, or certain extensions.

numpy.insert() – Python

numpy.insert() – Python | Definition, Syntax, Parameters, Example of Python Numpy.insert() Function

In this tutorial, we will discuss what is python numpy.insert() and how to use numpy.insert()? Also, you can get a good grip on numpy.insert() function in Python by using the example prevailing in this tutorial. Let’s tap on the direct links available here for quick reference on insert an element into NumPy Array in python.

Python numpy.insert()

Python Numpy library provides a function to insert elements in an array. If the insertion is not done in place and the function returns a new array. Moreover, if the axis is not given, the input array is flattened.

Syntax:

numpy.insert(arr, index, values, axis=None)

Parameters:

  • arr: array_like object
    • The array which we give as an input.
  • index: int, slice or sequence of ints
    • The index before which insertion is to be made
  • values: array_like object
    • The array of values to be inserted
  • axis: int, optional
    • The axis along which to insert. If not given, the input array is flattened

Return Values:

  • out: ndarray
    • A copy of arr with given values inserted are given indices.
      • If axis is None, then it returns a flattened array.
      • If axis is 1, then insert column-wise.
      • If axis is 0, then insert row-wise.
    • It doesn’t modify the actual array, rather it returns a copy of the given array with inserted values.

Let’s understand with some of the below-given examples:

numpy.insert() function Example

import numpy as np 
a = np.array([[1,2],[3,4],[5,6]]) 

print 'First array:' 
print a 
print '\n'  

print 'Axis parameter not passed. The input array is flattened before insertion.'
print np.insert(a,3,[11,12]) 
print '\n'  
print 'Axis parameter passed. The values array is broadcast to match input array.'

print 'Broadcast along axis 0:' 
print np.insert(a,1,[11],axis = 0) 
print '\n'  

print 'Broadcast along axis 1:' 
print np.insert(a,1,11,axis = 1)

Output:

First array:
[[1 2]
[3 4]
[5 6]]

Axis parameter not passed. The input array is flattened before insertion.
[ 1 2 3 11 12 4 5 6]

Axis parameter passed. The values array is broadcast to match input array.
Broadcast along axis 0:
[[ 1 2]
[11 11]
[ 3 4]
[ 5 6]]

Broadcast along axis 1:
[[ 1 11 2]
[ 3 11 4]
[ 5 11 6]]

Do Refer: 

Insert an element into a NumPy array at a given index position

Let’s take an array of integers and we want to insert an element 14 at the index position 3. For that, we will call the insert() with an array, index position, and element to be inserted.

import numpy as np
# Create a Numpy Array of integers
arr = np.array([8, 12, 5, 9, 13])
# Insert an element 14 at index position 3
new_arr = np.insert(arr, 3, 14)
print('New Array: ', new_arr)
print('Original Array: ', arr)

Output:

New Array: [ 8 12 5 14 9 13]
Original Array: [ 8 12 5 9 13]

Insert multiple elements into a NumPy array at the given index

In this, we are going to insert multiple elements, for this we pass the elements as a sequence along with the index position.

import numpy as np
# Create a Numpy Array of integers
arr = np.array([8, 12, 5, 9, 13])
# Insert three element at index position 3
new_arr = np.insert(arr, 3, (10, 10, 10))
print('New Array: ', new_arr)

Output:

New Array: [ 8 12 5 10 10 10 9 13]

Insert multiple elements at multiple indices in a NumPy array

In this, we are going to insert multiple elements at multiple indices.

import numpy as np
# Create a Numpy Array of integers
arr = np.array([8, 12, 5, 9, 13])
# Insert three element index position 0, 1 and 2
new_arr = np.insert(arr, (0,1,2), (21, 31, 41))
print('New Array: ', new_arr)

Output:

New Array: [21 8 31 12 41 5 9 13]

So in the above example, you can see that we have added (21,31,41) at (0,1,2) position.

Insert a row into a 2D Numpy array

In this, we are going to insert a row in the array, so we have to pass the axis as 0 and the values as a sequence.

import numpy as np
# Create 2D Numpy array of hard coded numbers
arr = np.array([[2, 3, 4],
                [7, 5, 7],
                [6, 3, 9]])
# Insert a row at index 1
new_arr = np.insert(arr, 1, (4, 4, 4), axis=0)
print(new_arr)

Output:

[[2 3 4]
[4 4 4]
[7 5 7]
[6 3 9]]

Insert a column into a 2D Numpy array

In this, we are going to insert a column in the array, for this we need to pass the axis as 1 and the values as a sequence

import numpy as np
# Create 2D Numpy array of hard coded numbers
arr = np.array([[2, 3, 4],
                [7, 5, 7],
                [6, 3, 9]])
# Insert a column at index 1
new_arr = np.insert(arr, 1, (5, 5, 5), axis=1)
print(new_arr)

Output:

[[2 5 3 4]
[7 5 5 7]
[6 5 3 9]]

So you can see that it inserted a column at index 1.

Here is another way to do the same,

import numpy as np
 # Create 2D Numpy array of hard coded numbers
 arr = np.array([[2, 3, 4],
                 [7, 5, 7], 
                 [6, 3, 9]]) 
# Insert a column at index 1 
new_arr = np.insert(arr, 1,5, axis=1) 
print(new_arr)

Output:

[[2 5 3 4]
[7 5 5 7]
[6 5 3 9]]

Conclusion

In this article, you have seen different uses of numpy.insert(). Thank you!